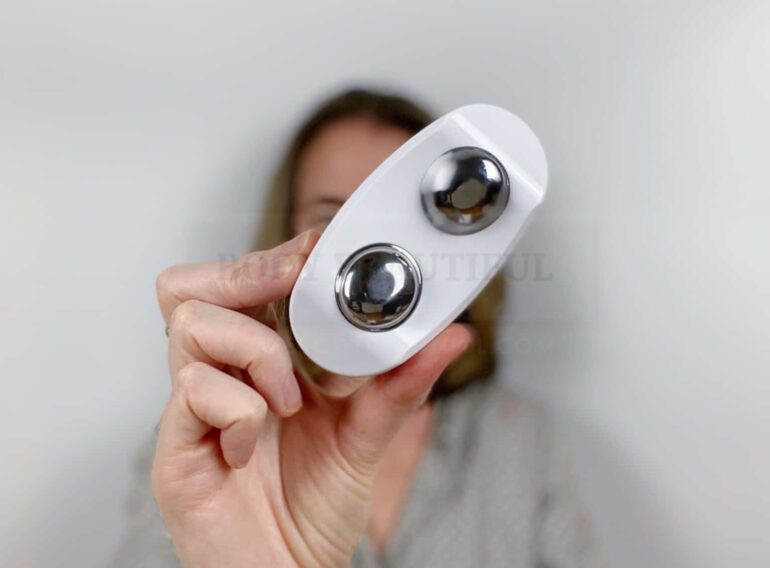
The CurrentBody Skin wearable LED light therapy tech comes in a flexible full-face mask, and separate neck and décolletage perfector. They each have many light emitting diodes (LEDS) of both red and near infra-red light held next to your skin.
Love these effortless masks with noticeable healthy-skin resultsLight therapy works by a process called Photobiomodulation
The photons in these specific light wavelengths boost blood flow and energise the mitochondria power generator organelles in our cells. The process is called photobiomodulation.
This perks-up all your cells, including fibroblasts which build more and stronger collagen and elastin. This gradually heals and refreshes your skin. With regular use they’re clinically proven to reduce facial lines, improve texture and pigmentation for younger looking, healthier skin. Use with an optional Hydrogel Face Mask for enhanced skin hydration too.
✔ Reduces inflammation ✔ Boosts blood flow ✔ Faster cell metabolism & so more ATP energy ✔ More antioxidants & detoxifies cells ✔ More & stronger collagen & elastin
The packaging reminds me of an expensive, white and black oblong chocolate box. It’s sturdy, minimal and all made of recyclable cardboard. The mask is shown below.
Simple and sophisticated box with designed in Britain flag top left.Concise information on the back of the neat boxThe mask fits snug and black cardboard secures everything inside the box.With compartments for the different plugs, manual, controller, cables and carry bagThe contents from the box
What’s in the box?
Silicone flexible face mask
Controller
Power supply and country specific adaptors
USB connector
Head strap
Carry bag
User manual
Quick start guide
The mask and neck & dec perfector are well-made and durable, smooth and soft. They connect to a controller with a single button to power it on. There are various cables for charging too. I like that they’re thin, lightweight and flexible, unlike alternative hard, moulded masks.
Bring out the gimp.
Before you start
Read the user manual for important contraindications and other info
Before you start, read the user manual. It’s a quick, easy and informative read. Check the contraindications section for important reasons you should not use the LED mask. These include pregnancy, breastfeeding, photosensitivity, photosensitising medications, lupus, and genetic eye conditions. See more contraindications here.
Also do a sensitivity test with the mask on the inside of your arm for a 10-minute treatment. If after 6 hours there’s no reaction, you’re good to go.
p
TIP: Test the mask immediately once you receive it because CurrentBody.com accept returns within 14 days of purchase for those who experience skin or eye sensitivity.
Design, durability & comfort
Simple but attractive styling with logo and light prism effect lines.
The mask-front is durable but soft white silicone with black branding matching the box. It’s thick enough and flexible. The inside of the mask is clear silicone, evenly spaced with small, slightly recessed LED lights. The user manual states the LEDs won’t dim with age to render them ineffective.
The mask and perfector run on battery power so you can use them anywhere. There’s a long white, flexible cable fixed and secure on the bottom righthand side. This attaches via USB to a small controller. It’s simple to operate with just a single button to power on/off the mask. There are no intensity levels or other controls to worry about. The LEDs automatically shut off once the 10 minutes are up.
Quality, smooth finishing and edges around the eyes, nose, mouth, sides and cables.Evenly spaced LEDs on the underside around cheeks, chin, forehead and two on the nose.Rows or red LED lights. You can’t see the NIR light.The battery-powered mask, cable and small controller
You also get a soft white fabric carry bag for each to keep them clean and free from dust. And because they’re flat not bulky, they’re easy to store in a drawer and fit in a case or bag if you travel frequently.
The protective carry bag.
The mask wraps around your face and moulds to your contours so the LED light bathes every area. A soft and smooth black strap, with no scratchy bits, secures the mask. It’s easy to thread through the loop on the sides of the mask. Loop it in and back to secure the Velcro on one side, then position on your face and secure the other side of the strap/mask. Once on, adjust the strap as needed so it’s a snug fit but isn’t squishing your skin, nose, lips or eyelashes/lids.
The perfector secures around your neck like a bib and rests comfy on your chest, bathing it in light. The black velcro strap is slightly thicker, but still soft, and easy to adjust. Wear a low cut and loose fitting top so it’s easier to postion under your clothes.
The soft black Velcro straps looped through the silicone mask and perfector.
p
TIP: My head is a weird shape and I find the mask strap slips down the back of my head. To stop this, I wear my hair in a secure ponytail just below where the strap sits to support it and stop it sliding 💥.
Comfortable masks wrap around contours & fit well.
The eye and mouth holes are in the right place (for me at least) and the mask is soft and comfortable. My nose fits comfortably through the slits and seems to get adequate coverage from the two surrounding LEDs. The nose slits leave small indentations when I take off the mask but it’s not uncomfortable.
However, I do find movement of my upper lip is restricted a bit under the mask. But I’m still able to stick my tongue out through the mouth hole which is very important. It’s always funny. And never gets tiresome. Ever.
Charging
My mask and perfector arrived fully charged so they’re ready to go out of the box. And the battery life is excellent. A single charge is good for around twenty 10-minute sessions.
Once used up, you must charge the Lithium battery in the controller. It takes around 6 hours to fully charge. Connect the mains-cable mini USB into the controller. Then plug into the mains using the plug adaptor. You get four different plug types, so this means it’s handy for travel too.
The four mains plugs (including UK) which connect to the mains charging cable
As it charges, three white micro LEDs flash on the controller, then stay lit when it’s fully charged. You can’t operate the mask whilst it’s charging (it won’t switch on).
The routine
Love, love these hands-free, effortless masks.
Wash and dry your face.
Put on the mask. Turn it on, sit back and relax for 10 minutes.
Take off the mask, wipe it down. Put it away.
Do something else.
Hands-free flexible red & NIR mask from CurrentBody is easy and excellent value
What does it feel like?
There’s no heat, pain or skin sensation from the light whatsoever. However, it is very bright. My eyes adjust after a minute or so, and I find it less intense if in a brightly lit room. If it’s still too bright just relax for 10 minutes and close your eyes!
Bright red LEDs covering the inside of the mask.
p
IS IT SAFE?
The mask needs no eye or skin safety mechanism and sensors as with other devices. That’s because the light wavelengths and intensity are safe for both skin and eyes. It’s also clinically proven safe and effective for home use and meets all European safety and manufacturing standards for CE conformity, plus some additional voluntary worldwide standards.
The mask and perfector remain cool throughout the session too, not sweaty or itchy. And it takes zero concentration. They’re perfect to do whilst watching TV or having a 10-minute lay down.
Skin reactions to the light are rare. Your skin may be a bit red afterwards but it should return to normal within 1 to 2 hours. And a possible side effect is a temporary headache. Drink water or take a painkiller if you need to.
Schedule, effort & results
Use the mask and perfector 3 to 5 times a week for 4 weeks. Then, use as frequently as you need to maintain your results. I do at least 3 maintenance session per week, sometimes more if my skin’s a bit tired and dehydrated.
The easy schedule
The CurrentBody LED mask is one of the lowest commitment and least effort devices you can choose. It asks for no brain-power, is hands-free and you can read or watch TV at the same time. So, it doesn’t feel like a chore and requires just the smallest motivation.
Zero concentration, 100% hands-free. A smidge sassy.
Most users see good results after 12 sessions. Collagen builds and refreshes your skin gradually so a before and after photo help show the changes. During this time skin texture smooths, firms and tones, skin rehydrates and fine lines and wrinkles soften, pigmentation fades and reveals a more even, brighter complexion.
You may see all these results or just a few, and to varying degrees too. Your lifestyle and overall skin condition determine the breadth and depth of results and how frequently you need continuing sessions too.
My before & after photos
I’ve heard that red light and microcurrent are a power-house combo, with a synergistic effect. So, I decided to test the CurrentBody Skin LED mask by adding it to my current microcurrent routine. I do a relaxing 10-minute mask session before my 25-minute evening microcurrent session. I’ve done this 5 days per week for 4 weeks.
Microcurrent gave me incredibly healthy and beautifully hydrated, supple skin. So, I wasn’t sure it could get better. But it has.
Here are my comparison photos after 4 weeks of using the CurrentBody Skin LED mask:
After 4 weeks of using the CurrentBody Skin LED mask (with microcurrent!)
My skin is perkier still! It’s further smoothed my skin and refined my pores. It also plumps-out and fades my forehead lines, being most noticeable immediately after the LED mask. My under-eye area is thicker and brighter, so the fine lines aren’t as noticeable anymore. And boy is my skin BRIGHT 🤩. The colour is deeper and more unified, and there’s a vibrancy to it too.
I love the results here. And the boosting combo makes sense to me, because both ultimately help your cells create ATP energy.
It works like this…red and near infrared light stimulates your cell’s mitochondria. These are the teeny power factories that create ATP energy via cellular respiration. Red light speeds-up cellular respiration producing much more ATP than usual. This ATP in turn fuels all cell activity, so everything perks-up and acts younger, including your fibroblasts building stronger collagen and elestin.
And microcurrent boosts cellular respiration too. The teeny microcurrent ‘recharges’ your skin’s dwindling bioelectricity by creating a flow of ions in your tissues. Your cells borrow this charge to move vital nutrients and ions exactly where they need them. So, your energised mitochondria have all the important ions readily available for faster and more efficient respiration and loads more ATP.
First, as mentioned earlier, the lights are bright. But there’s no annoying flashing as with other LED devices. A bright room makes it seem less intense and to read you need a well-lit page or screen. Or simply rest and close your eyes for the duration of the session.
Second, it’s a bit awkward to walk around in. That’s because you can only see dead ahead. No peripheral vision therefore means potential bumping and tripping hazards. Don’t even attempt the stairs.
Comfortable to watch TV or read with your head upright (looking downwards aches!)
I also feel discomfort in my neck if looking downward to read or type. It’s much more comfortable looking straight ahead. Therefore, I prefer watching TV during my treatments.
Next, it can be a little difficult to fit the mask properly. The strap can slip causing tightness in some places and gaps in others. A second strap across the top of the device would help here. Or, if you have longer hair, try positioning your ponytail low on the back of your head and lie the strap across it to keep it securely in place.
My ponytail stops the strap and mask slipping
Another negative is at £349 it’s expensive and it may simply be beyond your budget. However, offers are common, and you can buy the mask and neck and Dec perfector together to save cash. So, if you can afford them, but are weighing up a cheaper LED alternative, consider this. With other hand-held LED rivals, you must hold and position the device several times over your skin. Full-face treatments are tedious and aren’t hands-free. Therefore, I think the CurrentBody Skin LED mask is worth the extra cash because it’s so much more convenient. So, you’re much more likely to stick with.
I love the short 10-minute hands-free sessions because you can also watch TV, read or chill. And it’s fast to show results with just 3 to 5 sessions per week for 4 weeks. Then, continue as frequently as you need. No gels, no fussy routines. These masks are simple and effective for smoother, healthier and brighter skin.
Here’s a summary of my test scores, and pros and cons for the CurrentBody Skin Light Therapy Masks to help you decide:
Ease of use
👍👍👍👍👍
Easy to put on & simple to operate with a close-but-comfortable fit. Light is bright but not irritating, it’s pain-free. And as it’s hands-free you can easily watch TV, surfda interwebs, read or rest during the quick sessions.
Effort
💧
Three to five 10-minute easy and hands-free sessions per week for at least 4 weeks. Continue, or reduce frequency according to your skin’s needs. For ongoing use.
Results
⭐⭐⭐⭐⭐
Collagen and elastin build over 4 to 6 weeks to brighten, tighten and smooth skin. Wrinkles and fine lines then gradually soften. Gives a healthier, glowing complexion.
Pros
Quality, no-dimming Omnilux LED technology
Excellent battery life
Virtually effortless hands-free operation
Durable, comfortable & pain-free
Zero-faff: watch TV, read or rest during your sessions
No ongoing cost of gels or replacement bits
Lightweight & portable (good for travel)
Clinically-proven & CE certified
60-day money back guarantee
Cons
Bright lights! – may be irritating for some
Uncomfortable/bad fit for a few faces
Awkward to walk around in
It’s expensive at full RRP
CurrentBody Skin Light Therapy Mask deals
Found this review helpful? Please support future reviews and shop via these links for the CurrentBody Skin LED mask and Neck & Dec Perfector. I earn a small commission, but your price stays the same.
BODYLED
Use this code at CurrentBody for an extra 15% off!
R eviewing home beauty devices is what I do. And I love it. I meticulously record my experience and results to share with you. Changes in my skin are usually gradual over the course of a few months. And they’re often difficult to spot without comparison photos.
So, the idea of a review in reverse is quite interesting. What changes will I see when I stop using a device? Will effects be more noticeable as they fade? How will I feel, and will this change my overall opinion of the device?
I used both the Ziip and Nuface and was curious to see what happens when I stop
Luckily, I’ve been microcurrenting for several months now, so I decided to quit and share with you what happens.
Let’s do this.
A microcurrent addict for 14 months
I used the Nuface Trinity for 9 months
The Nuface Trinity microcurrent is the second home beauty device I’ve trialled. I started in April 2019 and stopped December 2019. I used it religiously for 9 whole months. Phew.
I used the Ziip Nano for 5 more months
I then switched to trial the ZIIP Nano device. I used it as frequently from January 2020 until the start of June 2020. So, that’s another 5 months.
And although I didn’t see everything I hoped for, I loved my results with both devices. For me, there’s no significant difference in results between the two.
What results I got, & didn’t get
Comparison photos after 8 months of Nuface (& CurrentBody Skin red light mask). ZIIP gave me identical healthy skin results.
This is what the Nuface and ZIIP did for my face:
Both gave me incredibly healthy skin. Before microcurrent, I considered that a very vague benefit. That’s because I didn’t realise how much of a difference a healthy complexion makes. It means hydrated, firm, bouncy, and dewy skin. My large pores became tight and my skin was beautifully silky to the touch.
They also clear away surface ‘bits’ and bumps and leave fewer and smaller blackheads. Only hormonal spots appear.
I see fuller cheeks, a natural pout, and a tightened jawline. They lift my small pre-jowls so I don’t notice them anymore.
And there are some temporary effects to de-puff my eyes and soften my under-eye fine lines.
The changes are subtle and easier to see with the help of comparison photos. But I could really feel the difference. This meant a boost to my confidence. My skin was the healthiest it has ever been. I was happy to skip CC cream and foundation most days.
But results vary by person, and you may not get ALL the results you hope for. As I also found.
Microcurrent didn’t tighten my under-chin wobble. Boo.
Microcurrent didn’t tighten my under-chin wobble. I became fixated on this during the first few months because I’d expected a noticeable change. So, I did more frequent sessions in a bid to tighten it up. It didn’t work. But as soon as I accepted this, I could concentrate on what good the microcurrent was doing to my skin.
OK, so if I saw such good results, why was I happy to stop?
Why I was happy to stop microcurrent
Despite my positive results, I was relieved to stop. That’s because both devices eventually felt like a chore.
Both the ZIIP Nano and Nuface Trinity eventually felt like a chore
I find both devices demand commitment and are time-consuming. I did four sessions per week taking 25 to 30 minutes each. I could do shorter sessions, but anything less seemed a waste of the expensive conductivity gels and my time! That’s because I know more is definitely more with microcurrent. I wanted the best possible results so I told myself to knuckle down and do it properly.
And the sessions are rather different for each.
Ziip needs motivation
You must concentrate to keep in sync with your ZIIP routine on the App or by memory
I find the ZIIP requires the most motivation. There are several App routines and you must concentrate to stay in sync because they’re timed.
The Ziip buzzes halfway through a routine so you know to move to the other half of your face. Some routines e.g. the longer Energise, use the same microcurrent throughout, so you can free-form and do your own routine without following the App. But, Ziip says you get your best results if you follow their routines because they help your lymphatic drainage.
Other shorter routines vary the micro/nano current output by facial areas so you really must follow the routine. The App video routines are easy enough to follow, but it’s sometimes easy to get ahead or lag behind and it’s annoyingly repetitive after a while. Or you can do your routines from memory, counting the reps to stay in sync. However, I lose track if I don’t concentrate so I can’t enjoy the routines whilst relaxing or watching TV simultaneously! You may not have this problem, but to me, it eventually felt too repetitive and a chore.
On the other hand, I appreciate you can treat all facial areas, including the eyes and lips, in this one device. You don’t need any additional and expensive attachments as you do with the Nuface Trinity. I also like the several and varied routines because it gives you greater control. You can select a few to fit your available time or pick them to focus on your problem areas. I love the routines focused on eyes, plumping and lips as well as the longer full-face routines. Also, the nourishing Ziip gels stay wet for ages so you can apply them to your entire face at the start and do several routines without them drying out or clumping on your skin.
You can Nuface on auto-pilot
Nuface is an easy auto-pilot device!
The Nuface Trinity feels simpler and easier. You can follow or learn the simple routine from videos on Youtube or in the App. And there are handy diagrams in the user guide too. It’s easy to remember.
The microcurrent output doesn’t change, so you can do your routine in any order. Do the basic short one, the longer advanced one, or your own combination with more reps over trouble spots. Whatever suits you best. The ELE attachment is worth it for lifting and smoothing the eye area too. It’s easy to do in front of the TV and it doesn’t matter if you lose your place. It’s an auto-pilot device.
The downside with the Nuface Trinity is the expensive Nuface gel and creams. They dry out gradually, so you must apply them and work in sections over your neck and face. You’ll use a lot more product and it’s a little more faff than the stay-wet Ziip gels. In my opinion, they don’t feel as nice or as nourishing as the Ziip gels either. Nuface also promotes them rather aggressively, but you can use cheaper alternatives and still get the same results. Learn more about the Nuface gels and substitute gels here.
For my last month of using Nuface Trinity, I combined it with the CurrentBody Skin LED mask. You do red light before microcurrent and oh my! What a power combo! The red light amplifies the effects of the microcurrent and gives a new beautiful glow on top. I love it. I continued with the LED mask during my ZiiP trial too and saw equal results.
But, during my final months, I was simply very bored with the microcurrent monotony. Especially compared to the easy, simple, and hands-free LED mask. I didn’t want to go back to the Trinity either.
Easy, simple, and hands-free (my dog and I much prefer it!)
Also, I was curious to see how my skin would change.
If I stopped, I reasoned I would write this reverse-review article and maybe it would help someone else who’s thinking of ditching their microcurrent routine. So, after a short deliberation with myself, I decided to quit.
That was at the beginning of June 2020. And to start, I did not miss it one bit.
What differences do I see now I’ve stopped?
I kept a diary over the next 4 months to record what happened as the microcurrent effects faded. I kept using the CurrentBody Skin LED mask 2 or 3 times a week.
I kept a diary of changes in my skin
For the first few weeks, there was no change. Then, I felt tiny bumps from a few blocked pores on my chin. My pout softened too. Was my mouth slightly down-turned too? And, oh hello. My small pre-jowls were back again 😞.
However, my skin was still smooth, beautifully hydrated, and looked healthy overall. I felt no more significant changes over the next few weeks until a few non-hormonal spots appeared. One on my left cheek and one on my right jawline. And by the following week (at the 2-month mark), a few more blemishes joined the party. Those under-the-surface bumps were bigger, with blackheads, and small spots around my nose, on my chin, and a few on my hairline too. I’d totally forgotten about these! However, they healed quickly with the help of the LED mask.
Aside from the blemishes and bumps, my skin also felt less hydrated. Therefore, it wasn’t as dewy and smooth. My cheeks felt less full, flat even. Overall, my lower face felt less supple and tight. I noticed my under-chin sag and pre-jowls a lot more now too. And my pout, gone 😭.
I seriously considered picking up the Trinity again. But I didn’t.
And a few weeks after that, my cheeks had less bounce for sure. I also felt less ‘meat’ around my eye sockets and – although my eyebrows weren’t level to start – they now looked more obviously lopsided. And my eyes looked heavier. I began worrying the bumps on my chin and even tried squeezing a few – something I’d not thought about for months.
For the next month, I saw and felt no more change in my skin. So, this was my new normal skin.
Here are my comparison photos from 4 months after I quit microcurrent (but continued with the red light mask):
4 months after I quit microcurrent: still healthy but with less volume, elasticity, hydration,& pout. More pronounced lopsided brow too.Have a closer look…And from this angle I see those pre-jowls again, flatter, less bouncy & supple mouth area, under eyes, & cheeks. Boo.From the side the under-chin sag is, well, saggier, and my jawline/jowls less defined.
Now, you can see the changes are subtle, but they’re noticeable to me. I still think my skin feels and looks good with the continued use of the red light mask. It’s just not as good as when combined with the microcurrent.
So, in summary:
I noticed small changes after a few weeks
They became more obvious after 2 months
It took about 3 months total for the microcurrent effects to completely fade away
The LED red light mask maintains healthy, smooth skin & tight pores, but to a lesser extent than with the microcurrent
I feel the changes more than seeing them
I miss my hydrated, dewy skin from microcurrent
I now get regular bumps & blemishes
There’s noticeably less volume & bounce in my skin,
I miss the tightened lift around my lower face & mouth
And I really want my pout back!
So, what do I think about home microcurrent now?
These little guys do more than I originally thought
I can see my results from microcurrent are more pronounced than I had first thought. I now appreciate the tightening effect, lift and volume, but also the extra hydration and how it clears blemishes, bumps, and blackheads. And keeps them away. But my results are subtle.
Combined with red light, however, results are much more noticeable.
Dynamic duo: Microcurrent & red light
So, it’s not only about collagen and elastin. But all my skin’s health. And this means perky, energetic cells, busy building, repairing and removing harmful cell waste and oxidants. And because these bad things age my skin, home microcurrent helps to help fight them.
However, it’s still rather a lot of effort. But now I know home microcurrent won’t lift my saggy under-chin, I’d simply focus on clear, hydrated, and healthy skin. So, I’d happily spend less time on it. Nuface’s 5-minute basic routine after my red light mask should do the trick.
Once I’m done testing a few other devices, maybe I’ll go back to it.
View Nuface & Ziip deals
When you shop via my links I earn a small commission (your price stays the same). I really appreciate your support 🙏!
BODY5
Use this code at CurrentBody for an extra discount!
What’s your favourite colour? By the end of this article I think you’ll be fairly fond of red. That’s because, from a strong light source, it casts some magical youth-restoring sorcery on your skin.
LEDs are the typical light source, but you can also use lasers and cold lasers. They shine red and near-infrared light onto your skin. There’s no damage, pain or burning sensation. But the light must be of precise wavelengths or it won’t work. The light energy passes through the skin layers and into the deep tissues. It stimulates our cells, boosting growth and healing. Dermatology professionals use it to treat lines and wrinkles, acne, psoriasis, and sun damage. You can buy various home versions too, which work in the same way as professional systems.
A red & near infrared LED anti-aging facial. Source.
OK, I know. It sounds a bit far-fetched. I was sceptical too. Until I experienced first-hand the glow-giving effects on my 40-something year old skin. Then, I had to know more.
So, it was time to release the Wearebodybeautiful research ferrets. They came back with some grade-A sciencey shit. And now you can learn all here, in red light therapy and facials 101.
Let’s start with a little background.
About light, life & Photobiomodulation
First, we need to understand a bit more about light energy, and how it affects living things by triggering biochemical reactions with photobiomodulation.
What is light?
Sunlight contains every colour of the rainbow, from red to blue. But visible light is only a small part of all light.
The visible spectrum of light from violet (380nm) to red (700nm)
We measure light waves in nanometers (nm). The human eye sees light with wavelengths from 380 nm to 700 nm. Light waves shorter than visible violet at 380 nm are ultraviolet (or UV) light. Waves longer than red at 700 nm are infrared (or IR) light. All light is part of the bigger electromagnetic radiation spectrum along with radio waves, microwaves, x-rays and gamma rays. As well as being waves at different lengths and frequencies, light also consists of photon particles.
Now, we know that light affects organisms. Think back to school science lessons. Plants use photon energy from sunlight, along with water and carbon dioxide, during a chemical process called photosynthesis. This creates sugars the plant then uses to grow and live.
Chloroplast photoreceptor cells in plants use sunlight, water and carbon dioxide to create sugar energy during photosynthesis.
Light affects humans too. Certain molecules in our bodies are light-sensitive, and specific wavelengths kick-start biochemical reactions. One example is when light hits special cells in the retinas of our eyes, called photoreceptors. They absorb light and, via a chemical reaction, convert the energy into an electrical nerve signal which our brain processes into vision.
Light hits retina photoreceptor cells, triggers an electrochemical reaction, and our brain translates it into vision.
In fact, not getting enough sunlight has a bad effect on us too. For example, you’ve probably heard of Seasonal Affective Syndrome (SAD), and rickets caused by lack of Vitamin D3, both stemming from a lack of sunlight.
This biochemical reaction started by light is called Photobiomodulation.
Photobiomodulation & its uses
The word ‘photo’ means from or produced by light. Light creates changes in our body, which is also known as a photochemical reaction. So, photobiomodulation is the scientific term given to how light can change or modulate a biological system.
Photobiomodulation: how light can change or modulate a biological system.
p
INFO: Photobiomodulation therapy using red and near-infrared light has other names too. Such as Low Level Light therapy (LLLT), soft laser, photobiostimulation and red light therapy.
The benefits delivered depend on:
the specific wavelengths
and how deep it reaches into your tissues.
Studies show it works to treat pain, inflammation and hard to treat wounds, and even dementia, cancer chemotherapy side effects and brain disorders. It’s widely used to speed-up healing of burns and sunburns by significantly reducingredness, swelling, and peeling of the skin. It also reduces healing time of skin grafts, infected wounds, amputations and other alternative and more aggressive cosmetic procedures such as laser resurfacing.
The therapy also helps to heal, reduce symptoms and reoccurrence of Herpes simplex lesions (cold sores). The red and NIR light helps strengthen immune system cells to help fight the virus in the body. It also speeds-up healing time.
In dermatology, blue light treats acne and red and near-infrared light treats inflammation such as psoriasis and rosacea. And the boost of collagen from red and NIR light also helps soften scarring (both colour and appearance), signs of sun damage and aging, such as sun spots and wrinkles.
The human eye sees red light as the wavelengths between 630mn and 700 nm long. It’s used to treat the surface of the skin.
Infrared light is invisible to the human eye, with wavelengths between 700 nm to 1,000,000 nm. The infrared spectrum is divided into near, mid, and far-infrared.
Near-infrared light or NIR has wavelengths of 700 to 1400 nm. It generates the most heat out of the different red lights. The healing action of near-infrared light can boost tissue repair and increase metabolism. These effects are due to how it stimulates the mitochondria in the cells, but more about that later.
Mid-infrared light has wavelengths of 1400 to 3000 nm. It can reach the hypodermis, increasing circulation and generating heat to help injured areas of the body.
Wavelength, power, and spot size of the light and the thickness, location, and type of tissue affect how deep it reaches into your skin. Skin colour is also a factor6. Therefore, there are no universal figures for wavelength subdivisions, or the depth of skin they can penetrate.
Indicative depth penetration of different light wavelengths. Source
So to recap, red and NIR wavelengths reach to different depths and stimulate our skin cells. Specific light-sensitive molecules inside our cells absorb the light photons and gain energy. This energy excites the cells so they work harder.
Next, we’ll look at what actually happens in our cells.
What does red light do in our cells?
The magic happens in ourcell Mitochondria. The light energizes their cellular respiration process, which results in a surge of vital ATP energy molecule.s To understand exactly what happens, first we’ll look at the cell mitochondria, how they produce ATP and then how red light enhances this process.
What are Mitochondria?
All the cells in your body, except red blood cells, have miniature power generators called mitochondria. They are essential for normal bodily functions. Their primary responsibility is to convert air, water, and food into energy for our cells. Without them, cells couldn’t grow, divide or function. The cells that use the most energy have higher numbers of mitochondria. The liver has up to 4000 mitochondria per cell!
Mitochondria have other roles in cell signalling, balancing calcium, maintaining body heat and killing cells that are no longer useful.
A chemical called adenosine triphosphate or ATP is the energy currency of the mitochondria. And when the mitochondria have more energy, they do more work and the body heals faster.
Mitochondria have an outer and inner membrane with an intermembrane space between the two. Pores in the outer membrane allow proteins, positively charged protons and negatively charged electrons to pass through. The protein-rich inner membrane encases the gel-like matrix, which is where most stages of mitochondrial respiration take place to create ATP.
Mitochondrial respiration to produce ATP
Mitochondria make ATP during cellular respiration. Mitochondrial respiration is either aerobic (with oxygen) or anaerobic (without oxygen). Aerobic respiration is best because it produces more ATP energy. It’s a complex process with four stages.
STAGE 1: Glycolysis. This takes place in cell cytoplasm.
STAGE 2: Pyruvate oxidation. This takes place inside the mitochondria matrix.
STAGE 3: Citric Acid or Krebs cycle. This also takes place inside the mitochondria matrix.
STAGE 4: Oxidative phosphorylation – Electron transport chain & Chemiosmosis, which takes place across the inner mitochondria membrane.
Diagram illustrating the 4 steps of cellular respiration. Source.
Thankfully, we don’t need to go into the detail of each stage. Suffice to say each stage processes nutrition particles in biochemical reactions to produce either waste (as carbon dioxide and water), or new molecules, electrons and substances used in the next step. Steps 1 & 3 create a little ATP, whereas step 4 creates the most. If you want to boffin-it-up, 🤓 learn more here and here.
So, where does photobiomodulation with red and NIR light come in?
Well, it’s now generally accepted that molecules in a mitochondrial enzyme called Cytochrome c oxidase or COX are the primary light-sensitive chromophores. They absorb either red and NIR wavelengths depending on the depth and tissue type of the mitochondrial location. COX enzyme is also a key player in stage 4 of cellular respiration called Oxidative phosphorylation. To understand how it reacts and why this is good, we must next understand a little more about stage 4 Oxidative phosphorylation.
Stage 4 Oxidative phosphorylation & Cytochrome c oxidase
COX protein enzyme (labelled IV) absorbs photon energy, then moves electrons & pumps protons faster helping ATP synthase produce more ATP. Yay! Source.
COX is the 4th and final protein enzyme (called a Complex) of the Electron Transport Chain. Each Complex embeds in the inner mitochondrial membrane. Electrons move along the Complexes from molecule to molecule, and as they do, they release energy. The Complex uses this energy to then pump out positive Hydrogen ions (H+ protons) through channels in the inner mitochondria membrane into the intermembrane space.
This build-up of H+ protons creates a proton gradient (or electrical charge like a battery) across the mitochondria inner cell membrane. During the following Chemiosmosis process, the Hydrogen protons flow back into the mitochondria through an enzyme called ATP synthase. ATP synthase harnesses the flow of protons like a turbine to synthesize ATP.
Phew.
Now, the crux of how red and NIR increases ATP production.
How red and NIR increases ATP production
Because red & NIR light stimulates COX, it works harder and more efficiently in Complex IV. This means it moves electrons and pumps protons faster, ready for the final ATP production stage in Chemiosmosis. This increases overall ATP output in the cell.
COX also completes the Electron Transfer Chain more efficiently. It’s an important stage to remove the waste molecules and ensure all respiration stages continue. It does this by handing-off the electrons to Oxygen, which then promptly splits and binds with Hydrogen protons to form water.
And an additional antioxidant effect of Red and NIR photons is important here too.
Red and NIR light donate their proton energy to electrons in the mitochondria. The energised electrons then break the bonds in nitric oxide. This is good because too much nitric oxide blocks oxygen from forming water at the end of the Electron Transport Chain. And this stalls ATP production. So, without excess nitric oxide, the process keeps moving efficiently, creating more ATP.
OK, so how does this increased ATP translate to anti-aging results?
ATP, collagen & elastin
With more ATP our cells work and heal faster. This is super news for our fibroblast calls.
Fibroblast cells in your dermis produce a gel-like support system called the extracellular matrix (ECM). Its made of the proteins collagen and elastin, and proteoglycans, which are highly hydrated sugar molecules. Its these things that make your skin supple and bouncy.
The ECM gives the skin strength, elasticity, and hydration and is essential for healing after an injury.
Genetics, lifestyle and environmental factors affect how skin ages. After the age of around 25, the ECM starts to degrade. The production of the essential components slows down, leading to skin that’s drier, weaker, has less elasticity, more wrinkles and imperfections. Boo.
Red light therapy stimulates the mitochondria in your skin cells and specifically your fibroblast cells. They therefore produce more ATP and get an energy boost to build new ECM, regenerate cells and promote oxygen utilization.
So, now you understand what red and NIR light triggers inside our skin, next we’ll look at the results you can expect.
Can I have red light therapy?
Red light therapy is very safe, and tolerated by most people. A sensitivity test patch is not necessary. However, if you have certain medical conditions you must avoid it.
Your clinic or spa will check your medical history. But at-home, you must check your device’s user manual thoroughly. It’s a good idea to download a copy and read it before you buy. Most brands have a PDF version available on their websites. If not, email their support team and request a copy.
Here are the contraindications applying to both professional and at-home red light therapy:
Key checks ✔️
Before you buy a home use device or book a professional sessions, check:
You’re not pregnant, trying to get pregnant or breastfeeding. (It’s not tested on pregnant or breast-feeding women so the risks are unknown).
You don’t have an open or bleeding wound
Body areas to avoid ❌
There aren’t any!
Choose a red light facial, or skin rejuvenation on your body, for your decolletage, tummy or knees.
Medical History
Don’t use it if you have a medical history of:
Lupus erythematosus
Photosensitive eczema or albinism as it may cause a severe skin reaction
Any photosensitive disorder (sensitization to light) such as epilepsy
Light induced headaches
Any genetic conditions of the eye
ALWAYS wear goggles with medical strength light if you have eye disease and conditions including Glaucoma, Cataracts, recent laser eye surgery or light induced migraines.
Medications
Don’t use if you’re taking or have recently taken these medications:
Steroids or cortisone injections
You are taking any medication that can cause photosensitivity. Medications include certain antibiotics, chemotherapy drugs, and diuretics. If you are unsure about your medication, check with your doctor.
Always check your medication instruction leaflet to see if photosensitivity is a listed side effect.
p
NOTE: Other substances not listed here can also cause photosensitivity. Common examples are: St John’s wort, coal tar, deodorants, antibacterial soaps, artificial sweeteners, naphthalene (mothballs), petroleum products, brightening agents found in laundry detergent, and cadmium sulphide (a chemical injected into the skin during tattooing).
Preparation for red light therapy
There’s nothing special you must do or avoid before red light therapy, aside from cleansing your skin and removing jewellery. You can safely go out in the sun both before and after your sessions.
Professional sessions are often combined with another treatment such as microdermabrasion. This removes the dry outer skin layers and helps the light penetrate deepest. So, you can also use a microdermabrasion tool or a gentle facial exfoliator before using a home-use device too.
Hands-free flexible red & NIR mask from CurrentBody is easy and excellent value
FOR AT-HOME SESSIONS ✔️
Find a comfy spot, I like to sit on my bed
Watch TV, listen to music or a podcast, or read a book during your session
If you need mains power an extension cable is handy
Have a small, portable mirror handy if you’ve a handheld to treat in sections
Use your phone to time each section (if needed)
Tie your hair back so it doesn’t get in the way
What does it feel like?
Red light therapy with powerful LEDs feels very pleasant indeed. It’s bright red and warm, but not hot. There’s no pain or burning sensation.
Most professional machines have a strong, manoeuvrable and pivoting arm with several adjustable panels of lights you can position around your face and body in a canopy. The more panels, the bigger surface area it can treat. You may sit or lie down for the session, depending on which body area you’re treating. The lights are typically 10cm from your skin. It’s most relaxing if you lie down. Goggles are provided because the lights are very bright (but harmless to your eyes).
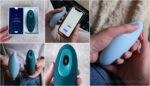
At-home LED devices vary in design. Most are for the face and neck area.
CurrentBody Skin silicone flexible wearable red and NIR light therapy masks.
You can choose a handheld wand-shape which you continuously move around your skin. You must treat your face in sections. Therefore, these are best for focused areas such as crow’s feet or around the mouth. They’re pleasant and comfy enough to use for 3 to 10 minutes per area.
Alternatively, you can choose a face mask. Some are a hard moulded shape, normally running on mains-power. Others are soft, flexible, battery-powered silicone masks, like those from CurrentBody Skin . You must wear them for between 10 to 20 minutes per session. They feel a little warm after a while, and don’t get too hot or sweaty.
And there’s one bad-boy medically certified home-use device from Dermalux.
A very pleasant, warm and relaxing session under the medically cleared FlexMD canopy.
The Flex MD is a mains-powered flexible panel, filled with potent red, NIR and blue LEDs. Not just for your face, you can use it around your whole-body, and comes with goggles too. Use it for 30 minutes in the canopy around your face, and 20 minutes laying directly on other body areas. You can feel a lovely energising warmth in your skin.
Side effects?
Nope.
There are no nasty side effects with red light therapy. Your skin maybe a little red afterwards, but this is simply due to increased circulation in your skin.
Red light therapy schedule & results
Both professional and at-home red light therapy gives best results after a course of sessions.
For professional red light therapy, you’ll need around 6 to 8 sessions in quick succession, one every 24 to 48 hours. You can then opt for periodic top-ups, or repeat the course when you need it. Spas and clinics often combine red and NIR therapy with other skin treatments such as Microdermabrasion, Skin Peels, Micro-Needling, Injectable treatments, and Laser.
The start-up schedules for at-home devices vary from 3 to 5 sessions per week, for 6 to 8 weeks. You’ll notice changes after around 4 weeks, but best results after a few months. The effects build slowly and gradually. Some devices are more efficient and powerful so give faster results. All at-home red light devices are for ongoing use with less regular maintenance sessions, 2 or 3 times per week, or as you feel you need them.
CurrentBody skin wearable masks are super easy to fit in and stick with.
p
TIP:Try the Dermalux FlexMD medically-cleared at-home device for the fastest and most significant results in just a few weeks. My review explains why it’s superior to cosmetic red light devices and how it gives far better results.
As explained earlier, the lights stimulate your skin cells so they create more ATP energy molecules. This sparks a further series of helpful metabolic events as follows:
Stimulates fibroblasts to produce more collagen & elastin
Like many other cosmetic technologies, results vary by individual. Your age, skin type, lifestyle, and genetics all play a part. So, for some results are subtle and for others they’re more significant. You’ll usually get faster and more significant results with a professional (or medical) device than a cosmetic-grade home device. However, there are now medically cleared devices available for home-use, albeit with a rather hefty price tag. Typical results are:
Smoother, firmer & well-hydrated skin
Brighter skin that glows
Fades dark spots & pigmentation
Calms redness & irritation
Softens acne scarring and other scars
Minimises fine lines & wrinkles
Skin looks healthier & younger
Clinical proof for red light facials
Since NASA (18) used red light therapy for experiments on plant growth in the 1990s, doctors have been using it for medical purposes. Numerous clinical research studies show red light therapy is effective.
Research in 36 subjects with sun-damaged skin had positive results. A combined 633 nm and 830 nm light-emitting diode (LED) treatment over five weeks led to significant improvement in wrinkles, softness, smoothness, and firmness of the skin. Electron microscopic analysis showed thicker collagen fibres.26
In a 2014 study of 90 were people treated with 611-650 nm red light (RLT) or 570-850 nm energising light (ELT), and compared to 23 controls. Both treatment groups showed increased intradermal collagen and an improvement in skin feeling and roughness.27
Another study used LED devices to treat 76 subjects with 830 mn, 633 nm, a combination of the two wavelengths or a control light. At the end of four weeks, there was a significant reduction in wrinkles, increase in skin elasticity and an increase in fibroblast activity, collagen and elastic fibres in the treatment groups.28
Professional vs at-home red light therapy
Here’s a comparison table to show the key similarities and differences.
Professional red light
At-home red light
Who’s it for?
✔️ For men and women
✔️ safe for all skin tones and types.
✔️ For men and women
✔️ safe for all skin tones and types.
What skin types?
Aging, dull or inflammed skin with fine lines, wrinkles, and pigmentation problems.
Aging, dull or inflammed skin with fine lines, wrinkles, and pigmentation problems.
Schedule
🗓 Around 8 sessions in quick succession for best results, one every 24 to 48 hours.
🗓 3 to 5 sessions per week for 4 to 12 weeks.
Maintenance
Less regular maintenance sessions or repeat the course as required.
Ongoing sessions as you need them.
Preparation
Clean skin, free from creams or metallic jewellery.
It helps to exfoliate before a session. May be combined with other treatments.
Clean skin, free from creams or metallic jewellery.
It helps to exfoliate or use a home microdermabrasion device before a session.
Session
The device is perpendicular to your skin, around 10cm away. You may lie or sit depending on the configuration of the device.
No gels needed.
Devices and application vary. Some are flexible or solid light panels positioned close to the face and neck. Others are small handheld devices moved across the skin in sections, solid moulded light masks or (the best) soft flexible battery-powered masks.
No gels needed, however with some LED masks you can also apply a hydrating sheet mask.
How long is a session?
⏱ 10 to 30 minutes
⏱ 10 to 30 minutes (depending on the device).
Sensation
No pain or burning sensation. Relaxing down-time. Goggles provided with NIR treatment and as the light is very bright.
No downtime.
Skin maybe red afterwards due to increased circulation.
No pain or burning sensation. Handheld or hands-free options
No downtime.br>
Use before your home microcurrent device.br>
Skin maybe red afterwards due to increased circulation.
Side effects
None! Very well-tolerated and completely safe procedure.
It’s safe to go in the sun before and after a session.
None! A safe & simple procedure with no side effects. However, overuse can cause dry skin.
It’s safe to go in the sun before and after a session.
Contraindications
Very safe procedure with just a few reasons you should not use it.
Very safe procedure with just a few reasons you should not use it.
Cost
£50 per session or £250 for six sessions
From £99 to £385
Results
Smooth, firm, toned, dewy & healthy skin with a natural glow. Reduces the appearance of fine lines, wrinkles & scars.
Results can last many months.
Smooth, firm, toned, dewy & healthy skin with a natural glow. Reduces the appearance of fine lines, wrinkles & scars.
Maintain results with regular weekly sessions, or more/less frequent as you need.
Pros & Cons
✔️ Results are more significant and longer-lasting than home-use devices
✔️ No pain, irritation, or down-time
✔️ More affordable than other professional treatments types
✔️ No negatives!
✔️ More affordable than professional sessions
✔️ You can maintain results in your home
✔️ Top devices are very low effort
✔️ No negatives!
At-home red light devices
If you have the dosh and want to splash out, you can try searching locally for a trusted beauty spa. Check the reviews, and ask about the equipment and training before you go ahead.
Or try this instead…
The best at-home red light therapy
Learn all the pros & cons of the best at-home red light therapy devices to give you healthy, hydrated, firm, smooth & bright skin.