


The Philips Lumea Advanced uses Intense Pulsed Light (IPL) that’s safe for use at home on the body and face. It slows and reduces hair regrowth after each treatment. Eventually your hair doesn’t grow back and periodic top ups are required less frequently to keep your skin smooth and hair-free. Learn more about how IPL works here.
First impressions
The Philips Lumea Advanced is packaged in a small neat deep pink box. It’s well designed with concise and clear key information shown on the outside. Simple icons note the key features, the safe skin tones and hair colours are shown, and the treatment windows you get with the model.
Inside, it’s all just as neat and well thought through. The device and attachments are protected in moulded plastic, the power cable, user manual, cleaning cloth and pouch below it. It mostly made of recyclable cardboard.


What’s in the box?
- Lumea Advanced gun-shaped device
- 4 cm2 body attachment
- 2 cm2 precision / facial attachment.
- 2 cm2 bikini area attachment (SC1999 only)
- Multi-voltage power adaptor and plug, approx 2 metres long
- Storage pouch and cleaning cloth
- User manual

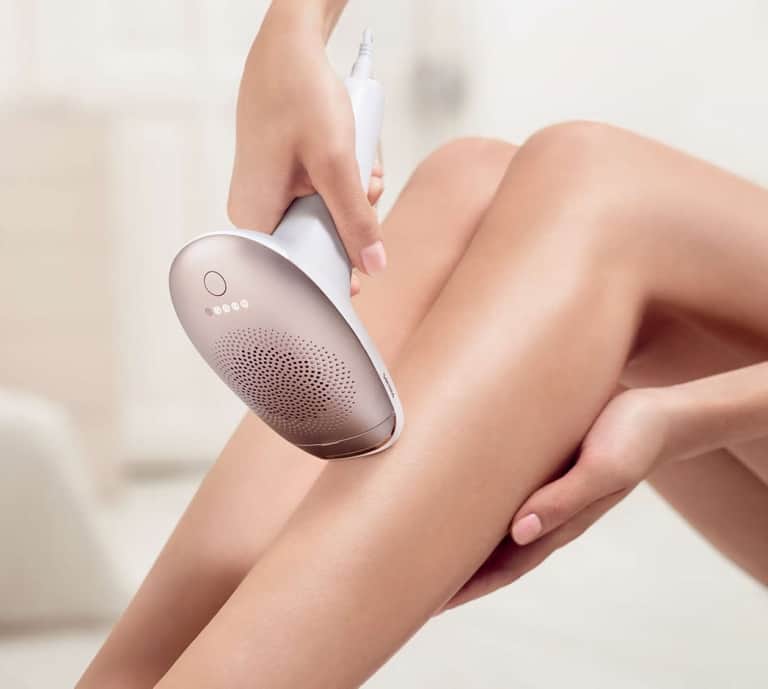
The Philips Lumea Advanced wouldn’t look out of place in Captain Kirk’s hand on the set of Star Trek. It’s gun-shaped and about the size of a small hair dryer, with a playful, retro feel about it.
The handle and underside are white with a dusky rose-gold top and matching glossy trim. And I like how the air vents on the top make a pretty flower pattern too.

It’s pleasing and comfortable to hold because it’s light-weight and well-made. It feels awesome to hold.
Before you start
Before you start, read the user manual. You MUST read the reasons you may not be suitable to use it (contraindications) and guidelines around tanning.
You must also prepare. This includes a skin patch test, shaving and finding a comfortable spot to do your treatment. Learn more in the next sections.
Read the user manual

The user manual is clear and easy to follow. It runs through how IPL works, suitable skin tones and hair colours, the various bits of the device and attachments, care and cleaning, important guidelines about tanning, using the Lumea Advanced and troubleshooting problems.
Spend time checking the important safety information, warnings and reasons you should not use the Lumea (such as pregnancy, dibetes, other medical conditions, diseases and medications you are taking, on tattoos, varicose veins and skin conditions).
It’s actually a good idea to check the user manual on Philips website before you buy.
Tanning guidelines
As with all home laser and IPL devices it’s important to follow the guidelines on tanning and sun exposure to keep your skin safe. Philips advise:
- Stay out of the sun for 2 weeks before a treatment
- Avoid the sun and tanning for 48 hours after your treatment
- Cover up or use a sun screen SPF 30+ on your treated skin for 2 weeks after your treatments
These guidelines mean you should avoid tanning altogether (with sunlight or artificially, with creams) during your initial treatment regimen.
Your skin test patch
You must choose one of the 5 intensity levels based on your skin tone / type and test it on a patch of skin.
There’s a table in the manual to check your skin type based on your skin tone and how it reacts in the sun. For each skin type the manual also recommends the maximum intensity levels you can safely use. It’s pretty simple to work it out.
Once you’ve done that, do your skin patch test. Shave, then flash each of your safe intensity levels on each body part you’re treating. If after 24 hours your skin is all good, you can use the highest level that was comfortable for your full treatment. Follow the instructions in the user manual.
TIP: If you’ve not used the Advanced for a while and your skin has darkened (i.e. after Summer) you should do another skin patch test.
Shave it!
Shabe immediately before your treatment.
Have a good clean shave. Get your treatment areas totally smooth with no hair above your skin. If there is, it can sting! The IPL energy must target your hair in the follicle (the bit below your skin). This is important because you want all the energy focused there. It’s how IPL works to give you hair reduction.
Once shaved, make sure your skin is dry. Don’t apply any moisturisers or deodorant to your skin!
So:
- Use a good, sharp razor
- Use shaving cream for a close shave. Try using hair conditioner – it does the job!
- Take your time to get a close shave without any nicks!
- If you don’t want to shave your face, try this instead
But do you have to shave before using Philips Lumea?
Can I wax or epilate instead?
IPL treatments are most effective when you shave beforehand. This means results are quickest.
But, Philips do say you can wax or epilate first. However, expect much slower results!
Philips also advise to wait 24 hours after waxing / epilating before your IPL treatment. This gives your skin time to recover, and allows the hair in your follicles to grow a bit so giving the IPL something to target.
Make sure all traces of wax are washed away before your treatment.
I recommend shaving for fastest results. But I understand maybe it’s not possible because it causes irritation and rash. That’s OK. Just be aware your results may be slower if you wax or epilate.
N.B. DON’T use hair removal creams because they may cause skin reactions with the IPL.
Pick your spot
Next, choose a comfortable and private spot to do your treatment.
Some people set up in front of the TV in the living room. Others don’t have this much privacy so choose the bathroom or their bedroom. Whilst it depends on which body areas you’re treating, there are a few tips to help you get started.
- In front of a mirror: I like to have a full length mirror. This is very helpful for a thorough bikini line , underarms and backs of legs
- A mains extension cable: the Prestige has a very long power cord, but an extension cable from the mains gives you more flexibility on where you situate yourself. If you’re treating large areas you’ll want to use it corded because it’s faster.
- Find privacy: back to the bikini line again! It’s far from elegant and not something you’ll want to share with housemates, kids, window cleaner etc.
- Choose the right time: you don’t want to be rushed or interrupted, so choose a time when kids are tucked up in bed.
So, if you’ve got all that sorted, you’re ready to go.
Getting started
It’s very simple to get started with the Lumea Advanced.
- Shave before every treatment (unless there’s no hair left!)
- Plug in and press the power button. The buttons illuminate white and you’ll hear the fan start up inside.
- Press the power button to cycle through and select your intensity level
- Position on your skin at a 90-degree angle and press the trigger button.
- Slide to the next spot and repeat. Cover your skin in flashes avoiding overlap.
When finished, press and hold the power button for 2 seconds to switch it off.
I tested the Lumea Advanced on my legs, bikini line and face and this is how it went.
Intuitive gun-shape design

The Lumea Advanced feels superb to hold. It’s light-weight but not delicate or flimsy at all. The tapered handle provides a natural grip and my index finger rests easily on the trigger button. The power cord fits snug and secure in the bottom of the handle. The cord is very long at around 192 cm.
When treating my legs and bikini line, it was natural to grip the Advanced and press the flash trigger button with my index finger.
When pointing the device towards my face and underarms, it felt best to press the trigger with my thumb.
It’s easy to experiement and find what works best.


The trigger button is easy to find on the Lumea Advanced. The gun-shape means there’s no stress on your grip as you press the button.
Simple controls

On top of the Advanced is a singlt control button. Press it to power it on, long press it to power off. When powered-on, press it to cycle through the 5 power levels and back to level 1.
It’s super-simple and intuitive.
Face, precision & bikini attachments
The Advanced models come with different flash windows.

All models come with a large 4 cm2 body window attachment. This gives faster coverage on large areas like legs.
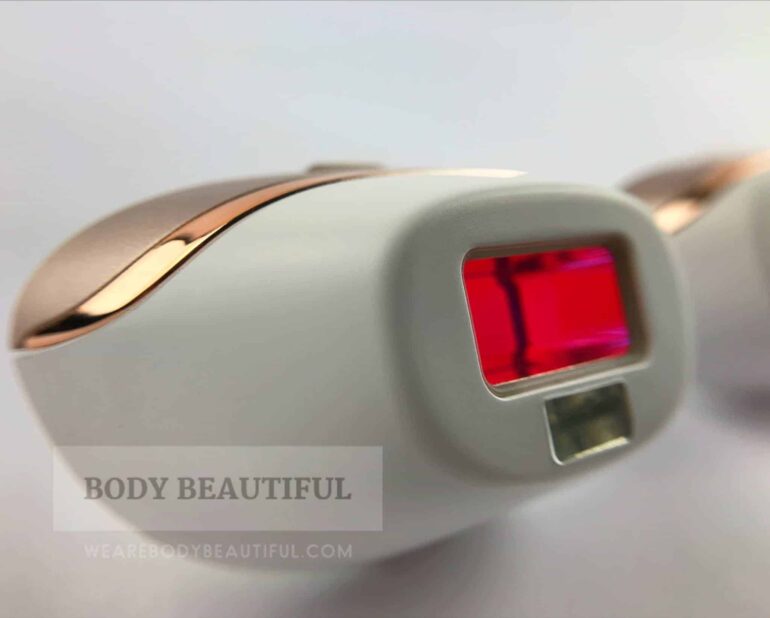
There’s also a smaller 2 cm2 precision or face attachment. This has an additional red filter so it’s gentle on more sensitive areas like the face. It’s also easier to position on bony and uneven surfaces than the larger body attachment. I found it helpful for toes, knees and ankles. And especially on the upper lip and chin to get full coverage but protect your lips too.

The Lumea SC1999 and BRI923 also have a 2 cm2 bikini attachment. Bikini hair is coarser and more stubborn than other body hair and flashes in this area can sting a bit. Using a lower intensity level helps but this then has a lesser effect. Philips therefore designed a specialist bikini attachment. It has a special filter that makes it comfortable to use a higher more effective intensity level when compared to the body attachment.

The flash windows simply pull off. There’s a small lip to grip on the top. Each window has a chip sticking out on the back. Align this with the slot on the device and slide in.

How long will the Lumea Advanced last?
The latest Lumea Advanced models have some of the best lamp lifetime out there.

They all provide a minimum of 250,000 flashes. Combined with the 4 cm2 body treatment window that means you can treat a massive 1,000,000 cm2 total body area. You’ll get loads of treatments and be able to maintain your results for years to come.
1,000,000 cm2 provides over 200 full body treatments (full legs, bikini line, underarms and face). That’s enough for your initial treatment regimen and then 15+ years of monthly top-up treatments. It’s a fantastic investment.
The Lumea Advanced offers excellent value for money and beats most other devices out there too. Just like their cordless cousins the Lumea Prestige, you could share it and still get several years of regular use.
N.B. 15+ years of use is based on the bulb life only and doesn’t take into consideration general usage, wear and tear that effect how long the machine keeps working.
Is the Lumea Advanced safe?
Yes. It’s clinically proven safe for home-use.
There’s an in-built UV filter in the flash window to protect your skin. And other impressive and high-tech safety features.
Skin tone sensor and safety system

Before the first flash, the Advanced checks for a safe skin tone. It won’t flash if your skin is too dark. It shows the status of the tone check with the ‘Ready’ light on the back of the device.
It’s easy to see the ‘ready’ light when you position the device against your skin.


The Advanced also checks your skin tone regularly during your treatment.
Eye safety
There are also contact sensors around the flash window. These prevent accidental flashes into open air and near your eyes.
If you don’t have full skin contact it won’t flash. This means you must hold the gun at a 90-degree angle to your skin to cover the contacts. I found it comfortable and easy to hold with just the right pressure against my skin.
Stamp & slide modes
Like all modern devices, the Lumea Advanced comes with 2 treatment modes; a stamping mode and a continuous flash mode.
- For Stamp & Flash you press and release the trigger for one flash, then re-position and repeat. It’s best for bits that need a bit more care.
- For Slide & Flash you keep the trigger pressed and after each flash slide it across your skin to the next position, and repeat. This is more comfortable for treating larger areas.
Both modes are easy to use. Between each flash, you need to move the attachment head with just the right amount of overlap so the flash window lines up with the previous position. It treats only skin directly in front of the flash window so it pays to concentrate and get this right for the best coverage. It’s easy once you get the hang of it.
The ‘Slide & Flash’ mode was good for treating my legs. I had to wait a few seconds between flashes, but it’s easy to get into a good rhythm – just wait for the flash, slide along, ‘flash’ then slide, ‘flash’ etc. Without it, treating my entire legs with Stamp & Flash mode would be very tedious!
The tricky bits
Reaching some areas is tricky, like the backs of your knees and upper legs, and involves twisting and turning in front of a mirror. The gun-shape helps because it provides excellent grip and extra reach when I needed it.
The power-cord didn’t cause any notable problems either. It’s long enough and easy to work with once you find the best way to reach all the necessary areas.
Tips:
✔️ Use an extension cable in front of a full-length mirror so you can use all the power-cord to manoeuvre around your body
✔️ I prefer holding the device sidewards and working in rings around the contour of my legs. That way it’s easier to keep track of where I’ve flashed.
So how quick are the treatments?
How quick are sessions?
The Advanced is lightweight and comfy to hold. And the large 4 cm2 body window covers a good amount of skin in one flash. However, the flash rate is rather slow at around 3.5 seconds between flashes.
Philips advise it takes about 14 mins to zap a full leg. That’s about right. It took me just over 30 mins for two full legs on level 4, using the precision attachment on knees, ankles and toes. I find it a little tiring and tedious for large areas. There are much faster rival devices to choose at a similar price, like the Smoothskin Pure or Braun Pro 5 IPL.
The Advanced is much better suited to zapping your face and smaller body areas such as your bikini line and underarms. And the extra flash windows are a nice touch for these areas too.
What does it feel like?
You’ll hear the whirring of the fan and a soft popping sound with each flash.
Like most reviewers, I found it pain-free with just a slight, occasional sting. But it’s no way as painful as waxing, epilating or threading!
The flashes mostly feel warm against your skin. But some areas, like ankles, thighs, bikini line and underarms can smart more because they’re more sensitive. And you may feel increased heat on your bikini line and underarms where your hair is thicker and denser.
The flashes are bright, but harmless to your eyes. You don’t need to buy specialist goggles or glasses. Use it in a well-lit room so the flashes don’t seem so intense. Try not to look directly at the flashing end (that’s difficult I know, because you need to get good coverage!) and wear sunglasses to ease the irritation.
It takes a bit of concentration so you don’t miss any areas. And note, Philips say DON’T mark off areas you’ve done with a pen or pencil as this can cause a skin reaction.
After your IPL session, your skin may feel warm and slightly red, and prickle or tingle. It may feel dry and itch a bit too. This is normal and it wears off after a short while. Try using an ice pack or a wet face cloth to soothe it. Cooling water sprays are good too, aloe vera gel or a non-scented moisturiser. Side effects are rare but can occur (especially if you expose your skin to the sun).
Effort & results
The regimen is a treatment every 2 weeks for the first 4 to 5 treatments, so that’ll take 8 weeks to complete to see significant hair reduction results.
The overall effort depends on which body areas you treat and how long the sessions take. As mentioned earlier, I don’t recomment the Advanced for zapping legs and large areas. It’s much better suited to small areas and the face, which you can do in around 20 to 30 minutes.
After the start-up regimen, you’ll need touch-ups sessions every 4 to 8 weeks. And once you’ve done several top-ups, you’ll likely need them even less frequently.
Typical results are to notice some hair reduction after 2 or 3 sessions, and after treatments 4 to 5 tsessions he reduction should be significant. For most people it takes just a few treatments to see softer, slower and patchy hair regrowth. You need to shave less frequently, and eventually not at all! It can take a little longer for some to match these results because it varies by person. Learn more about results here. Best results come once the regimen is complete, and periodic top up treatments keep skin hair-free and smooth.
Philips Lumea Advanced BRI923 vs BRI921, SC1999 & SC1997
All models have the same excellent design, features and performance. The only differences are the specialist attachments with each, different prices and the latest models come with a Philips Satin Compact Facial Trimmer.
Lumea Advanced BRI923
- RRP £350
- 4 cm2 body
- 2 cm2 face / precision
- 2 cm2 bikini
- + Satin Compact Pen Trimmer
Lumea Advanced BRI921
- RRP £300
- 4 cm2 body
- 2 cm2 face / precision
2 cm2 bikini- + Satin Compact Pen Trimmer
Lumea Advanced BRI922
- RRP £380
- 4 cm2 body
- 2 cm2 face / precision
2 cm2 bikini- + VisaPure mini facial cleanser
Lumea Advanced SC1999
- RRP £385
- 4 cm2 body
- 2 cm2 face / precision
- 2 cm2 bikini
Lumea Advanced SC1999
- RRP £350
- 4 cm2 body
- 2 cm2 face / precision
2 cm2 bikini

The BRI923 is a the same IPL as the SC1999. They both have 3 attachments for face, body and bikini. You get a Philips Satin Compact Facial Trimmer with it.
The BRI921 is the same as the SC1997. They both have 2 attachments for body and face. You get a Philips Satin Compact Facial Trimmer with it.
Think of the bikini attachment as an optional extra. It’s designed to be more comfortable and effective than the body attachment. But it’s still safe to use the body attachment or the precision attachment on the bikini area.
So how much extra cash is it worth? Anything more than £50 difference is hard to justify the benefit of the bikini attachment. So check the offers and then decide if you need the extra attachment for the difference in price.
The Satin Compact Facial Trimmer is a nice bonus, especially if you’ll be zapping chin whiskers or your ladytache. But if you aren’t bothered, you can find clearance offers for the SC1997 and SC1999. You could grab yourself a bargain.
Lumea Advanced Summary
The Lumea Advanced is a solid choice for lighter skin tones and small body areas because it’s very comfy and great quality. However it’s sloooow on large areas like legs, so choose another device for these and whole body hair removal.

Lamp lifetime
⚡⚡⚡⚡⚡
The flashes last 15+ years of monthly treatments. It’s one of the best.
Ease of use
👍👍👍
Quality, mains-power intuitive gun-shape, precise & comfortable, plus specialist flash windows. Average speed sessions.
Effort & Results
⭐⭐⭐⭐
Lovely & smooth after 4 to 5 sessions (1 every 2 weeks) plus top-ups every month or so to stay smooth.
Pros
- Eye-catching, retro-styled, light-weight & gun-shape
- Very easy to operate and comfortable to use
- Flash windows for different body areas
- Won’t flash on too-dark skin
- Clinically-proven & CE certification
- UK 100-day money back guarantee
Cons
- Tediously slow on large areas like leg and torso
- Power cord can get in the way
- Skin tone sensor doesn’t select your intensity level
- Not yet FDA-cleared in US
View Philips Lumea Advanced deals
Found this review helpful? Please support future reviews and shop via these links. I earn a small commission if you shop via these links, but your price stays the same.


