The Flex MD is a large, bendy LED panel made by experts Dermalux. It’s for both in-clinic treatments and for the LED aficionado to use at-home.
A new class of home skincare device. Serious stuff.
An imprressive multi-tasker for treating mild, moderate & severe acne, bacterial conditions, psoriasis, hormonal pigmentation, inflammation & redness, wound & scar healing, sensitive & delicate skin, skin rejuvenation, dark spots, wrinkles, loads more signs of aging, & pain relief. Use the canopy around your head, face and neck, or lay it flat against your skin on other body areas.
Flexible light therapy for your scalp, face & whole-body
Dermalux tech is proven to kick-start significant biochemical changes in our skin. So much so, it’s the only home device CE medically certified to treat acne, heal wounds, psoriasis and relive pain. Therefore, it’s extra fast and effective versus rival home LED devices for anti-aging concerns too!
The Flex MD home-use, super-charged light therapy kit is the dog’s danglies.
p
DERMALUX CLAIMS:
Dermalux make some very impressive claims about the Flex MD. 👉 It uses unique LED technology 👉 Dermalux say it’s the World’s most powerful home LED device 👉 It gives professional-level results
If you want to know if these claims are true, then you’re in luck. I fact-check them in the review below 🤓.
With the Flex MD you can use single or combined wavelengths. The photons in these specific light wavelengths do special things in your cells with a process called photobiomodulation.
The red (633nm) and NIR (830nm) wavelengths reach different depths where they reduce inflammation, boost blood flow, and energise all your cells, kickstarting collagen and elastin production, to calm, heal, refresh, hydrate and brighten your skin. And they build gentle heat to relieve muscular and joint pain too.
Blue wavelength (415nm) controls sebum, destroys acne and other bacteria, and calms other bacterial conditions for improved skin clarity.
First impressions
The Flex MD wins first place 🥇 for home beauty device in impressively large packaging. Everything is nice and secure in recyclable cardboard, so there’s very little wasteful, plastic packaging ♻.
It takes a while to unpack the several layers of cardboard packaging. You’ll need a small knife or box cutter to slice through the tape and seals (take care not to damage the kit). This not only prolongs the suspense but it’s also the most expensive game of pass the parcel I’ve ever played! By myself, admittedly.
The Flex MD arrives in a mahoosive DERMALUX branded cardboard box…With a striking red inside ‘Welcome’ message and then a smaller Flex MD-branded grey box inside.Everything is neatly packaged in protective cardboard-encased layers, starting with the LED panel…And the rest of the kit a level down, with the large black storage case on the bottom.Everything from the box…The Flex MD kit contents: Bendy LED panel, storage bag, base, pillow, controller & cable, mains cable & plugs, goggles, user guide, protocols guide, warranty card, promo leaflets.
What’s in the box?
LED array panel
Storage bag
C-shape base
Pillow
Controller & cable
Mains cable & plugs
Goggles
User guide
Protocol guide
Warranty card
Promo leaflets
All the kit bits fit neat in the large storage bag provided. This keeps everything together and conveniently portable. However, it’s worth hanging onto the Flex MD cardboard box too for extra sturdy storage protection against knocks.
Quality & design
Use the LED panel as a canopy for treating your scalp, face and neck. Alternatively, lay it flat against your skin on your chest, back, tummy and other body areas. The design is functional versus stylish, coloured in a neutral but rather dull grey.
The mains-powered LED panel is 1.5cm thick, and three layers of a body-safe foam-like material that’s sturdy but surprisingly bendy. It’s a robust, durable and flexible construction which should last well with care. Embedded on the underside is the neat network of LED lights paced every 2cm and protected under a wipe-clean transparent cover. There are two rigid plastic runners on each end which slide into the C-shape base.
As you move the panel it makes an odd wobbly, scratchy noise which takes a little getting used to!
The LED array on the underside of the bendy panelWipe-clean LED panel roughly 40cm long x 23cm wide.Slide the plastic runners into the sides of the C-shape base to create the arched canopy.Attach the controller cable to the panel hereVery simple and intuitive buttons on the comfy contoller.
The controller is lightweight and compact. And if I’m being pernickety, it’s also a bit plasticy and bland compared to the more refined styles of other top home use device brands. But it’s a minor point because it does the job well.
Plenty of slack with a 2m long cable from the controller
Attach the controller to the LED panel via the two metre RJ11 cable. This has rather old-school clippy-connectors at each end, like those on your landline phone or wireless router. One clips into the corner of the LED panel and the other into the base of the controller.
p
TIP: The RJ11 cable is a little difficult to disconnect from the controller if you don’t have long nails to release the clip. You can use a pin or simply leave the cable plugged in, which also avoids wear of the plastic clip mechanism.
The mains cable is a good 1.5 metres long and it comes with UK, European and Australia mains plug adaptors. There’s enough cable to plug this in beside my bed, but you may need an extension cable if your socket is further away.
OK quality 1.5m mains cable Australia, UK and Europe plugs which are easy to changeConnect the mains cable to the LED panel and then to the mains
p
TIP: the mains cable and the controller both connect to the left-hand side of the LED panel, with the mains cable back-left when in the base.
However, the quality of the mains cord is rather disappointing. Other home devices with thicker, more supple cords and more expensive materials not only look and feel better, but are more durable too. It’s not such an issue with the Flex MD because it’s a stationary device. But, for the price of this very expensive kit, I expect more. So, take extra care whilst coiling the cables, and packing and unpacking the kit into the storage bag.
The Flex MD comes with a good 2-year warranty.
Next, let’s look at the impressive claims Dermalux make for the Flex MD.
Are Dermalux claims real?
Dermalux make some bold claims about the Flex MD. They say:
👉 #1 They have unique LED technology (it’s won awards 5 years running, don’t you know). But what exactly is so darned special about it?
👉 #2 It’s the world’s most powerful home LED device, and specifically 3x more powerful than the closest rival.
👉 #3 It gives professional-level results at home, faster and better than the competition.
I’m not one to blindly accept or repeat marketing claims. A healthy dose of scepticism means I can’t help but question the what, how, and why until I really understand something. Therefore, I did some digging into these claims. So…
First, let’s look at the LED technology in the Flex MD and how it compares to rivals.
#1 Unique LED technology?
What’s so special about Dermalux LED tech?
If you’ve done a little interwebs research on home LED devices, you’ll know there are typically three important specifications given by manufacturers.
These are:
The wavelengths in nanometres (nm)
The optical output power in milliwatts per centimetre squared (mW/cm2)
And the dose, or total amount of optical power emitted during a session in Joules per centimetre squared (J/cm2)
Here’s this data for the Flex MD (just in case you’re curious):
🔴 Red
🔵 Blue
🟡 NIR
Wavelength:
633nm
415nm
830nm
Power:
11.5 mW/cm2
5.52 mW/cm2
5.5 mW/cm2
Dose per 30 mins:
20 J/cm2
10 J/cm2
10 J/cm2
Now, armed with this data, it’s tempting to compare it and chose a device which doses your skin in the most advertised photon ‘juice’. Right?
Wrong. Because the problem is, on paper most devices present almost identical numbers. It’s proper confusing 😕.
So, why is this and how can you tell the best from the rest?
I asked team Dermalux to explain. And I was pleasantly surprised when co-founder Louise, and Managing Director Dale, took time on a Zoom call to patiently delve into key areas of photonics science and the Flex MD design.
Proven therapeutic light
So, it’s no surprise Dermalux adhere to the proven therapeutic science of light therapy. They use only clinically proven wavelengths (415nm, 630nm and 833nm). We know the target areas in our cells readily absorb these. And they use ample optical power to reach these key areas, thus triggering the desired biochemical changes in our skin. With hundreds of LEDs too. But, there’s much more to it than this.
LEDs: Quality is more important than quantity. Luckily, Flex MD has both!
Dale further explained, it’s not only about the optical power, but the precision of this photon energy which directly and markedly affects results. And this precision is determined by the quality and stability of the LEDs.
And Dermalux LEDs are unique because they don’t use standard cosmetic LEDs. They start with the best of these, and then refine them. Again, and again. They end-up with top-quality ultra-precise light energy. This means the target organelles of our cells absorb virtually all the delivered photon energy. It’s so advanced, precise, and secret-squirrel that Dermalux designed their own scale to measure and manufacture their LEDs. No-one else has them. So yup, their LED technology is unique.
OK, but… how are their LEDs better?
Photonics stuff
Dale explained he precisely shapes the light energy to be much more efficient and effective on our cells.
Here’s an illustrative diagram of a standard LED waveform.
Photonics for dummies, by Laura Gladman aged 43 and ½
In comparison, Dermalux LEDs are further refined. They have a waveform with a narrow ‘Full width half max’ (FWHM) and a high peak emission. This ‘pointy’ shape is best because it’s high energy and narrow, so more of the photon energy focuses precisely on the therapeutic wavelength ‘peak’.
Rival devices, with standard and less precise LEDs, comparatively deliver some photon power at the desired wavelengths. But the overall shape is much less efficient and effective.
In less refined LEDs, the lower broad peak and broader FWHM means much of the energy misses the target absorption point in our cells. Therefore, most of it is wasted.
With a Dermalux LED, the FWHM is +/- 12 to 15 nm, and the peak emission is ultra-precise at +/- 2 nm. That’s versus +/- 5 to 10 nm peak emission typically in other devices. It may not sound much, but in photonics, it’s HUGE.
So, that’s the difference between standard and Dermalux quality LEDs. But equally important is keeping the LEDs cool and stable…
Cool LEDs are stable
LEDs generate heat, and heat reduces their overall optical efficiency. So, it’s vital to keep the LEDs cool. Cool LEDs mean precise and powerful energy, consistent from session start to finish 😎.
To do this, the Flex MD borrows cooling technology from Dermalux largest machine, the Triwave MD. Multi-layers of copper conduct and draw heat away from the LEDs. This also keeps the Flex MD LED panel light-weight and flexible.
Cheaper rival devices don’t have this cooling capability. So, they also don’t output stable, consistently powerful light energy.
Alrighty. Now onto power…
#2 The World’s most powerful home LED device?
Flex MD: is it’s the worlds most powerful home LED device?
Now, I’ll be honest. The first time I heard this claim it made me feel all itchy. That’s because:
a) it sounds like the myriad other overzealous and unsubstantiated claims designed to ‘wow’ us, and
b) on paper, the power output from the Flex MD is super-similar to cheaper home devices.
However, we’ve just now learned how Dermalux powerful, precise, and stable LED tech delivers more targeted energy, right where our cells need it. So, this explains how devices with apparently the same wavelengths and power output can give vastly different results.
But… we’re still just taking Dermalux’s word for it, right?
Well, here, we don’t need to.
Dermalux too were curious to see how they stacked up against the competition. So, they got an independent accredited test lab to accurately measure the optical power delivered by the Flex MD, and that of the other leading home LED devices.
The tests measured the optical power and wavelength precision of each device resulting in the optical power output (J/cm2) during a session.
And, you guessed it… the Flex MD came out on top! 🥳🎉👯♂️
The results confirm the ✔ accuracy and ✔stability of the Flex MD, and that ✔ the advertised power and dose is spot on.
That’s compared to the rival home devices where the power fluctuates during a session. This reveals their advertised power output (typically based on manufacturer LED standards) to be much lower in real-life tests.
Unfortunately for us, this juicy report is not publicly available. That’s to avoid an inevitable global home-beauty photonic tech war from erupting. It’s safer this way. However, Louise did share data from the resulting report comparing the Flex MD to its closest at-home competitor. I saw it with my own eyes, and I can confirm this data shows the Flex MD does indeed deliver 3x more optical energy💪.
So, I’m convinced the Flex MD is the most powerful home LED device. But does this mean it gives professional-level results?
#3 Professional-level results?
This is such an over-used and misleading claim made by home beauty tech brands 🙄 (IMHO).
“Professional-level results” implies results from home devices are every bit as good as those from their in-clinic technology counterparts. And whilst these scaled-down, less powerful home versions can improve your skin, results typically are slower and much less significant.
So, I thought this was more of the same predictable over-hype. That’s because the Flex MD is also a scaled-down, less powerful version of Dermalux’s flagship in-clinic (and bad-ass) Triwave MD LED system.
But wait 🙋♀️.
The portable Flex MD may be less powerful and therefore smaller and light-weight, but it has the exact same LEDs inside. Therefore, this home-version Flex MD is still considerably bad-ass.
But you don’t need to take my word for it this time.
The yellow CE mark on the Flex MD: Medical devices must display this mark noting the related CE directive, safety cautions & power output data
p
GOOD TO KNOW:
The Flex MD is CE medically certified under directive EN 60601-2-57:2011 to treat: ✔ acne, ✔ psoriasis, ✔ healing ✔ & pain
European medical certification is hard to get. It means an independent party – called a Notified Body – has continuously reviewed your device against super-comprehensive and strict directives. These are much tougher than self-assessed, non-medical CE directives (focused primarily on health and safety), which purely cosmetic LED devices require. It’s also tougher than the United States FDA medical clearance process. This is why:
First, the manufacturer must gather extensive clinical evidence supporting the science and technology. They must also design, document, and build the device to meet the applicable set of directives. This then ensures it’s safe to clinically test.
Clinical evidence for the Flex MD includes clinical reports & photos, and indepth histology studies & skin analysis.
And, because we demand effective medical devices, there’s a much keener focus on detailed clinical evidence, such as skin analysis and histology studies. It’s assessed and approved by a team of qualified clinicians. Finally, once manufacturing meets consistent standards, the Notified Body certifies it as a medical device for sale in the EEA. And it’s a globally recognised medical certification.
Phew.
👉 This means its therapeutic light starts significant biochemical changes in our skin and tissues resulting in healing, regeneration and relieving pain. The Flex MD is not ‘professional-level’ or ‘medical-grade’.
It’s simply a professional medical device you can use at home.
q
IMPORTANT: Don’t be fooled by rival home devices who say they use “medical-grade” LED technology. This sounds reassuring – and that’s the aim – but it’s simply not the same.
👉 Treating real medical conditions requires much higher quality and power light energy which is much harder to deliver. Therefore, it’s not found in cheaper, purely cosmetic home devices.
Ok. Still here? Jolly good. Let’s run through what this baby is like to use!
Before you start
Before you start, read the user manual. It’s a quick and easy read with some helpful diagrams. It explains how to set it up, how to use it, cleaning instructions and maintenance.
Read the Flex MD user guide thoroughly before first use!
Pay close attention to the warnings, risks, and contraindications. Common reasons you can’t use the Flex MD are light sensitivity, metabolic disorders such as Porphyria, epilepsy or seizures triggered by light, photosensitive disorders such as photosensitive Eczema, active cancers, autoimmune disorders such as Systemic Lupus Erythematosus, and use of photosensitive medications and substances. You can learn more here, and be sure to check the full list in the user manual.
You’ll know already if you have one of these conditions. And because LED light therapy is so well tolerated by everyone else, there’s no need for s kin sensitivity test before your first session!
q
IMPORTANT: Although not explicitly contraindicated by Dermalux, the LED panel is not tested for safety if you’re pregnant 🤰, so the risks (if any) are unknown.
👉 AND, be extra careful if you have eye disease and conditions including Glaucoma, Cataracts, recent laser eye surgery or light induced migraines and ALWAYS wear the goggles provided 🕶
Next, let’s look at how you use it…
How to use the LED kit
Find a comfy spot and get yourself set up. I choose my bed in the privacy of my bedroom. You can do it any time of the day, but I prefer a relaxing evening wind-down routine.
Set-up the canopy in the c-shape base for your face. Or leave it flat for body areas. Attach the controller to the LED panel. Then, connect the mains cable, plug into and then switch on the mains. Have the goggles handy too.
Set up the LED canopy on your bed for your face, or use it flat for your body areas
To start your session, gently tap the power button so it lights up green. Then, gently tap each of the LED colours you want to use in your treatment. The buttons illuminate once selected.
Powered-on and LED colours chosen! Ready to go…Then tap the ‘play’ button to start your session.Tap ‘play’ button again if you want to pause/restart your session. The session countdown timer shows the minutes remaining.
Each facial session under the canopy takes 30 minutes. So, simply lay back and relax until the device auto shuts off once the 30 minutes is up. I either take 30 in a silent meditative rest 💤, listen to the radio, music, or a podcast.
My easy, relaxing red & NIR 30-minute facialWear the opaque goggles to keep your peepers comfy
p
TIP: Once you’re under the canopy, simply lay the goggles over your eyes rather than tightening them around your head
Reduce the session time to 20-minutes for body areas where you lay the LED panel across your skin. You need less time because it’s so much closer to your skin. There’s no 20-minute option on the timer. So, you must stop it manually once the 20 minutes are up. Simply set an alarm on your phone, or set a timer with your friendly virtual home assistant.
I focus on my décolletage/chest, but also tummy, knees, and legs if I have time. I simply remove my clothing and lay the LED panel across my body, or long-ways down the front of my shins. The LED panel is 40cm wide which covers the width of my body comfortably. I watch TV and treat as many areas as I can during an episode or two.
Cover your body area in segments the size of the LED panel (roughly 40cm by 23cm)
Once you’re done, power off the controller. Dismantle the kit and store it safely in the storage bag away from direct heat or sunlight. Or, if you have the space leave it all assembled on a bed, but turn it off / unplug it at the mains.
You get a handy treatment protocols reference guide to match your skin goals to the correct combination of lights and face or body areas. Most protocols combine both red and NIR light to treat a variety of skin concerns on your face, scalp, neck, chest, hands, and body. Blue light is always combined with NIR, or both red and NIR lights for best results.
p
MORE THAN ONE SKIN CONCERN?
If you have more than one concern (which are separate on the protocol sheet or in the lists below), select ALL the wavelengths that apply, in one session.
For example, if you want to treat both acne and anti-aging at the same time, choose blue, NIR and red combo. Also, if you suffer from facial redness, using NIR along with red helps both the redness and overall anti-aging concerns.
Here are the wavelengths/colours to use for various skin concerns and conditions:
🔴🟡 Red & NIR combo
Face, neck, chest & hands
Skin concerns
➕ Fine lines & wrinkles ➕ Loss of elasticity ➕ Dehydration ➕ Large pores ➕ Dull, uneven tone ➕ Sun-damaged skin
➕ Medicines ➕ Hormones ➕ Post inflammatory hyperpigmentation (PIH)
Results: repairs
✔ Fades hyperpigmentation ✔ Evens skin tone
What does it feel like?
First, I like that there are no gels to use as with other home devices. Apply your serums and moisturisers after your LED session so nothing in your skin obstructs or diffuses the LED.
Comfy FLEX MD canopy set up
It’s a little awkward to get under the canopy – I slide in whilst tilting the base and canopy backwards, then position it around my head. I like to get comfy under the canopy, close my eyes and start the lights, and then place goggles over my eyes. Or you can start the lights and then shimmy under the canopy if you prefer.
And the lights are super bright, so wear the goggles provided. They’re totally opaque so are excellent at shielding your eyes. You don’t need to tighten the strap around your head. Simply lay the goggles comfortably over your eyes – it does the job and ensures nothing digs in. Wearing them, you can see the colour of the lights but it’s not overly bright.
The wipe-clean low pillow gives good support and keeps your head at the ideal distance from the canopy. Make sure the canopy is right above your face so the light reaches your neck too. If it’s too far back, you can slide it forward slightly on the runners.
Warm, calming, relaxing & bright!
It feels pleasantly warm under the canopy and never gets too hot. It feels safe and calming, and I find it a very relaxing way to spend 30 minutes. I like to listen to a podcast or music. Afterwards, my skin is sometimes pink due to increased blood flow, but there’s no stinging or other sensation. However, I do find everything has a slight bluey-green hue afterwards and it takes a few minutes for my eyes to readjust.
p
TIP: headaches are rare but possible after your session. Stay hydrated before and after, and take pain killers if needed.
It’s a bit trickier for body areas, but easy once you know how. Lay the LED panel flat over your chest, tummy back and other body areas. The LED array is wide enough to cover the width of my body. It’s not too heavy, but the edges can dig in a little depending on your body angle. Try positioning a couple of pillows down your sides to make it comfier. I pile up a few pillows, test the angle, whip off my top then position the panel. I keep my arms under the panel with the controller on my right-hand side. There’s no need to wear the goggles so you can watch TV or read during the 20-minute session.
q
IMPORTANT: Don’t lie on or put weight on the LED panel, or bend it beyond the shape of the canopy! You’ll break it!
There’s no 20-minute countdown option, so I set a timer with my Google home assistant. Sometimes, she gets it right.
Schedule, effort & results
Do twelve frequent sessions per area, 3 to 5 times per week. Continue if you like or reduce them as you see fit. Two or so sessions per week keeps my skin in tip-top condition.
You can also do a short course of three frequent sessions to give your skin a rejuvenating or calming boost. This is handy before a big event, as a pick-me-up, and even during the darker winter months when everything just feels a bit ‘ugh’.
For your face, you must commit at least 30 minutes almost daily to start. Add an additional 20 minutes per body area too. Therefore, it’s time intensive, especially if you treat multiple areas. But it’s very little effort.
I watch TV or read for 20 minutes with red and NIR on my neck and chest, then relax for another 30 minutes under the canopy for my face. So, I’m done in 50 minutes. I set aside a quiet hour, usually just before bed. I look forward to this relaxing, centring, wind-down time.
And the Flex MD is easy to stick with during the intensive course, because results appear fast.
Some feel the difference with calmed or invigorated skin after just one session. Others see soothed, brighter, hydrated, and healthier skin after just two or three sessions. And the results keep getting better from there.
Skin gradually smooths, firms, and rehydrates, pores shrink, scars, fine lines, pigmentation, spider veins and redness fade, so you’ve a healthy radiant glow instead. Breakouts, dryness, inflammation, and psoriasis calm and heal, and thin, delicate, and vulnerable skin rebuilds and strengthens.
Consistent use gives best results, so complete all twelve sessions quickly to see your best results. Two or three maintenance sessions per week is usual to maintain your new heathy skin.
p
A note About results…
As with all home beauty tech, results vary by individual. Your lifestyle, overall skin health and skin condition severity determine the breadth and depth of results. And how frequently you need maintenance sessions too. ❤ That said, this sophisticated LED kit is capable of some serious skin lovin’ which other devices simply can’t match ❤.
Learn about my results next…
My Flex MD before & after photos
I’ve tried at-home red light therapy before and I love the ease, simplicity, and my fresh skin results. So, I’m beyond keen to try the Flex MD and see how a medically cleared device compares.
I use the Flex MD with red and NIR for general antiaging on my chest and 43-year-old face. And sometimes I add in blue if I feel a few pesky spots emerging. I do four or five sessions per week for three weeks, then drop to two or three per week. I also use a gentle natural and organic facial exfoliator every few days.
And I can feel the change after my very first session. The next day my face is silky-smooth and clear, like on a good skin day. Then, after three sessions it’s bright and dewy too. And it just keeps getting better.
Gradually, my chest, forehead and cheeks feel firmer and meatier, with more bounce to the touch. And a few sessions combined with blue light lifts several under skin bumps on my chin to the surface so they easily exfoliate away. My under-eyes are brighter and fuller, and old red blemish marks start to fade. My chest is smooth, better hydrated and the red-bib effect is slowly fading too.
I see and feel a significant difference after 8 sessions, taking just 2 weeks. My skin is considerably plumper, firm and supple, smooth, tight and bright. My pores are still teeny too. During the first three weeks, a few more spots work themselves out, but quickly heal and fade. Overall, my skin is significantly more healthy, fresh and revitalized and I think looks several years younger 🥳.
It takes me three weeks to do all twelve start-up sessions. Then I drop to two, sometimes three, sessions per week. I took comparison photos after five weeks.
p
Note: The ‘Before’ photos are after finishing my Foreo UFO 2 trial, and dropping my Tripollar RF sessions to one every two weeks (to maintain skin tightening under my chin).
After 5 weeks of red, NIR and blue LED light therapy sessions with the Dermalux Flex MD.This side view shows the youthful, plump, volume in my skin
Although my skin is bright, I see small patches of diffuse redness in my after photos. But I think this is because I’ve enjoyed recent sunny weather, which my ‘before’ skin hadn’t seen for several months. However, I still have a few my red spider veins on my cheeks, so unfortunately the flex MD hasn’t faded these at all.
Have a closer look at my plump and lifted mouth area!Close-up of my teeny pores, eye area & forehead
I also use the Flex MD on the several bruises and owies I collect on my shins. It stops the bruises in their tracks, and helps strengthen the very thin skin I have in this area.
My results with the Flex MD came much quicker than with the flexible red light face mask I used previously. I loved my results from that, but they’re much more pronounced with the Flex MD. I see and feel the difference most with the delicious youthful, plump volume and hydration. And the blemish busting power of the blue light.
The negatives
There are a few negatives to consider with the Flex MD. I’ll get to the hefty price tag after a few minor points…
First, it’s rather a large piece of kit. This means you need a safe space or ideally a spare bed to leave it assembled when not in use. If you don’t have this, you must pack it into and out of the storage bag (or box if you keep it) for each session. This is a bit of a faff but is super important to protect this very expensive investment!
Store the LED panel flat when inside the storage bag. I hide mine under the bed…The Flex MD is portable in the storage bag, but it’s too large for travel.
Second, as mentioned earlier, although it’s easy, it is time intensive. A facial session demands 30 minutes out of your day. This is a good excuse to simply relax, listen to podcasts or audio books you’d normally not make time for. But if you rarely have any spare time, you may prefer another device that’s easier to fit in.
And next, it’s easy to accidentally pause or turn off the lights with the controller. That’s because it’s capacitive (it senses your fingers, elbow etc) and you don’t have to physically touch it to alter the controls. To avoid this, I place the controller next to the canopy out of the way of my hands.
Also, the mains cable is a little thin and could be better quality to match the robust LED panel. Especially considering the price. Which leads nicely to…
How much 🤑?!
And lastly – there’s no denying it – the Flex MD is seriously expensive at £1,895 / $2,495.
Crikey.
So, if you have the cash, is it worth it?
Based on the precise, stable and powerful LED tech, versatile panel design, CE medical certification, and my fast results, for me it’s an enthusiastic yes.
You could spend around the same on a rival 4-colour LED hard face mask. But that’d be a mistake because you’re paying more for an unproven green light wavelength, it’s not as precise and powerful, you can’t treat your face and whole body, and it’s not CE medically certified.
So, compared to this, and other LED face masks, panels and devices on offer, I think the Flex MD is remarkable. It’s a new class of home-use device and I’m confident it’s the best home LED kit you can buy.
Dermalux Flex MD review summary with pros & cons
“For tight, bright, supple & healthy skin, AND medically-cleared for healing, acne, psoriasis, pain relief.”
Professional, medical light therapy healing & rejuvenation
I highly recommend the Flex MD light panel with red, near infrared and blue LEDs. And if you can afford it, I think it’s a solid investment. That’s because of the precise, stable and powerful LED tech, versatile panel design for whole-body use, CE medical certification, and the fast, significant healthy and youthful skin results. From head to toe. I love it.
5 / 5
Face, scalp & whole body
💰💰💰💰💰+
Here’s a summary of my test scores, and pros and cons for the Dermalux Flex MD light therapy kit to help you decide:
Ease of use
👍👍👍👍👍
Easy, hands-free, robust panel. The precise medical LEDs are very bright & warm! Choose your combo of lights then total horizontal downtime under the canopy for your face & scalp with the goggles. Listen to music, podcasts or meditate. Lay the durable LED panel flat over your body bits for 20 minutes per area, & read or watch TV. Ideally keep it in situ on a spare bed, or pack it away safely after use.
Effort
💧
Time-intensive but zero effort sessions. Do 3 to 5 sessions per week, 30 mins under the canopy for your face, or 20-minutes per body area. You can do less minutes if you’re short on time. Do 12 sessions for an intensive anti-aging or healing course. Then regular top-up sessions as you need them. Do 3 sequential daily sessions whenever you fancy to calm and kickstart your skin.
Results
⭐⭐⭐⭐⭐
A fast & impressive multi-tasker which soothes, heals, rejuvenates, relieves musculoskeletal aches & pains, fights acne & other bacterial conditions. Skin visibly perks-up or calms after each session. Results build significantly over the 3 to 4 week short intensive course.
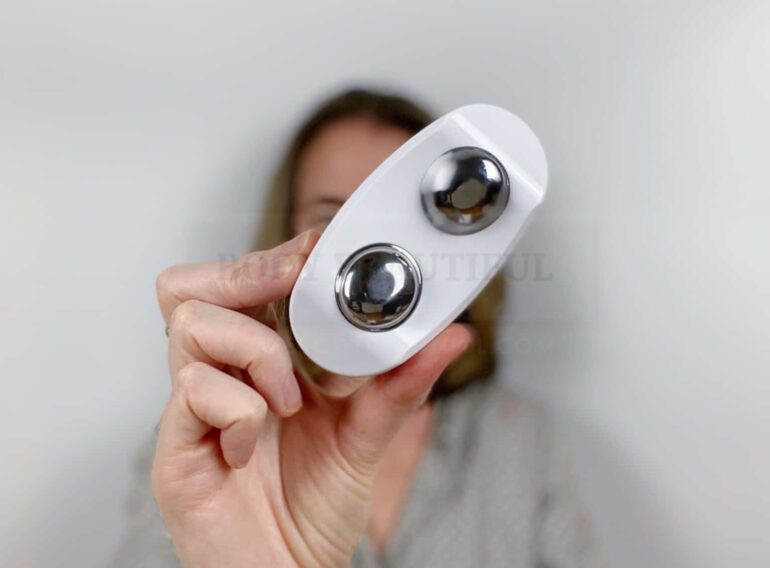
The CurrentBody Skin wearable LED light therapy tech comes in a flexible full-face mask, and separate neck and décolletage perfector. They each have many light emitting diodes (LEDS) of both red and near infra-red light held next to your skin.
Love these effortless masks with noticeable healthy-skin resultsLight therapy works by a process called Photobiomodulation
The photons in these specific light wavelengths boost blood flow and energise the mitochondria power generator organelles in our cells. The process is called photobiomodulation.
This perks-up all your cells, including fibroblasts which build more and stronger collagen and elastin. This gradually heals and refreshes your skin. With regular use they’re clinically proven to reduce facial lines, improve texture and pigmentation for younger looking, healthier skin. Use with an optional Hydrogel Face Mask for enhanced skin hydration too.
✔ Reduces inflammation ✔ Boosts blood flow ✔ Faster cell metabolism & so more ATP energy ✔ More antioxidants & detoxifies cells ✔ More & stronger collagen & elastin
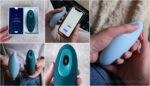
The packaging reminds me of an expensive, white and black oblong chocolate box. It’s sturdy, minimal and all made of recyclable cardboard. The mask is shown below.
Simple and sophisticated box with designed in Britain flag top left.Concise information on the back of the neat boxThe mask fits snug and black cardboard secures everything inside the box.With compartments for the different plugs, manual, controller, cables and carry bagThe contents from the box
What’s in the box?
Silicone flexible face mask
Controller
Power supply and country specific adaptors
USB connector
Head strap
Carry bag
User manual
Quick start guide
The mask and neck & dec perfector are well-made and durable, smooth and soft. They connect to a controller with a single button to power it on. There are various cables for charging too. I like that they’re thin, lightweight and flexible, unlike alternative hard, moulded masks.
Bring out the gimp.
Before you start
Read the user manual for important contraindications and other info
Before you start, read the user manual. It’s a quick, easy and informative read. Check the contraindications section for important reasons you should not use the LED mask. These include pregnancy, breastfeeding, photosensitivity, photosensitising medications, lupus, and genetic eye conditions. See more contraindications here.
Also do a sensitivity test with the mask on the inside of your arm for a 10-minute treatment. If after 6 hours there’s no reaction, you’re good to go.
p
TIP: Test the mask immediately once you receive it because CurrentBody.com accept returns within 14 days of purchase for those who experience skin or eye sensitivity.
Design, durability & comfort
Simple but attractive styling with logo and light prism effect lines.
The mask-front is durable but soft white silicone with black branding matching the box. It’s thick enough and flexible. The inside of the mask is clear silicone, evenly spaced with small, slightly recessed LED lights. The user manual states the LEDs won’t dim with age to render them ineffective.
The mask and perfector run on battery power so you can use them anywhere. There’s a long white, flexible cable fixed and secure on the bottom righthand side. This attaches via USB to a small controller. It’s simple to operate with just a single button to power on/off the mask. There are no intensity levels or other controls to worry about. The LEDs automatically shut off once the 10 minutes are up.
Quality, smooth finishing and edges around the eyes, nose, mouth, sides and cables.Evenly spaced LEDs on the underside around cheeks, chin, forehead and two on the nose.Rows or red LED lights. You can’t see the NIR light.The battery-powered mask, cable and small controller
You also get a soft white fabric carry bag for each to keep them clean and free from dust. And because they’re flat not bulky, they’re easy to store in a drawer and fit in a case or bag if you travel frequently.
The protective carry bag.
The mask wraps around your face and moulds to your contours so the LED light bathes every area. A soft and smooth black strap, with no scratchy bits, secures the mask. It’s easy to thread through the loop on the sides of the mask. Loop it in and back to secure the Velcro on one side, then position on your face and secure the other side of the strap/mask. Once on, adjust the strap as needed so it’s a snug fit but isn’t squishing your skin, nose, lips or eyelashes/lids.
The perfector secures around your neck like a bib and rests comfy on your chest, bathing it in light. The black velcro strap is slightly thicker, but still soft, and easy to adjust. Wear a low cut and loose fitting top so it’s easier to postion under your clothes.
The soft black Velcro straps looped through the silicone mask and perfector.
p
TIP: My head is a weird shape and I find the mask strap slips down the back of my head. To stop this, I wear my hair in a secure ponytail just below where the strap sits to support it and stop it sliding 💥.
Comfortable masks wrap around contours & fit well.
The eye and mouth holes are in the right place (for me at least) and the mask is soft and comfortable. My nose fits comfortably through the slits and seems to get adequate coverage from the two surrounding LEDs. The nose slits leave small indentations when I take off the mask but it’s not uncomfortable.
However, I do find movement of my upper lip is restricted a bit under the mask. But I’m still able to stick my tongue out through the mouth hole which is very important. It’s always funny. And never gets tiresome. Ever.
Charging
My mask and perfector arrived fully charged so they’re ready to go out of the box. And the battery life is excellent. A single charge is good for around twenty 10-minute sessions.
Once used up, you must charge the Lithium battery in the controller. It takes around 6 hours to fully charge. Connect the mains-cable mini USB into the controller. Then plug into the mains using the plug adaptor. You get four different plug types, so this means it’s handy for travel too.
The four mains plugs (including UK) which connect to the mains charging cable
As it charges, three white micro LEDs flash on the controller, then stay lit when it’s fully charged. You can’t operate the mask whilst it’s charging (it won’t switch on).
The routine
Love, love these hands-free, effortless masks.
Wash and dry your face.
Put on the mask. Turn it on, sit back and relax for 10 minutes.
Take off the mask, wipe it down. Put it away.
Do something else.
Hands-free flexible red & NIR mask from CurrentBody is easy and excellent value
What does it feel like?
There’s no heat, pain or skin sensation from the light whatsoever. However, it is very bright. My eyes adjust after a minute or so, and I find it less intense if in a brightly lit room. If it’s still too bright just relax for 10 minutes and close your eyes!
Bright red LEDs covering the inside of the mask.
p
IS IT SAFE?
The mask needs no eye or skin safety mechanism and sensors as with other devices. That’s because the light wavelengths and intensity are safe for both skin and eyes. It’s also clinically proven safe and effective for home use and meets all European safety and manufacturing standards for CE conformity, plus some additional voluntary worldwide standards.
The mask and perfector remain cool throughout the session too, not sweaty or itchy. And it takes zero concentration. They’re perfect to do whilst watching TV or having a 10-minute lay down.
Skin reactions to the light are rare. Your skin may be a bit red afterwards but it should return to normal within 1 to 2 hours. And a possible side effect is a temporary headache. Drink water or take a painkiller if you need to.
Schedule, effort & results
Use the mask and perfector 3 to 5 times a week for 4 weeks. Then, use as frequently as you need to maintain your results. I do at least 3 maintenance session per week, sometimes more if my skin’s a bit tired and dehydrated.
The easy schedule
The CurrentBody LED mask is one of the lowest commitment and least effort devices you can choose. It asks for no brain-power, is hands-free and you can read or watch TV at the same time. So, it doesn’t feel like a chore and requires just the smallest motivation.
Zero concentration, 100% hands-free. A smidge sassy.
Most users see good results after 12 sessions. Collagen builds and refreshes your skin gradually so a before and after photo help show the changes. During this time skin texture smooths, firms and tones, skin rehydrates and fine lines and wrinkles soften, pigmentation fades and reveals a more even, brighter complexion.
You may see all these results or just a few, and to varying degrees too. Your lifestyle and overall skin condition determine the breadth and depth of results and how frequently you need continuing sessions too.
My before & after photos
I’ve heard that red light and microcurrent are a power-house combo, with a synergistic effect. So, I decided to test the CurrentBody Skin LED mask by adding it to my current microcurrent routine. I do a relaxing 10-minute mask session before my 25-minute evening microcurrent session. I’ve done this 5 days per week for 4 weeks.
Microcurrent gave me incredibly healthy and beautifully hydrated, supple skin. So, I wasn’t sure it could get better. But it has.
Here are my comparison photos after 4 weeks of using the CurrentBody Skin LED mask:
After 4 weeks of using the CurrentBody Skin LED mask (with microcurrent!)
My skin is perkier still! It’s further smoothed my skin and refined my pores. It also plumps-out and fades my forehead lines, being most noticeable immediately after the LED mask. My under-eye area is thicker and brighter, so the fine lines aren’t as noticeable anymore. And boy is my skin BRIGHT 🤩. The colour is deeper and more unified, and there’s a vibrancy to it too.
I love the results here. And the boosting combo makes sense to me, because both ultimately help your cells create ATP energy.
It works like this…red and near infrared light stimulates your cell’s mitochondria. These are the teeny power factories that create ATP energy via cellular respiration. Red light speeds-up cellular respiration producing much more ATP than usual. This ATP in turn fuels all cell activity, so everything perks-up and acts younger, including your fibroblasts building stronger collagen and elestin.
And microcurrent boosts cellular respiration too. The teeny microcurrent ‘recharges’ your skin’s dwindling bioelectricity by creating a flow of ions in your tissues. Your cells borrow this charge to move vital nutrients and ions exactly where they need them. So, your energised mitochondria have all the important ions readily available for faster and more efficient respiration and loads more ATP.
First, as mentioned earlier, the lights are bright. But there’s no annoying flashing as with other LED devices. A bright room makes it seem less intense and to read you need a well-lit page or screen. Or simply rest and close your eyes for the duration of the session.
Second, it’s a bit awkward to walk around in. That’s because you can only see dead ahead. No peripheral vision therefore means potential bumping and tripping hazards. Don’t even attempt the stairs.
Comfortable to watch TV or read with your head upright (looking downwards aches!)
I also feel discomfort in my neck if looking downward to read or type. It’s much more comfortable looking straight ahead. Therefore, I prefer watching TV during my treatments.
Next, it can be a little difficult to fit the mask properly. The strap can slip causing tightness in some places and gaps in others. A second strap across the top of the device would help here. Or, if you have longer hair, try positioning your ponytail low on the back of your head and lie the strap across it to keep it securely in place.
My ponytail stops the strap and mask slipping
Another negative is at £349 it’s expensive and it may simply be beyond your budget. However, offers are common, and you can buy the mask and neck and Dec perfector together to save cash. So, if you can afford them, but are weighing up a cheaper LED alternative, consider this. With other hand-held LED rivals, you must hold and position the device several times over your skin. Full-face treatments are tedious and aren’t hands-free. Therefore, I think the CurrentBody Skin LED mask is worth the extra cash because it’s so much more convenient. So, you’re much more likely to stick with.
I love the short 10-minute hands-free sessions because you can also watch TV, read or chill. And it’s fast to show results with just 3 to 5 sessions per week for 4 weeks. Then, continue as frequently as you need. No gels, no fussy routines. These masks are simple and effective for smoother, healthier and brighter skin.
Here’s a summary of my test scores, and pros and cons for the CurrentBody Skin Light Therapy Masks to help you decide:
Ease of use
👍👍👍👍👍
Easy to put on & simple to operate with a close-but-comfortable fit. Light is bright but not irritating, it’s pain-free. And as it’s hands-free you can easily watch TV, surfda interwebs, read or rest during the quick sessions.
Effort
💧
Three to five 10-minute easy and hands-free sessions per week for at least 4 weeks. Continue, or reduce frequency according to your skin’s needs. For ongoing use.
Results
⭐⭐⭐⭐⭐
Collagen and elastin build over 4 to 6 weeks to brighten, tighten and smooth skin. Wrinkles and fine lines then gradually soften. Gives a healthier, glowing complexion.
Pros
Quality, no-dimming Omnilux LED technology
Excellent battery life
Virtually effortless hands-free operation
Durable, comfortable & pain-free
Zero-faff: watch TV, read or rest during your sessions
No ongoing cost of gels or replacement bits
Lightweight & portable (good for travel)
Clinically-proven & CE certified
60-day money back guarantee
Cons
Bright lights! – may be irritating for some
Uncomfortable/bad fit for a few faces
Awkward to walk around in
It’s expensive at full RRP
CurrentBody Skin Light Therapy Mask deals
Found this review helpful? Please support future reviews and shop via these links for the CurrentBody Skin LED mask and Neck & Dec Perfector. I earn a small commission, but your price stays the same.
BODYLED
Use this code at CurrentBody for an extra 15% off!
The Geneo device helps your skin behave younger. It does this in two ways. First, as a vibrating facial cleanser device that massages your skin during each 3-minute session. Not only does this deep-clean your pores, but it stimulates blood flow which energises your skin cells so they perk-up.
Second, during each weekly facial, the Geneo gel and capsule create a gentle chemical reaction that releases Carbon Dioxide microbubbles into your skin. Your skin senses the increase in CO2 and reacts with a surge of oxygen-rich blood to the area. This oxygen and other essential nutrients feed your cells. This boosts energy, fights oxidation, and removes toxins. So, sluggish cells speed up, repairing and building fresh skin.
In all, the Geneo keeps cells in top condition, helping them behave younger and slowing the signs of aging. With regular use, you get healthier, smoother, more hydrated, glowing and youthful skin.
The kit comes with two boxes; the Geneo device and a box of the oxygen facial consumables.
Box #1: Compact, sturdy professional Geneo device box. Recyclable cardboard ♻ too!Pull to small ribbon to lift the lid and the Geneo device lies in a secure moulded bedThe Geneo box contents: User guide, quick start guide, device, cleansing head, charging cradle & fixed USB cableBox #2: Small cardboard packaging for a months’ worth of oxygen facial consumablesSlide out box with cardboard inserts to secure the product (plus silica packets to keep it dry)4x capsule sachets for the oxygen facial 4x gel sachets for the oxygen facialsEverything you get in the Geneo kit from the 2 boxes
The Geneo kit contents:
Geneo device
Cleansing head
Charging cradle & cable
User guide
Quick start guide
4x capsule sachets
4x gel sachets
1x 50ml anti-aging cream
Quality & design
The Geneo is a simple, quality, cordless device. It’s made of a beautiful tactile material with a slight shimmer and available in three pastel shades; green, pink, and white. The charging cradle has a fixed USB charging cord, so you won’t lose it. Plus, it’s easy to travel with as there’s no bulky mains plug. It’s all well-made and robust, designed to last.
12cm long, 6cm wide, 4cm deep, curvy little Geneo devicePleasing curves and the joins are close and preciseFits very snug in your palm, it’s lightweight (125g) & comfy to holdSimple, single button to operatePress the large soft eject button and the cleansing head pops out!The device sits securely in the matching charging cradle with a decent 96cm long USB cable.
Daily am/pm cleansing routine
The facial cleansing brush and my favourite creamy coconut cleanser
Keep it in the bathroom, obviously. It looks pretty on the sink. Each battery charge lasts 2 to 3 weeks when using it two times per day. Keep an eye out for the small orange light on the back when it needs a charge.
It’s very simple to use:
Dampen your face & neck and apply your favourite cleanser
Press the power button and the brush head starts to gently vibrate
Move it in small circles or massaging swoops around your facial contours
Stop or keep going when it buzzes after 3 minutes!
Turn of the device and rinse& dry your face
Use your preferred cleanser. I alternate between a blemish control wash and a creamy coconut cleanser. I don’t wear much make-up so the cleansing brush works fine. But if I have more of a face on, I usually pre-wash to remove my tubing mascara (or it gets stuck in the silicone grooves!)
Ensure you cover all your skin, and you can concentrate on areas that feel good. I love how it feels around my eyes, cheekbones to ears, and lips too. It’s like a delicate massage which wakes up your skin.
Lush massage from the circular silicone grooved and knobbled cleansing brush head
The 3 minutes is over quick. And I love that it’s waterproof so I get an extra 3 minutes in the shower every morning! And I love how my skin feels afterwards. It’s deeply clean, soft, and invigorated. I find it very easy to make time for, even late on an evening when I’m tired. It’s easily part of my cleansing routine now.
Weekly oxygen boosting facial
I also use the Tripollar STOP radio frequency device to help with jawline tightening. And I like to do the Geneo weekly facial as an indulgent treat the day after a STOP session. First cleanse your skin, then do the facial, and finish with the anti-aging cream.
What you need for your weekly pampering oxygen facialCleanse your face for 3 minutes then remove the cleansing head.Carefully open a sachet of gloopy gel and squeeze it outApply the gel with your finger tips all round your face and neck (if you like) then wipe your handsThen open a capsule sachetPop the capsule in the Geneo deviceWith small circular motions, run the capsule through all the gel, all around your face.The gel and capsule create teeny CO2 bubbles. Don’t forget your nose!The capsule once done: The capsule dissolves and creates a gloopy CO2 goo!Next, remove the gloop from your face (a face cloth is handy to scrape it off, then rinse and dry).
The sensation of the capsule and gel is slightly abrasive and tingly-cool as it exfoliates your skin. It’s unlike any other home device I’ve tested, and although it’s not as soothing as others, I do still rather enjoy it. And I love the idea of the teeny CO2 microbubbles sloshing about in the gloop and partying in my skin.
The timer buzzes after 3 minutes, but keep going if you need to until you’ve covered all your skin. There’s loads of the capsule left. So, I apply any remaining gel in the sachet to the backs of my hands and treat them too. When you’re done, eject the capsule and put it in the bin.
p
TIP: you can’t reuse the capsule because it softens and disintegrates when exposed to air.
I find it difficult to remove the gloopy gel with water alone. It’s easier to scrape it from your face with a damp face-cloth, then rinse your face. Pat your face dry and them apply the anti-aging cream.
Finally, apply the light but nourishing anti-aging cream
I love this light-but-nourishing formula that sinks in without feeling greasy. It’s got lots of moisturising, antioxidant and cell-communicating goodies for your skin (more info here). And the smell is lush too. Your energized skin cells will make good use of the anti-aging goodies that absorb in.
Afterwards, my face feels super-soft and smooth, fresh and invigorated. And it looks perky and bright too.
Schedule, effort & results
Cleansing both morning and evening takes 6 minutes of out your day. I find it low-effort and easy, and it’s now part of my am/pm routine.
Easy, low-effort daily cleansing routine (you can use in the shower too – sorry, no 📸!)
With daily use, the cleansing head not only keeps your skin clean, but the massaging cleansing action gives your skin a gentle pick me up by increasing blood flow to your cells. With continued use this encourages your skin to actively cleanse and heal cells. This is a simple, quick, effective and aging-preventative way to care for your skin.
But the star of the show is the weekly oxygen facial🌟. It’s easy, pleasant and takes just 10 minutes max. This, supported by the daily cleansing, energises your skin cells and gives them the oxygen, nutrients, and energy they need to clear oxidants and toxins, to heal and strengthen. So, with ongoing use your skin starts to look, as well as behave, younger. I also found after a few weeks I had many fewer and smaller blackheads and blemishes, and smaller pores.
I love the centring, daily selfcare of this low-effort feel-good device. And you must continue with the boosting weekly facials to keep your skin in tip-top condition.
The negatives
There’s not much to dislike with the Geneo personal at all. As mentioned earlier, I find the gel difficult to remove. But a face-cloth solves this issue.
Also, to keep up with the weekly facial routine, you’ll need a consumables kit every month. Each kit costs around £30 and gives you 4x facials and 50ml of anti-aging cream. So, that’s £7.50 per weekly facial and the cream easily lasts longer than a month. It’s also a lovely hand moisturizer.
Around £30 for 4 oxygen facials +50ml of anti-aging cream. So, good value at £7.50 per facial, but you must commit for best results!
Now, I think that’s pretty good value compared to premium at-home sheet masks and treatments. And especially compared to professional facials! But you’ll know if this is something you want to commit to and invest in.
Tripollar Geneo Review Summary
If you’re looking for a pampering weekly treat to perk-up your skin, this is a fine choice. It’s easy, the facial feels good and it boosts your skin’s health. I love it works to keep your cells active and fit, and so prevents sluggish unhealthy cells that don’t age well.
Here’s a summary of my test scores, and pros and cons for the Tripollar Geneo personal oxygenation device, to help you decide:
Ease of use
👍👍👍👍
Compact, cordless, easy 3-minute cleansing massage deep-cleans pores (morning & evening). And the weekly 3-minute oxygen boosting facial is quick & pampering. No routines to remember. Just quick, easy, and pleasant self-care time.
Effort
💧
Low effort, for daily cleansing (love you can use in the shower!) and a quick, refreshing weekly facial. For ongoing, regular use that’s very easy to stick with.
Results
⭐⭐⭐⭐
The daily celanse leaves skin super-clean & soft. The weekly oxygen boost gives noticeably softer, invigorated skin with a healthy glow. Skin perks-up and gets fresher & clearer (reduces blackheads, calms skin) after a few weeks of regular use. Top-choice for a preventative healthy skincare regimen.
Pros
Very easy to use
Pleasant daily cleansing ritual (3 extra minutes in the shower!)
R eviewing home beauty devices is what I do. And I love it. I meticulously record my experience and results to share with you. Changes in my skin are usually gradual over the course of a few months. And they’re often difficult to spot without comparison photos.
So, the idea of a review in reverse is quite interesting. What changes will I see when I stop using a device? Will effects be more noticeable as they fade? How will I feel, and will this change my overall opinion of the device?
I used both the Ziip and Nuface and was curious to see what happens when I stop
Luckily, I’ve been microcurrenting for several months now, so I decided to quit and share with you what happens.
Let’s do this.
A microcurrent addict for 14 months
I used the Nuface Trinity for 9 months
The Nuface Trinity microcurrent is the second home beauty device I’ve trialled. I started in April 2019 and stopped December 2019. I used it religiously for 9 whole months. Phew.
I used the Ziip Nano for 5 more months
I then switched to trial the ZIIP Nano device. I used it as frequently from January 2020 until the start of June 2020. So, that’s another 5 months.
And although I didn’t see everything I hoped for, I loved my results with both devices. For me, there’s no significant difference in results between the two.
What results I got, & didn’t get
Comparison photos after 8 months of Nuface (& CurrentBody Skin red light mask). ZIIP gave me identical healthy skin results.
This is what the Nuface and ZIIP did for my face:
Both gave me incredibly healthy skin. Before microcurrent, I considered that a very vague benefit. That’s because I didn’t realise how much of a difference a healthy complexion makes. It means hydrated, firm, bouncy, and dewy skin. My large pores became tight and my skin was beautifully silky to the touch.
They also clear away surface ‘bits’ and bumps and leave fewer and smaller blackheads. Only hormonal spots appear.
I see fuller cheeks, a natural pout, and a tightened jawline. They lift my small pre-jowls so I don’t notice them anymore.
And there are some temporary effects to de-puff my eyes and soften my under-eye fine lines.
The changes are subtle and easier to see with the help of comparison photos. But I could really feel the difference. This meant a boost to my confidence. My skin was the healthiest it has ever been. I was happy to skip CC cream and foundation most days.
But results vary by person, and you may not get ALL the results you hope for. As I also found.
Microcurrent didn’t tighten my under-chin wobble. Boo.
Microcurrent didn’t tighten my under-chin wobble. I became fixated on this during the first few months because I’d expected a noticeable change. So, I did more frequent sessions in a bid to tighten it up. It didn’t work. But as soon as I accepted this, I could concentrate on what good the microcurrent was doing to my skin.
OK, so if I saw such good results, why was I happy to stop?
Why I was happy to stop microcurrent
Despite my positive results, I was relieved to stop. That’s because both devices eventually felt like a chore.
Both the ZIIP Nano and Nuface Trinity eventually felt like a chore
I find both devices demand commitment and are time-consuming. I did four sessions per week taking 25 to 30 minutes each. I could do shorter sessions, but anything less seemed a waste of the expensive conductivity gels and my time! That’s because I know more is definitely more with microcurrent. I wanted the best possible results so I told myself to knuckle down and do it properly.
And the sessions are rather different for each.
Ziip needs motivation
You must concentrate to keep in sync with your ZIIP routine on the App or by memory
I find the ZIIP requires the most motivation. There are several App routines and you must concentrate to stay in sync because they’re timed.
The Ziip buzzes halfway through a routine so you know to move to the other half of your face. Some routines e.g. the longer Energise, use the same microcurrent throughout, so you can free-form and do your own routine without following the App. But, Ziip says you get your best results if you follow their routines because they help your lymphatic drainage.
Other shorter routines vary the micro/nano current output by facial areas so you really must follow the routine. The App video routines are easy enough to follow, but it’s sometimes easy to get ahead or lag behind and it’s annoyingly repetitive after a while. Or you can do your routines from memory, counting the reps to stay in sync. However, I lose track if I don’t concentrate so I can’t enjoy the routines whilst relaxing or watching TV simultaneously! You may not have this problem, but to me, it eventually felt too repetitive and a chore.
On the other hand, I appreciate you can treat all facial areas, including the eyes and lips, in this one device. You don’t need any additional and expensive attachments as you do with the Nuface Trinity. I also like the several and varied routines because it gives you greater control. You can select a few to fit your available time or pick them to focus on your problem areas. I love the routines focused on eyes, plumping and lips as well as the longer full-face routines. Also, the nourishing Ziip gels stay wet for ages so you can apply them to your entire face at the start and do several routines without them drying out or clumping on your skin.
You can Nuface on auto-pilot
Nuface is an easy auto-pilot device!
The Nuface Trinity feels simpler and easier. You can follow or learn the simple routine from videos on Youtube or in the App. And there are handy diagrams in the user guide too. It’s easy to remember.
The microcurrent output doesn’t change, so you can do your routine in any order. Do the basic short one, the longer advanced one, or your own combination with more reps over trouble spots. Whatever suits you best. The ELE attachment is worth it for lifting and smoothing the eye area too. It’s easy to do in front of the TV and it doesn’t matter if you lose your place. It’s an auto-pilot device.
The downside with the Nuface Trinity is the expensive Nuface gel and creams. They dry out gradually, so you must apply them and work in sections over your neck and face. You’ll use a lot more product and it’s a little more faff than the stay-wet Ziip gels. In my opinion, they don’t feel as nice or as nourishing as the Ziip gels either. Nuface also promotes them rather aggressively, but you can use cheaper alternatives and still get the same results. Learn more about the Nuface gels and substitute gels here.
For my last month of using Nuface Trinity, I combined it with the CurrentBody Skin LED mask. You do red light before microcurrent and oh my! What a power combo! The red light amplifies the effects of the microcurrent and gives a new beautiful glow on top. I love it. I continued with the LED mask during my ZiiP trial too and saw equal results.
But, during my final months, I was simply very bored with the microcurrent monotony. Especially compared to the easy, simple, and hands-free LED mask. I didn’t want to go back to the Trinity either.
Easy, simple, and hands-free (my dog and I much prefer it!)
Also, I was curious to see how my skin would change.
If I stopped, I reasoned I would write this reverse-review article and maybe it would help someone else who’s thinking of ditching their microcurrent routine. So, after a short deliberation with myself, I decided to quit.
That was at the beginning of June 2020. And to start, I did not miss it one bit.
What differences do I see now I’ve stopped?
I kept a diary over the next 4 months to record what happened as the microcurrent effects faded. I kept using the CurrentBody Skin LED mask 2 or 3 times a week.
I kept a diary of changes in my skin
For the first few weeks, there was no change. Then, I felt tiny bumps from a few blocked pores on my chin. My pout softened too. Was my mouth slightly down-turned too? And, oh hello. My small pre-jowls were back again 😞.
However, my skin was still smooth, beautifully hydrated, and looked healthy overall. I felt no more significant changes over the next few weeks until a few non-hormonal spots appeared. One on my left cheek and one on my right jawline. And by the following week (at the 2-month mark), a few more blemishes joined the party. Those under-the-surface bumps were bigger, with blackheads, and small spots around my nose, on my chin, and a few on my hairline too. I’d totally forgotten about these! However, they healed quickly with the help of the LED mask.
Aside from the blemishes and bumps, my skin also felt less hydrated. Therefore, it wasn’t as dewy and smooth. My cheeks felt less full, flat even. Overall, my lower face felt less supple and tight. I noticed my under-chin sag and pre-jowls a lot more now too. And my pout, gone 😭.
I seriously considered picking up the Trinity again. But I didn’t.
And a few weeks after that, my cheeks had less bounce for sure. I also felt less ‘meat’ around my eye sockets and – although my eyebrows weren’t level to start – they now looked more obviously lopsided. And my eyes looked heavier. I began worrying the bumps on my chin and even tried squeezing a few – something I’d not thought about for months.
For the next month, I saw and felt no more change in my skin. So, this was my new normal skin.
Here are my comparison photos from 4 months after I quit microcurrent (but continued with the red light mask):
4 months after I quit microcurrent: still healthy but with less volume, elasticity, hydration,& pout. More pronounced lopsided brow too.Have a closer look…And from this angle I see those pre-jowls again, flatter, less bouncy & supple mouth area, under eyes, & cheeks. Boo.From the side the under-chin sag is, well, saggier, and my jawline/jowls less defined.
Now, you can see the changes are subtle, but they’re noticeable to me. I still think my skin feels and looks good with the continued use of the red light mask. It’s just not as good as when combined with the microcurrent.
So, in summary:
I noticed small changes after a few weeks
They became more obvious after 2 months
It took about 3 months total for the microcurrent effects to completely fade away
The LED red light mask maintains healthy, smooth skin & tight pores, but to a lesser extent than with the microcurrent
I feel the changes more than seeing them
I miss my hydrated, dewy skin from microcurrent
I now get regular bumps & blemishes
There’s noticeably less volume & bounce in my skin,
I miss the tightened lift around my lower face & mouth
And I really want my pout back!
So, what do I think about home microcurrent now?
These little guys do more than I originally thought
I can see my results from microcurrent are more pronounced than I had first thought. I now appreciate the tightening effect, lift and volume, but also the extra hydration and how it clears blemishes, bumps, and blackheads. And keeps them away. But my results are subtle.
Combined with red light, however, results are much more noticeable.
Dynamic duo: Microcurrent & red light
So, it’s not only about collagen and elastin. But all my skin’s health. And this means perky, energetic cells, busy building, repairing and removing harmful cell waste and oxidants. And because these bad things age my skin, home microcurrent helps to help fight them.
However, it’s still rather a lot of effort. But now I know home microcurrent won’t lift my saggy under-chin, I’d simply focus on clear, hydrated, and healthy skin. So, I’d happily spend less time on it. Nuface’s 5-minute basic routine after my red light mask should do the trick.
Once I’m done testing a few other devices, maybe I’ll go back to it.
View Nuface & Ziip deals
When you shop via my links I earn a small commission (your price stays the same). I really appreciate your support 🙏!
BODY5
Use this code at CurrentBody for an extra discount!
The Tria Age-Defying laser is an FDA-cleared fractional non-ablative Diode laser for safe use at home. It zaps tiny columns of your skin causing microscopic injuries (but doesn’t destroy the skin). Your skin cells react by boosting collagen and elastin to repair it. Over the course of 3 months, levels surge and you get a rejuvenating fresh-face make-over. you can learn more about how laser resurfacing & rejuvenation works in detail here.
At home fractional laser for facial rejuvenation
This is an in-depth review from real-life tests, with photos, feedback & loads of helpful information. Dip-in using the links below or read it all. Enjoy!
First impressions
Attractive, clean & clear packaging. The Tria laser looks classy & expensive.Reassuring recommendations from professional dermatologists, don’t you know.Loads more information & user satisfaction scores inside the info flap.
The information sleeve slides off with a bit of wiggling. Beneath is a smooth white and beautiful magenta colour box. Remove the white lid and the lilac device is nestled in a white plastic moulded bed.
Keep the compact box to store the Age Defying Laser in when not doing a treatment cycle.Secure, sturdy & beautiful attention to detail The Tria Age defying laser box contents
What’s in the box?
Age-Defying Laser
Charging stand
Charging cable
User manual
Quick start guide
Before you start
Before you start using the Tria Age Defying Laser you must charge it, read the user manual and do a skin sensitivity test.
The user manual is a quick and easy read with plenty of diagrams. It explains how to operate and charge it, the routine, what to expect, tips for use, how to clean and store it, and a troubleshooting guide.
Read the manual paying close attention to the warnings and safety info.
Pay close attention to the important warnings and precautions. For example, you must not use the laser if you’re pregnant, under 18 years old, have a skin condition, sensitivity to light or take medications making you more sensitive to light, take oral retinoids or steriods, after a recent professional skin peel, laser resurfacing, Botox or fillers, and avoid tattoos and broken skin too.
Two rare but possible skin reactions are wrinkles getting worse or skin getting darker (most common on darker skin tones). If this happens stop using the laser.
Do a sensitivity test on the inside of your arm. Try the 3 different levels. If your skin’s normal after 24 hours do your first session at level 1.
Test how Tria laser feels on the inside of your arm.
Next, let’s learn about the laser’s features and how easy it is to use.
Quality & design
The laser device is small, lightweight and feels quality. The long handle is shaped to fit comfortably in your hand and it’s battery powered so there’s no cord to get in the way. There’s just one button on top to power it on and select your treatment level.
18.5cm tall and weighs 215g.The Tria laser, charging cradle and 145cm mains cable.
Charge the laser in the purple cradle. The charging cable is only 145cm long so you must sit it close to a mains outlet. It’s easily knocked over on the floor so try a shelf or table instead. A full charge takes 2.5 hours. If you use it regularly and charge the battery after each use, this will keep the battery life long.
The blue battery icon flashes to show it’s charging. The battery icon shows red if there’s a fault.
The Tria Age Defying laser is clinically proven safe for use at home and it’s FDA-cleared too.
The blue padlock shows the safety lock is on.
There’s ahandy safety lock to stop curious hands playing with your Tria. Press and hold the power button until the lock icon lights up. To turn the lock off, press and hold the power button until you hear 4 beeps, then release. It unlocks with a happy-sounding series of beeps!
Laser opening, skin sensors inside the opening and small displacement sensors either side.
The laser comes from a small slit about 22 mm high and 2 mm wide. It only starts when skin sensors inside the device (not visible) detect your skin. And two small motion ‘displacement’ sensors either side of the slit check the device is constantly moving to protect your skin.
Cycle through the three treatment levels by pressing the power button. Indicator lights show which level you’re on. Each level lasts for a different duration and has more or less laser power (measured in millijoules (mJ)).
Start on level 1 to get used to the sensation, then move up to level 2 and 3. These levels give the best results.
Low (1 light) lasts for 30 seconds on each zone with 5 mJ power per pulse
Medium (2 lights) lasts for 1 minute on each zone with 10 mJ power per pulse
High (3 lights) lasts for 2.5 minutes per zone with 12 mJ power per pulse
The routine
The routine is very simple and easy to remember. You need a mirror. The laser makes buzzing noises to let you know when to move to the next area. And at the very end it makes a ‘fanfare’ serious of beepy-buzzes. It’s like a little victory call and it makes me smile every time 🎺😁.
Here’s how you use it:
Wash and dry your face
Press the power button to cycle through the 3 levels. Start with low to get used to the sensation
Treat your face in 4 zones. Hold the laser upright and without pressing too hard, swipe your skin horizontally back-and-forth. When it buzzes move to zone 2, then 3 then 4
A green tick shows on top when the session is complete. Pop the laser back in the charging cradle
Apply cooling sprays, gels or your favourite serum and moisturiser
Treat the 4 facial zones in turn avoiding your eye area and lips. Don’t hold the laser in one spot.2 pink lights show you have good skin contact and the laser is working, and you hear a whirring noise.Swipe the laser horizontally, NEVER up/down as above as this can cause scratch like marks on your skin.
p
TIP: Wear a sunscreen (SPF 30+) every day to protect your sensitive skin and prevent future sun skin damage.
The laser is comfortable to hold and move around your face without tiring because it’s lightweight. It’s easy to glide over your skin but take your time on curvy areas to keep good contact so it doesn’t cut out. For the upper-lip it’s easier to rotate the laser 90 degrees and move up and down in very small movements.
As Tria recommends, I treat my face at night so it calms and recovers during sleep. On the highest level I go slower and do multiple passes during each 2.5 minute zone.
It’s easy to slide around your ‘crow’s feet’ eye areaBut the laser is too big to zap the under-eye area. The smaller Nira Skincare laser is better for this.I use both horizontal and vertical motions on my forehead and try to get between my eyebrows too.Although not in the instructions, I zap my nose too. I have a lot of redness where it joins my cheeks.
What does it feel like?
Tria suggest it takes a week or two to progress up the levels to the highest intensity. The sensation varies by person. They say the laser feels like a slight warming or prickling, a bit like sunburn with mild discomfort. They also say your skin may turn pink or red and could swell a bit too. This typically fades in a few minutes or up to an hour. And these reactions reduce after a few weeks of use too.
And that doesn’t sound too bad, right?
What it really feels like
“How bad can it be?” thought I. And feeling confident I started my first session on level 2!
Yikes! It’s surprisingly uncomfortable and I lasted just a few seconds.
Numpty🤦♀️.
Start again. Level 1 feels like tiny pin pricks and lasts just 30 seconds per area. It doesn’t sting and leaves no redness. After two nights of this I felt brave enough to try level 2 again.
And owwie! This thing stings!
Level 2 lasts just 1 minute per zone and feels like tiny hot needles penetrating your skin. Afterwards, my skin burns hot-red with a prickling sensation. It’s uncomfortable but bearable, and fades after around 5 minutes. The next day my skin is tender, pink, dry, and slightly flaky too.
But it all improves over the next week. The stinging fades and my skin is less tender. So, by session 10 I’m ready for level 3 💪.
My skin turns tomato red after 2.5 minutes per zone as you can see on my cheek!
The level 3 sting is no worse but it lasts for 2.5 minutes per zone. And because it zaps for longer it leaves my skin tomato-red with an intense ‘after-burn’ especially around my cheeks, upper lip, and nose. It’s not pleasant and I don’t like it. A spritz of cooling toner followed by serum and moisturizer helps soothe the burn. I have a silk pillow case too and this feels wonderfully cool against my skin. The sensation fades after 10 minutes or so.
Cool, soothe & moisturise afterwards (and apply a sun screen SPF30+ the next day too)
Over the next few sessions, the stinging and after-burn gradually reduces. My skin is still red and dry the next day, but much less tender. So, by the end of week two its totally bearable and requires much less will power and motivation. Each daily 10-minute session is easy to fit in and I zap almost without fail. (Just one or two missed nights due to pub-based antics).
p
TIP: Be gentle when washing, applying make-up and go easy on the exfoliator! If your skin is tender and uncomfortable rest it and simply skip a session.
Schedule, effort & results
The Tria Age Defying Laser is a medium effort device. The UK schedule is daily sessions for 8 weeks, then take a 4-week break. The 4-week break is as important as the first 8 weeks. Your fibroblasts are still producing collagen and elastin then and it’s important to let it all balance out.
The US schedule is 5 sessions per week for 12 weeks. Overall, it’s the same number of sessions. So you can compare to alternative devices, we’ve calculated this effort in the table below. Here’s how it breaks down:
8-week regimen
8-week total effort
10 minutes per session
7 days per week
56 sessions taking
9.5 hours
Although this seems quite a lot of time, I find each 10-minute session is easy to fit in my nightly routine. And because it’s consistent, it quickly becomes habit.
Advertised results
What it fixes: Smooths fine lines & wrinkles, reduces redness & pigmentation, firms & smooths skin, fades scars, creates a radiant & youthful glow.
You may see some quick results after just a couple of weeks. This could be a ‘daily glow’ or perhaps baby smooth skin. But expect your best results during the rest period between weeks 9 to 12 when your collagen and elastin is in overdrive. This is when dark spots and redness fade, fine lines and wrinkles smooth, skin feels firmer and ‘meatier’ with an even and radiant tone. Additional results from the user reviews are faded acne scars and smaller pores too.
You may see all or just some of these results, some subtle and some more obvious. The Tria clinical study shows after 1 cycle not everyone gets noticeable results for every sign of aging. Therefore, results vary by individual. And there’s no maintenance schedule with the Tria laser. Simply do another 8-week on and 4-week off cycle for further results.
Next, my 3-month user trial results with before and after photos.
My before and after results
First, here’s a bit about my skin concerns and goals.
“I don’t have any major hang ups or look older than my 41 years. But a few tell-tale signs do betray my age and I think the Tria can help. Here are my before photos:
Before starting the 8-week Tria Age Defying Laser treatment regimen. (Rocking the fluffy hair).
First, I have fine lines around my eyes. The outer ‘crow’s feet’ lines don’t bother me. But the crêpey skin below my eyes does. Combined with slightly darker bluish-purple shadows there, I can look over-tired, or just plain ill. I’d like to improve that.
Second, I’m fair-skinned with a very uneven skin tone.It’s a mix of translucent, rosy and yellowy-golden patches. And it changes from day to day. I also have small, red broken veins and larger diffuse red patches. I’d love to fix this so I can skip the daily application of foundation.
I have large pores tooaround my nose, patches on cheeks and between my eyebrows. And because my skin is oily, they really stand out.My skin doesn’t look smooth or particularly healthy.
I also like that the Tria Laser comes with a money back guarantee. And it’s based on proven professional laser rejuvenating treatments. But a waaaaay less powerful home version. Therefore, much like home laser hair removal, I know it takes time to see results. But I’m convinced it’s the bees-knees. And I want me some. Fingers-crossed 🤞
I bought the Tria Age Defying laser from Tria Beauty UK.
The first 2 weeks
During the first 2 weeks my skin is mostly red, dry and a bit flaky. It’s also tender after my first level 2 session, then feels much smoother, especially on my cheeks. It’s tender again after level 3. But this tenderness lasts only a day.
Tria say some people see results after just 2 weeks. Not so much for me. My skin is very soft and smooth, red and pink, and sometimes dry. I hope to see more change soon, especially now I’m on level 3.
Photo comparison just 2 weeks into the 8-week regimen. I is PINK with a weird glow.
After 4 weeks
Week 3 brings nothing new. Some days my skin feels very dry, other days not so much.
Then after session 30 (half way there!) my skin suddenly feels much better. It’s still soft, occasionally dry, and now not so much red as rosy. After moisturising, it’s super-smooth, soft and bouncy! It looks a bit glowy too, although it’s hard to tell through the rosy sheen.
It’s really encouraging and I can’t wait to get all 60 days done.
Photo comparison after 4 weeks into the 8 week regimen. Smooth but rosy.
Weeks 5 to 8
Over the next few weeks my skin is super-smooth and supple, not dry at all. It glows too although it’s still rosy-in colour. I still have diffuse red and yellowy-gold patches under the skin. But the colour is evening out slowly and subtly. And possibly my pores also look a bit smaller.
I’m also sporting a few spots in places they haven’t appeared for years! But they dry-out and heal super-quick. I also think the pigment bleed from my lips is clearing so there’s a crisper, cleaner line to them. I like this. A pink cold sore scar on the left of my lower lip seems to be fading too.
Then week 8. Woah!
My skin turned a weird orangey-pink colour for a few days! Very Oompa Loompa. I remained calm and stopped using the laser. It disappeared after two rest days and some gentle exfoliation. Then, I resumed to complete my final session with no other dramas!
At this point I still have a few blemishes on my chin and forehead. My skin is super-smooth, redness is fading and I have a clearer, unified tone with a subtle glow. The fine lines and wrinkles around my eyes are softer but my under eye crêpiness and forehead lines are still there.
Here’s a comparison photo taken the day after the final session.
Photo comparison after finishing the 8-week regimen. Smooth, clarified skin.
Now for the 4-week rest period. It’s during this time Tria say you should see your best results.
Bring it on!
Rest weeks 9 to 12
Now I no longer use the laser daily the rosy-pinkness has faded. My skin is still exceptionally smooth and soft to touch, and feels gradually firmer. I can’t help but touch it a lot!
But it’s at week 11 that I see the biggest change in my skin.
Firm, bright, luminous and more unified skin tone after finishing the regimen and waiting a few more weeks. Total: 11 weeks after start.A faded cold sore scar under my lower left lip after 11 weeksA clear & crisp lip line after 11 weeks
So, here’s the results I see and feel compared to my hopes for the Age Defying Laser:
My hopes
My results
Soften fine lines around & under my eyes
Yes. No visible fine lines around eye corners down to top of cheekbones
Reduce crêpey under-eye bags
eye bags reduced a teeny bit but still visible. The laser can't adequately cover this under-eye area
Even-out my complexion, unify the rosy & yellowy-golden patches
Love! Under-the-surface redness around my nose & cheeks is gone!
The random yellowy-gold patches are gone
Shrink large pores around my nose, patches on cheeks & between my eyebrows
Smaller pores on my forehead
No real change around my nose & cheeks
Soften horizontal forehead lines
No noticeable change in my forehead expression wrinkles. My eyebrows win again!
Super-smooth, soft & bouncy skin. Tiny bumps & imperfections on my chin, cheeks & forehead have gone
Plump & brighten my skin for a healthier look
It's brought out blemishes to clarify my skin & it heals lightening-fast.
Skin tone is clearer, more unified with an obvious glow
Fewer spots or blemishes overall
My cheeks & lips feel fuller
My skin feels better hydrated
BONUS!
My lip line is clearer & sharp
My red cold sore scar is faded
I’m very happy with my results! But there are some negatives I must share. Onto these next…
Negatives
There are a few negatives to consider with the Tria Age Defying Laser.
The higher intensities sting and give red & tender skin. Plus it cuts out on the forehead.
First, as mentioned earlier in the review, the laser can sting more than a bit. And it can leave you with red, dry, flaking and tender skin. This fades after a few weeks, but it’s not pleasant.
p
Painless alternatives…
If ‘the sting’ and skin reactions turns you off of the Tria Age Defying Laser and you want something quick and pampering, try the Mira-skin system or CurrentBody Skin red light mask. They’re aren’t lasers but they work really well.
Night-time sessions are also wise because it takes a while for your skin to calm. So, if you’re after a morning routine, it’s probably not the best choice. I find it easy and quick as part of my evening routine, but consider if you can make this daily commitment.
The device is also tricky to zap on the forehead where skin is thinner. The laser can cut-out so it takes a few passes and some patience to cover the zone completely. Also, the shape of the device head means it can’t zap all the skin under the eyes. But it covers crow’s feet very well. Try the small Nira Skincare laser for crow’s feet and under eye bags and lines.
And finally, an important note based on the user feedback. Reviews from 2015/16 mention several charging faults with the laser. However, this issue now seems fixed. Which is good because Tria Beauty UK offer only a miserly 1-year warranty. Boo.
Tria Age Defying Laser Review Summary
This is the least pleasant at-home device I’ve tested 🤣. It stings and leaves your skin pink, dry and flaky. So, it’s sometimes tempting to skip a day. But stick at it because it’s worth it for the full rejuvenating results. I love my radiant, firm, bouncy skin, defined lip line and faded scar. And you can repeat the regime for better results (if you can psyche yourself for ‘the sting’!
Here’s a summary of my test scores, and pros and cons for the Tria Age Defying Laser, to help you decide:
Ease of use
👍👍👍
Very easy to use, no faffy gels. Stings at first but this fades. Skin redness & tenderness after treatments.
Effort
💧💧💧
It’s a medium-effort schedule. 10 mins daily for 8-weeks, then an important 4-weeks rest. Repeat the cycle as you like.
Results
⭐⭐⭐⭐
Boosts skin healing, gradually fades redness, scars & discolouration, firms, smooths skin & wrinkles over the course. Best radiant, results between 9 to 12 weeks. Some dry & flaking skin possible.
Pros
Quick sessions: 10 minutes max
Easy, consistent evening routine
No expensive, messy gels!
Clinically proven & FDA cleared
60-day money back guarantee from Tria Beauty
Cons
Not pleasant or pampering as other rivals
Stings on the high levels
Red, dry & flaky skin reactions. Fades with use.
Not suited to morning sessions because of the skin reactions
Requires daily commitment
Takes months to see results
Expensive at full RRP
Only 1-year warranty from Tria Beauty
Tria Age Defying Laser deals
I hope you found this Tria age Defying Laser review helpful. When you shop via my links I earn a small commission (but your price stays the same). And I really appreciate your support 🙏!
The NIRA Precision rejuvenation laser is a non-ablative non-fractional laser that’s FDA-cleared safe and effective for use at home. It works best on small facial areas, and especially well on crow’s feet and under eye wrinkles and bags. NIRA also offer an optional hydrating serum, but the laser needs no gels or other consumables to work.
Water in your dermis absorbs the infrared laser beams and creates heat. The laser precisely controls the heat so it won’t damage your skin or cause pain. But it’s hot enough to trigger your skin’s healing response. This means your fibroblasts build stronger collagen and elastin, which supports and regenerates your skin so it gradually perks up. The result is firmer, supple skin, and smoothed-away fine lines and wrinkles. Learn more about how laser rejuvenation works
Low-effort device for a smooth, firm & supple eye area & upper lip lines
First impressions
The NIRA Precision laser isn’t fancy like other rival brands. But that’s not a bad thing. It is a laser after all, and lasers aren’t sexy. They mean business. So, the packaging is clean, simple, straightforward and professional. Quite.
A small, neat box with a green & white slide-off info sleeveImportant details on the back for your reading pleasureSmall, sturdy white box under the sleeve with NIRA logosThe laser and charging cable sit securely on a white plastic bed.The contents of the NIRA Precision laser box
What’s in the box?
NIRA laser
USB charging cable
User manual with quick start guide
The laser itself is small and lightweight, and not scary looking at all. In fact, he’s kinda cute! Keep the box to protect and store him in. It easily fits in a drawer or sits on a shelf.
Before you start
Your laser may arrive fully charged but check before your start. If not, plug it in and charge it (it connects to any USB plug, socket or laptop USB port). Then read the user manual.
It’s a quick and easy read to learn how to use it safely, when to use it and what to expect, charging instructions, connecting to the App, troubleshooting, maintenance, precautions, safety and warnings, and a bunch of technical information. Check the safety warnings closely for reasons you can’t use the laser. These include if you’re pregnant or breastfeeding, have a history of skin cancer, and you mustn’t use it on tanned skin.
Strange fact: you must be 12 or over to use the NIRA laser. That’s right 12. I know kids look older these days, but what the…?
There’s no direction for a skin test. Simply try it out starting on the lowest level and check how it feels. Then treat on the highest level which feels warm but that doesn’t sting or hurt.
Quickie routine
The NIRA laser is the ‘quickie’ of anti-ageing devices. It’s straight in with some hot pulses, covers the essentials and then back in your draws before you can say Neocollagenisis. And it’s so simple a 12-year-old could use it, apparently. You’ll need to be close enough to a mirror that you can lick it.
Wash & dry your face
Turn on the laser & select your intensity
Position & zap! It goes “Bu-beep” then move to the next spot with a little overlap
Continue until you’ve zapped all your undereye and crow’s feet areas
Repeat on the other side
To keep your eyes safe, the laser aperture must be flush against your skin to pulse. If not, it makes a ‘duh!’ noise. It also makes this noise if you move it before the ‘bu-beep!’ finishes. This means it started the pulse but couldn’t finish it (I find it a bit too hot and owie to repeat the fudged pulse).
You need an up-close mirror for precise zappage under your eye.
Next, let’s look at what it’s like to use and how it feels.
Design & quality
The laser is small and lightweight and made of smooth white plastic. The materials and build are decent – it’s not flimsy – but it’s not as robust or as fancy as say the Tria laser or Mira-skin ultrasound. NIRA explain it’s what’s inside that counts so they use a solid-state diode laser. Besides sounding fancy, this means there are no moving parts, so there’s less that can fail or break making it more reliable.
The laser is balanced so it stands on the base. This is also a grippy silicone material to ensure it doesn’t topple, however, keep it protected in the box when not in use.
17cm tall, 4cm wide and 3.5 cm deep weighing just 144g.
It has a long triangular-shaped handle and elongated nose which tapers to the 6mm round laser aperture. The handle fits comfortably and securely in your palm and fingers, and it’s easy and precise to see where you’re zapping.
It’s straightforward to operate too. Long-press the power button to turn it on, then press again to cycle through the five intensity levels. The pulse button, on the thinner part of the neck, is easy to reach with your thumb or forefinger.
Your chosen intensity level is shown by five green indicator lightsEasy-press laser pulse button
The laser charges via a small, robust USB cable. The laser charges on worldwide voltage and there is no mains plug provided. To charge it, simply connect it to any USB socket, mains plug or even your laptop. I like there’s no bulky charging cradle to carry around, or unnecessary plastic plugs to add to ‘that’ draw we all have but rarely open.
Good quality USB charging cable in the charging portTwo orange bars mean I’m fully charged!
It shows orange bars as it charges and takes up to 3 hours for a full charge. This gives 4 hours of power which is very good, lasting around 4 weeks of daily use. Although this will reduce as it ages, the battery has no charging cycle limits or a finite number of pulses. It’ll last a long time with periodic charging.
What does it feel like?
It’s true as NIRA claims. There’s no pain with the laser.
Our tester started on level four and after just a few sessions, tried the highest level five without any discomfort. Each pulse feels like a quick, hot sensation between the ‘bu-beeps’.
Careful concentration and precision around your eye!
However, if you accidentally go over the same spot it does sting. So, concentrate to get just the right amount of overlap. For this, you’ll need to be up close to a mirror. NIRA suggest you need 40 pulses to cover one eye area. Therefore, once you’ve done 40 the device sounds an ascending ‘doodely-doodely!”. This is helpful; however, our tester uses more pulses to cover all the eye bag area onto her cheeks. She’s very thorough.
You can also use the laser on other small wrinkled areas or areas of pigmentation and rough texture. Our tester also zaps a few bumpy areas on her forehead and an old scar which suffers from large pores.
She also says her skin is slightly pink after use. But this fade within a few minutes of use. And aside from this, there are no other skin reactions or irritation.
Ever-so-slightly pink skin (under my eye on the right) after use. Fades within a few minutes.
It’s easy and quick to get the hang of. Just take care to keep the laser flush against your skin and take your time. Try not to move it before the ‘bu-beep’ is done or else it doesn’t finish the pulse. Our tester does it in both her morning routine and evening routines and it quickly becomes a habit if you keep it where you get ready.
Schedule, effort & results
This little laser is easy to commit to. It has the quickest sessions so, despite needing daily use, it’s one of the lowest-effort devices overall. Plus, the ongoing routine doesn’t change so it quickly becomes a habit too.
Use it once a day, morning or night. NIRA suggest it takes about 2 minutes for both eyes (that’s 40 pulses per eye). That’s about right, although it sometimes takes a little longer depending on how thorough you are. So, you’ll likely spend between 2 and 4 minutes every day zapping.
p
TIP: NIRA also say you can use the laser twice a day for faster results. However, if you have thin and crêpey skin under your eyes this could be too much and actually dry out your skin. So, stick with just once a day to be safe.
What it fixes: Firms & smooths away wrinkles and fine lines, increases elasticity for a supple under-eye area, tightens crêpey skin and fades eye bags for brighter and younger-looking eyes and complexion.
Over the first 60 days, your collagen and elastin slowly build, so it takes this long to see noticeable results. Take photos to compare your progress so you can see the changes. It’s after 3 months you’ll see your best results with smoothed eye bags and faded wrinkles, and firmer and brighter skin. Keep going with the daily sessions to maintain these results.
NIRA also have a Hyaluronic Serum because it’s very important to hydrate the skin you zap after your sessions. You can try the NIRA serum or an alternative moisturising serum with Hyaluronic Acid.
Your age, lifestyle and overall skin condition affect your results. So, as with all home beauty devices, you may see significant changes or they could be subtle. Results vary by individual.
Negatives
Thankfully, the NIRA laser doesn’t sting or cause burning red skin. So, you don’t need a will of steel to keep going (ahem, Tria). But don’t expect to use it for your entire face and neck rejuvenation. The laser aperture is teeny and takes too long and oodles of concentration to cover such large areas. Instead, try a home Radio Frequency device which also creates dermal heat, for similar collagen-building, and skin smoothing and firming effects.
Tiny things come in expensive packages (so it seems).
The main negative withthe NIRA laser is it’s expensive at RRP £299/$399. And this does seem a little steep. Especially compared to rival devices using alternative technology which quickly treat your full face and neck. However, most of these can’t rival the NIRA laser as an effective, specialist tool for eye wrinkles. That’s because it zaps right up to the lower lid so no wrinkles escape. And it gives longer-lasting results than other popular home technologies such as microcurrent. But if you’re still unsure, you can test it to see if it’s worth it with a reassuring 60-day money-back guarantee.
NIRA Skincare Laser Summary
If you want a smoother and firmer, younger looking eye area this is a top choice. I love the quick and painless sessions. And the ongoing daily use is easy to fit in, so it quickly becomes a habit. Use it on other smaller wrinkled areas, pigmentation or texture issues. However, there are much better choices for full face and neck rejuvenation. But for your peepers, this small and precise laser safely fits the areas other devices can’t reach.
Here’s a summary of my test scores, and pros and cons for the NIRA Skincare Laser, to help you decide:
Ease of use
👍👍👍👍
Very easy to use little cordless device with excellent battery life. No gels needed. Super-simple routine over crow’s feet and under eye area, or other small wrinkled surfaces. Quick, hot sensation that’s totally bearable with no skin reactions or irritation.
Effort
💧
Low effort routine for ongoing daily use. Takes just a few minutes both morning and night. Quickly becomes a habit that’s easy to remember and fit in.
Results
⭐⭐⭐⭐
Smooths and firms gradually so you see wrinkles and lines fading around 60 days in, and best results after 90 days. Tightens and refreshes for healthy, supple skin.
Pros
You can get right-up close to the lower eyelid to zap every single wrinkle
No faffy gels or other expensive consumables
Lightweight & compact so good if you travel
Conventient USB charger
Test it out with a 60-day money back guarantee
Clinically proven, CE certified & FDA-cleared
Cons
Teeny, precise pulses are too time-consuming for full face and neck treatment
It’s expensive at full RRP, but offers are common
NIRA Precision Laser deals
I hope you’ve found this NIRA Precision Laser review helpful. It’s rather good for shaving a few years off. If you decide it’s for you, please shop via my links when you’re ready. I earn a small commission, but your price stays the same. And I really appreciate your support 🙏!
25% off code: BFCM
👉 BLACK FRIDAY DEAL 25% off at Niraskin.com with code BFCM (🇺🇸 US only. Until 27 Nov)
Laser resurfacing is a very popular professional cosmetic procedure for face, neck, hands, and chest. It encourages fresh, new, supple skin to grow. The laser beams selectively target then heat, or sometimes destroy, parts of your skin. This kick-starts collagen synthesis to repair these injuries. Fresh new collagen rejuvenates your skin, smoothing out lines and wrinkles, fading wrinkles and areas of discolouration, and tightening your skin for a younger appearance.
Although not as drastic as cosmetic surgeries, you’ll still need a few weeks to heal with some types of professional laser resurfacing . Smaller home lasers have no down-time but demand many more sessions than professional treatments for noticeable results.
This article explains everything you need to know about professional laser resurfacing treatments, how home versions measure up and where you can get one.
How do cosmetic lasers work?
First, let’s understand what a laser is and then what they do in our skin.
A laser generates a narrow beam of very intense light. Laser beams are monochromatic which means they’re of all one wavelength. The waves are also in the same phase (coherent) and are parallel to each other (collimated), don’t you know 🤓.
A frikkin laser beam has waves of the same wavelengths and they’re in phase SourceTypes of lasers and the different wavelengths
A laser beam is either a continuous or pulsed source of photons. Photons are the smallest measurements of electromagnetic radiation and the basic energy units of all light.7
Roger that. So, what do they do?
They zap specific substances in our skin causing controlled damage with heat.
The substances are called chromophores. These are parts of molecule responsible for its colour. That’s because, chromophores absorb photons from light of various wavelengths, and the colour our eyes see is the colour/wavelength NOT absorbed by the chromophore. Chromophores occur naturally in our tissues (or endogenously). Examples are melanin, haemoglobin in blood, protein, nucleic acid, and water. Or they can be from an external source (or exogenous) like tattoo ink.8
As mentioned, target chromophores absorb light photons from the laser beams. And because the energy’s intense it converts to heat. If no chromophore is present, the laser beam passes straight without causing any heat or damage. It’s only when the chromophore absorbs photons that the laser causes damage and an injury.10
Tattoo ink absorbs laser photons and vaporizes, leaving surrounding normal skin untouched source
So, surrounding skin tissues without that chromophore remain unchanged. This principle is called selective photothermolysis. Therefore, when we know which wavelengths chromophores absorb, we can use intense light and lasers for various controlled effects on our skin. Effects such as laser hair removal, tattoo removal, and laser resurfacing.
Cosmetic lasers use the scientific principle of selective photothermolysis
Controlled damage
Laser operatives must configure the laser beams to control the heat and damage to the surrounding skin structures.
To do this, the pulse width of the laser must be shorter than the Thermal Relaxation Time (TRT) of the target. TRT is the amount of time needed for an object to cool down to 50% of the initial temperature. It depends on the size of the target chromophore. Larger objects have a longer TRT. For example, in tattoo removal, tattoo particles need a few nanoseconds, whereas varicose leg veins require a hundred milliseconds.
Some experts now believe that the TRT is an outdated concept, because it concerns cooling time, not heating time. They think the unique properties of the skin and how well it absorbs heat should dictate the laser pulse, not how quickly it cools. However, operatives still widely use TRT to calculate laser pulse duration.
So, what effect do lasers have on our skin?
What lasers do to your skin
The skin damage caused by lasers starts a natural healing response called neocollagenesis. This kickstarts your cells into building more collagen and elastin to repair the damage.
Collagen and elastin are the mesh of fibres that support your skin. They’re the main proteins of the extracellular matrix (ECM).
✔️ Collagen makes your skin strong and firm
✔️ Elastin keeps your skin tight and supple
Fibroblast cells found in the dermis layer of your skin, produce both collagen and elastin..
You’ve plenty when you’re young. But from around 30 you produce less and less each year. The result is fine lines, wrinkles, sagging, loss of tone, dull skin, rosy-redness and darker spots. Collagen creams can’t help because the collagen molecules are too big to sink into your skin.
Comparison of younger and aging skin. The dermis ECM deteriorates in aging skin.
So, neocollagenesis with laser rejuvenation is awesome for aging skin. Here’s what happens.
👉 When the laser destroys or heats the skin cells, they release inflammatory mediators, such as histamine and prostaglandins. These chemical messengers trigger cell growth and collagen remodelling. Your fibroblasts become more active and boost their production of collagen which spreads throughout your dermis. The collagen and elastin fibres then tighten and rearrange in the connective tissues. These cellular-level effects lead to a reduction in wrinkles and sagging 11 and repairs and revitalises your skin. This gives you fresher, smoother and supple, younger-looking skin!
Lasers also treat acne scarring and inflammation, and the visible blood vessels you experience with rosacea. Professionals use Pulse Dye lasers (PDL) to destroy the vascular components (blood vessels) of the dermis, which then regrows without scars and redness.12
But not all laser treatments are the same. That’s because there are different types of laser.
Different types of laser
There are various types of cosmetic lasers for facial rejuvenation. The wavelength and how they deliver the laser beams determine their classification.
First, we’ll look at ablative vs non-ablative laser, then fractional vs non-fractional.
Ablative vs non-ablative and Fractional vs non-fractional lasers
Ablative lasers
Ablative lasers generate temperatures over 100 °C to vapourize the outer skin layer (epidermis).
They’re the most aggressive and produce the most dramatic results. They create a carefully controlled pattern of skin micro-wounds in the skin surface. They do this by superheating the intracellular water in the skin’s outer layer (epidermis), which then vapourizes the skin cells. This also heats the underlying dermis. The effect extends around 1.5 mm deep into the skin.
And they leave your skin red-raw. Ouchy.
Before & after with a CO2 ablative laser. Extensive skin healing needed Source
Your skin reacts by producing loads of collagen and elastin to build a fresh new epidermal layer. This ‘resurfacing’ has a dramatic effect on ageing skin by continuously producing buckets of collagen. However, it takes weeks to heal and there’s also a risk of infection.
And dramatic results from CO2 ablative laser resurfacing Source
Types of ablative laser include the carbon dioxide (CO2) laser which emits light at a 10,600 nm wavelength, the erbium laser emitting infrared light at 2940 nm wavelength, and systems that combine these.1 These combined systems have fewer side-effects, and some studies find they’re equally as effective for facial rejuvenation and wrinkle reduction.2
Non-ablative lasers
Non-ablative lasers are gentler on the skin than ablative.
The laser beam heats up and damages the outer (epidermis) and lower (dermis) layers of skin, but it doesn’t destroy them. The epidermis remains in-tact, which means there’s no skin peeling. But also that results are more subtle and gradual.4
Non-ablative lasers generate temperatures of around 65°C which makes the dermal collagen shrink and uncoil, leading to thermal remodelling of the dermis.9 Your body produces a surge of collagen and elastin to repair and renew the damaged cells, which then gradually freshens up the rest of your skin too.
Non-ablative laser rejuvenation with Fraxel re:store
Non-ablative lasers emit light at wavelengths between 1320nm and 1927nm.3 There are two types of non-ablative lasers. Pulsed dye lasers (PDL) and intense pulsed light (IPL, which uses intense light energy but isn’t a laser). These devices create controlled wounds in the dermal micro-vasculature. Mid-infrared lasers target water in the dermis to create heat.
Both ablative and non-ablative lasers can be non-fractional or fractional.
Non-fractional lasers
Non-fractional lasers have a wide area of effect. A single, larger beam of energy zaps the entire surface of the treatment zone. This leads to more side effects and an extended recovery period.
Fractional lasers
Close-up pattern of fractional laser zaps on the skin
Fractional lasers are like a pixelated beam. The laser beam breaks into thousands of tiny evenly spaced beams that create columns of thermal injury in the skin, called microthermal zones (MTZs). MTZs range in size from 100 to 400 microns (μm) in width and around 300 to 700 μm in depth.5
p
TIP: A micron, also known as a micrometre, is a millionth of a metre. Therefore, 300 to 700 μm depth is 0.3 to 0.7 millimetres. Teeny. The symbol for microns is μm.
Because the laser only treats a fraction of the skin, there is less downtime and fewer side-effects.6
Lasers for darker skin tones
There is a common misconception that laser treatments do not suit darker skin tones. The old theory was that as lasers target chromophores, which include melanin, they could burn and scar darker skin.
Before & after non-ablative fractional laser rejuvenation on dark skin source
However, melanin doesn’t absorb non-ablative wavelengths. So, you can use it to reduce acne scarring and for facial rejuvenation on darker skin tones. Fractional lasers are a better choice for darker skin tones too as they affect a smaller area, minimising potential issues.13 Avoid ablative lasers on darker skin tones because they can result in permanent hyperpigmentation.
A 2013 research review found that longer wavelength lasers are safe for ethnic skin.14
What clinical evidence is there?
Whilst a few independent clinical studies do exist, overall, there’s a lack of clinical evidence confirming the effectiveness of laser resurfacing and rejuvenation.
👉 Here’s a summary of the existing studies.
A 2017 study published in the Journal of Clinical and Aesthetic Dermatology reviewed 48 research studies on fractional, non-ablative, skin resurfacing methods. The researchers specifically looked at darker skin types. They conclude that fractional resurfacing is safe and effective for treating acne, surgical, and traumatic scars, melasma, and skin rejuvenation.15
A 55-person trial compared the effects of ablative and non-ablative fractional laser treatments on thyroidectomy scars. Researchers found that both types of lasers significantly reduced the scars’ colour, contour, and skin distortion.16
In another study, researchers combined fractional ablative and non-ablative laser resurfacing treatments on one half of the face and purely ablative on the other. Using just eight subjects, they found there were improvements in wrinkles and pigment in both groups, and results were equivalent. However, in the combination areas, there were fewer immediate side effects.17
Is laser resurfacing FDA approved?
Despite this sparse clinical evidence, several laser resurfacing manufacturers have gained FDA 501K clearance for their professional machines. So, this is some good reassurance that approved machinery is safe and effective.
The job of protecting US citizens’ health lies with the US Food and Drug Administration (FDA). All manufacturers of laser resurfacing facial devices must have FDA clearance before they can sell or market the device in the US.
Many professional and at-home machinery manufacturers have FDA-clearance
To apply for clearance, the manufacturer must submit evidence showing the device is substantially similar to another cleared or approved machine (called a ‘predicate’ device). This ‘substantial equivalence’ then implies the device is at least as effective and safe as the predicate device.
And there are many professional grade laser machines cleared by the FDA from brands such as Lumenis, Sciton, Candela, Cynosure, Fraxel, and Syneron. You can search the 501K database here.
Several home-use laser resurfacing devices, including the NIRA and Tria skin care lasers, are also FDA cleared as over the counter class II medical devices. This means they have a moderate risk associated with their use.18,19
At home laser devices
Compared to a doctor’s clinic, at-home lasers are considerably smaller and use much less power.
These home lasers can reach a depth of around 500 μm (remember, a micron is a millionth of a metre, so it’s 0.5 millimetres). By comparison, an example professional grade laser goes 500 to 1400 μm deep.
This means with professional treatments you need many fewer sessions to see results. Most doctors recommend 3 to 5 for non-ablative lasers. And there’s a few days recovery before your skin heals and is back to normal. With home lasers you need many more treatments, but your skin heals quickly within 24 hours.
Professional grade lasers have professional operators too. They’re medically trained specialists who configure the laser specifically to suit the patient. At home it’s just you, so it must be easy, safe and simple.
So, this is all good stuff. Home devices are designed to:
✔️ keep us safe, ✔️ work with minimal discomfort, ✔️ repair fast, and ✔️ still give visible results overtime ✔️ with clinical evidence proving safety and effect
The best at-home laser rejuvenation round-up
Learn all the pros & cons of the best at-home laser resurfacing & rejuvenation devices to give you firm, smooth, supple & radiant skin, with softened wrinkles, redness & scars.
TIP: Another laser is the LYMA rejuvenation laser. However, this works in a different more gentle way to energise and not damage your skin cells, using Near infrared (NIR) light.
T here’s some seriously sci-fi sounding home anti-aging technology available today. You can use oxygen or light of different colours and teeny electrical currents to stimulate your skin cells. Or there’s ultrasound to get more product deeper into your skin. But the most intriguing? It’s surely radio frequency.
But how the schnauzer can radio make you look younger?
It’s not as crazy as it sounds. A Radio Frequency device sends an electrical current into your skin. This heats your tissues causing an immediate tightening effect. It also kick-starts protein production. So, over time, you build fresh collagen and elastin fibres to support your face. The result is firmer, tighter, more radiant skin. Various home-use versions are available promising similar results.
An in-clinic RF skin tightening facial treatment.
Now, you probably have many questions. I did too. So, off I set to learn all about Radio Frequency skin tightening and then share it with you.
What is Radio Frequency?
Radio Frequency (RF) is two things. First, it’s a type of electromagnetic radiation at a specific frequency range, also known as radio waves. And second, Radio Frequency also describes the oscillating electrical currents used to generate radio waves. Let’s look at each in turn.
#1 Radio Frequency is a type of electromagnetic radiation at a specific frequency range, also known as radio waves.
Radio is a type of electromagnetic radiation we use for communications.
We’re surrounded by
electromagnetic radiation. It comes from many sources including the sun, stars,
lightning and our bodies. Gamma rays, X-rays, microwaves, lasers and light are
other types. They span an enormous range of wavelengths and frequencies.
A wavelength is the distance between two
peaks of the wave.
The frequency is how many cycles form in one
second, and it’s measured in Hertz (Hz).
We categorise these different frequencies and wavelengths in the electromagnetic spectrum.
The Electromagnetic spectrum: Each type comes from a different source & has different effects on matter
Radio Frequencies are the lowest energy electromagnetic radiation. They have a longer wavelength and therefore a lower frequency because each wave cycle takes longer to complete. The range of RF is around 20 kilohertz/kHz to around 300 gigahertz/GHz (30 billion hertz)2. But this isn’t exactly what we use in RF anti-aging skin tightening treatments.
#2 Radio Frequency also describes the oscillating electrical currents used to generate radio waves.
It works like this. Alternating currents of specific voltage sent through a conducting antenna vibrates electrons, generating radio waves. This is the transmitter. The radio waves travel at the speed of light from the transmitter to a receiver. Electrons in the receiver then vibrate, recreating the original signal. Learn more here.
RF also describes alternating electrical currents sent through a transmitter. This creates electromagnetic radiation at Radio Frequencies.
We divide radio frequency into bands, from very low to very high. Very low frequencies transmit longer distances, between 10-33km. So, we use these radio waves mainly for communicating voice, data and entertainment media. High frequency transmits just a little distance. And so it’s this RF generating electrical current we use to help the human body in medicine and aesthetics.
Radio Frequency current & the body
Our nerves don’t register RF currents because they move too fast.
Unlike other forms of electrical current, RF currents flow through our tissues without shocking us. Here’s why.
Our nerve membranes have an electrical charge of their own. Any outside source of electricity affects them. An electric shock causes a sensation of pain and makes our muscles twitch. But an RF current is too rapid to do this. It travels at the speed of light, so our nerves and muscles don’t register it.
So then, what effect does RF current have?
How Radio Frequency current affects our tissues
Our cells conduct RF current in the range 0.3– 10 Megahertz (MHz) using it as part of their own electrical circuit. It flows freely through the tissues. But where there’s any resistance, it generates heat. And the heat produced depends on the electrical properties of the specific tissue.
Radio Frequency ablation performed on varicose veins.
This means we’ve found several uses for it. For example, doctors direct RF current using the heat to destroy small tumours, varicose veins and even correct heart murmurs. Clinical studies confirm this technology is safe and effective.
It’s this same idea of heating tissue we use in anti-aging RF facials and body contouring.
How RF skin tightening works
To understand more we’ll first look at what happens in aging skin, and then how RF facials and body contouring help.
How skin ages
Below your skin’s surface, there’s a collagen and elastin scaffolding holding together the dermis and epidermis. This keeps your skin firm and bouncy. From age 30 onwards, we lose around 1 to 2% of our collagen every year. So, gradually this scaffolding becomes weaker and breaks down. Yikes. Also, the amount of collagen and elastin our fibroblasts produce decreases dramatically. And to top it off, the cells in our epidermis (skin surface) don’t renew as quickly either.
The result is sagging, textural issues, dullness and wrinkles. Oh, crapsticks.
Younger skin on the left, aging skin on the right.
Now, there are different flavours of RF treatment to help combat these signs of aging.
Fractional RF is like a fractional non-ablative laser which heats tiny segments of the skin surface and dermis causing micro-injuries. Your skin’s healing response kicks in, rebuilding the damaged tissue. This resurfacing helps with fine lines, wrinkles, and improves texture and colour.
But there’s a deeper type of RF treatment, which we’re interested in. It concentrates on the lower skin layers. Along with microcurrent facials, this type of technology can lift, tighten and define facial contours.
There are three important effects of RF treatments;
skin tightening,
dermal remodelling,
and increased cell metabolism.
The RF heats and stimulates the underlying structures of the skin down to the dermis, causing controlled damage. Heating deeper skin tissues to 67°C gives the best results.
The heat denatures the collagen and elastin proteins. Denaturing means they unravel. Now, whilst this sounds bad, the immediate effect is the collagen matrix contracts and shrinks, creating a lifting effect of the face and tightening lax skin on the body. And this skin tightening is good because it gives a more youthful appearance.
RF treatment gives an immediate, short-term tightening effect as the collagen structures shrink
Your body then goes into healing mode, just as it does after a cut or injury. It triggers your fibroblast cells in the deeper skin layers to produce shiny new collagen and elastin. Over time, they create much more of these proteins than were there before. This tightening and increase in these fresh, supple skin-supporting proteins is dermal remodelling. It increases skin elasticity, reduces wrinkles and lines, tightens and firms, and improves skin texture and plumpness.
Heat also has a detoxifying effect and increases cell metabolism. That’s because when RF energy heats tissues between 40°C to 45°C, it increases blood flow through vasodilation. Vasodilation is the widening of blood vessels. The increased circulation brings more oxygen and nutrients to the cells. It also removes waste products, such as carbon dioxide. This means your cells’ metabolism speeds up resulting in more energy, so they work harder. This promotes skin health and gives an energy boost to fuel dermal remodelling.
RF heats tissues resulting in increased blood flow or vasodilation. Source
p
TIP: RF current doesn’t affect the melanin in your skin, so it’s suitable for all skin tones and types, without risk of discolouration. 13
These effects of RF give excellent tightening and anti-aging results on the face. And it works just as well on the body too. It’s particularly helpful for tightening loose skin after weight loss, pregnancy or from the natural aging process. We call this body contouring.
Radio Frequency body contouring
This lady looks well-contoured to me
Non-surgical RF body
contouring is a professional treatment that helps with common problems such
as skin sagging on tummy, chest and knees, cellulite and reducing localised fat.
It helps improve the appearance of saddlebags, inner thighs, love handles,
abdominal fat, post-baby tummies and bingo wings.
You can choose to both reduce fat and then tighten the
leftover lax skin, or simply tighten and remodel aging skin on the body.
For fat reduction, RF reaches down to the deepest layers of the skin to the adipose tissue. It heats only the fat cells causing apoptosis or ‘suicide’ of the fat adipocytes cells. Therefore, fatty deposits reduce in size for a slimming effect. Alternatively, machines may use ultrasound cavitation to target fat, exciting and bursting the fat cells. Fatty waste is then excreted through your lymphatic system.
RF heat causes the white fat cells (adipocytes) to die, thus reducing fatty deposits and wobbly bits.
To tighten loose skin around your body, RF energy heats tissues in the dermis. As with RF facials, this causes the breakdown of collagen fibres for skin tightening, stimulates fibroblast production of collagen and elastin for dermal remodeling, and boosts cell metabolism.
The result is an improved body contour, with smooth, firm and luminous skin.
Surgical RF body skin tightening is a more extensive procedure done in the operating room under anaesthesia. The surgeon inserts an RF probe below the skin for an intensive application of RF heat to the subdermal layers, whilst infrared cameras monitor the skin temperature. This procedure focuses on tightening loose skin on the arms, legs, stomach, back, and buttocks.
There are also two ways to deliver RF energy; monopolar and bipolar.
Different types of RF
There are two ways
that we can direct RF into the skin: monopolar or bipolar.
Monopolar is most common in professional body contouring. It’s also known as unipolar because the instrument has one electrode/pole in the handpiece. This RF delivery treats deep tissue structures because the positive and negative poles are separate from each other. It works like this:
Monopolar Radio Frequency used on the body
The unit generates
the current, and the handpiece applies the positive RF current to the skin. Most
resistance occurs where the handpiece touches the skin.
Attached to the client, usually on their lower back, is a negative grounding pad. The pad creates a low resistance path for the current to return to the generator, completing the electrical circuit. The RF current travels from the handpiece to the pad, passing through all the skin layers. It even reaches the subcutaneous fat layer 20mm below the skin.
Bipolar RF for facial skin tightening
Bipolar means the handpiece has poles in sets of two;
negative and positive. It’s used in both professional RF facials and at-home
devices.
The RF current flows
only through the small area of tissue between these two poles, reaching 2-4mm
below the skin. The current doesn’t flow through the deep tissues.
Tri-polar machines can deliver both types of RF treatment.
Can I have RF treatments?
Check the home device user manual contraindications carefully
RF is safe, but if you have certain conditions you must avoid it. A professional operative will check your medical history. But at-home, you must check your device’s user manual thoroughly. It’s a good idea to download a copy and read it before you buy. Most brands have a PDF version available on their websites. If not, email their support team and request a copy.
Here are the contraindications applying to both professional and at-home Radio Frequency skin tightening.
Key checks ✔️
You CAN’T have RF sessions if you:
Are under 18 years of age
Are pregnant or are nursing
Have a pacemaker or defibrillator
Have metal implants in the treatment area, such as gold threads or metal plates & screws. But dental fillings or implants are ok
Currently use medications, herbal preparations, vitamins or food supplements that may cause fragile or dry skin
Body areas to avoid ❌
DON’T USE a home device on the following areas:
over eyelids,
closed eyes,
thyroid area,
lips,
ears,
breasts
or genital areas
Medical History
DON’T USE if you currently have, or have a medical history of:
Cancer, especially skin cancer or premalignant moles
Severe concurrent conditions, such as cardiac disorders
An impaired immune system due to immunosuppressive diseases such as HIV, or are using immunosuppressive medications
Heat-stimulated diseases such as recurrent Herpes Simplex (within the treatment area)
Any active skin condition within the treatment area, such as sores, psoriasis, eczema or a rash
Keloid scarring, abnormal wound healing or fragile skin
Suspicious lesions within the treatment area
Cosmetic or surgical procedures
DON’T USE if you’ve had these recent cosmetic or surgical procedures:
Any surgical procedure, laser resurfacing or deep chemical peeling in the treatment area within the past three months or are still undergoing a healing process
Permanent fillers within the treatment area.
If you have temporary dermal fillers within the treatment area, consult your doctor for advice
Collagen or Botox administered in the treatment area within the past three months
Professional RF skin tightening only
These apply to professional RF treatments.
DON’T USE:
If you have a history of coagulopathies or the use of anticoagulants
Have used isotretinoin in the past 6 months
Taken nonsteroidal anti-inflammatory drugs (e.g. with ibuprofen) one week before and after each treatment
On a tattoo or permanent makeup
On excessively sunburned skins, tans from sunbeds or tanning creams in the last two weeks
Preparation for RF skin tightening
The Harley Medical group suggest a few helpful preparation tips for professional face and body skin tightening treatments.
DO ✔️
Avoid the sun for 2-3 days before so your skin isn’t dry or red
Remove make-up prior to facial treatments
Drink 1 litre of water in the few hours before your session. Keep well hydrated
Eat light food before your session
Wear loose fitting and comfortable clothing for body skin tightening
DON’T ❌
Apply fake tan or tanning creams within 10 days of the treatment or throughout the treatment course
Don’t apply creams or oils to your skin before your session
Avoid heavy meals that are carbohydrate or fat rich less than two hours prior to your treatment
A mirror and extension cable are handy for a comfy RF session set-up
FOR AT-HOME SESSIONS ✔️
Wash and dry your face
Find a comfy and warm spot, I like to sit on my bed
Watch TV, listen to music or a podcast
Use an extension cable so you’ve plenty of slack
Have a small, portable mirror handy
Don’t forget to apply a thin layer of RF gel!
Use your phone to time each section
Tie your hair back so it doesn’t get stuck in the gel
Have a towel handy to clean up any gel slops
p
TIP: If your body is cold it takes ages to get your skin to temperature. So, it can feel like it’s not working. I like to do my treatments after I’ve taken a shower. This makes sure I’m nice and warm, plus I feel nice and relaxed for my session!
What does it feel like?
If you opt for a professional RF facial, your clinic will advise which facial areas they’ll focus on. Common areas are the forehead, under the eyes, cheeks, mid-face, jaw line, and neck.
Your clinician will talk you through what happens, what results to expect, and post-treatment care typically lasting around a week after your session. For example:
DO ✔️
Drink 4 to 5 glasses of water each day
use sun protection cream
DON’T ❌
sunbathe, or use a sauna, and no hot baths!
drink alcohol (for at least 2 days)
For the procedure, you’ll lie on a treatment bed with the RF machine next to you. Most machines are a large base unit with controls, and gunshaped hand-pieces connected by cords. The clinician first applies a conductivity gel to the treatment areas. They then move the RF probes on your skin, in upward and circular motions. As they move along your skin you’ll feel warmth, and also occassional cooling. The clinician adjusts the RF intensity to match your skin sensitvity, and they monitor your skin temperature to avoid overheating. It shouldn’t be painful or too hot, but it’s important to say if it’s burning or uncomfortable!
⏱ A professional session focusing on your under-chin, neck, jawline, cheekbones and forehead takes around 50 to 60 minutes.
For at-home sessions, you divide your face and neck into sections and work on each in turn. First apply the protective conductivity gel. If it’s water-based, apply it to one section only in turn. The gylcerin based gels don’t dry out so you can apply them to the whole of your face. Then, slowly glide the electrodes in small overlapping circles all over the treatment area. Repeat for around 4 to 5 mins per area.
The Tripollar Stop VX is my favourite at-home RF device for full-face and neck, and the NEWA is awesome for your cheeks, jaw and chin area.
You feel pleasant heat slowly building. Keep the electrodes moving or it gets burny hot very quickly. Most devices have skin temperature sensors and switch the RF off when the skin reaches the perfect temperature. And some devices feel hotter than others. A full face and neck session takes from 25 to around 60 minutes, depending on your chosen device.
Once you’re done, wipe or wash off the gel. Then apply your favourite nourishing and hydrating serums and creams. I opt for hyaluronic acid rich products, sealed in with a ceramide based moisturiser. If you have the time, a moisturising sheet mask is a delicious alternative treat too.
Radio Frequency possible side effects
Your clinic will explain possible but rare side effects
RF treatments are very safe and well tolerated. Common skin reactions to the heat are red and swollen or plumped skin. Use Aloe Vera to cool and soothe if necessary.
There are a few rare and temporary side effects with professional and at-home RF skin tightening. If you get any and they last more than 24 hours, go see your doctor.
You should also avoid sun exposure after a session and always wear a good sunscreen! Make sure you moisturise well after a session to avoid any skin drying too.
Schedule & results for RF skin tightening
The advertised effects of a professional skin tightening RF treatment on body or face are:
✔️ Short term collagen shrinkage in the dermis
✔️ Longer term fibroblast stimulation to create revitalised collagen and elastin
✔️ Stronger skin scaffolding in the deeper skin layers
✔️ Enhanced cell metabolism
✔️ Refreshed epidermis/outer layer skin cells
You need a course of around 3 to 8 professional RF treatments, depending on the area treated.
You need a course of 3 to 8 treatments, but typically around 6 professional RF treatments. You may see some immediate tightening after each session. But results appear gradually over several months. Best results are typically at the end of the schedule. However, you may see further improvements over the following 3 to 6 months. That’s because your skin is still building shed loads of collagen and elastin. Top-ups are recommended every 1 to 3 months, depending on your end results.
The Harley Medical Group say skin tightening effects vary and are different by individual, so they can’t guarantee specific results. Therefore, they can range from subtle to significant, and last months to years. Results are:
Tightening of lax skin such as jowls, eyebrows and neck
Reduces pore size, fine lines and wrinkles
Smoother skin texture
Healthier looking, radiant skin
The effects of at-home RF skin tightening are similar to professional sessions. However, the effect of each session is much reduced. Therefore, you need many more treatments, several times per week during a start-up stage of 4 to 8 weeks.
The quick 4-week NEWA start-up and ongoing maintenance schedule
Results are also gradual, and best at the end of the course, further developing over the next few months. They vary by individual too. Stick with the top-ups, typically one or two per week, to maintain your results.
Reassuringly, there are clinical studies proving Radio Frequency skin tightening works too.
Clinical proof
Numerous clinical studies show that RF is effective at skin tightening. There’s lots of proof it works.
In 2011, researchers in the USA studied six participants and found the RF produced noticeable clinical results. The subjects were also highly satisfied with their skin improvement and increase in collagen.
Researchers in Korea mirrored these findings. RF treatment is safe and effective to treat signs of ageing and reducing scarring.
However, such studies researching the effects of aesthetic rather than medical treatments are difficult to compare. That’s because they use small groups of people, and the methods and research quality vary significantly. Brazilian researchers discovered these issues in their literature review of 2015. They looked at 30 different studies investigating RF facial treatments. They conclude whilst RF therapy is successful in stimulating collagen synthesis, we need further studies to clarify treatment parameters and effectiveness.
At-home bipolar devices are not as powerful as professional monopolar devices. However, researchers have shown they are effective in some clinical trials.
Professional RF vs at-home
Like most at-home and professional comparisons, you can expect faster results with professional sessions. But you’ll also pay a lot more overall.
Here’s a comparison table to show the key similarities and differences.
Professional RF skin tightening
At-home RF skin tightening
Who’s it for?
✔️ For men and women
✔️ Safe for all skin tones and types.
✔️ For men and women
✔️ Safe for all skin tones and types.
What skin types?
👉 For jowls and loose skin on the jawline and neck
👉 Fine to medium lines around eyes
🧑⚕️ Your practitioner advises the number of sessions best for your skin condition and the likely outcome.
👉 For lax facial skin
👉 Lines and wrinkles
Follow the recommended treatment schedule.
Schedule
🗓 Around 6 sessions, each session 1 to 2 weeks apart.
🗓 2 to 3 sessions per week, for 6 to 8 weeks
Maintenance
Top-ups every 1 to 3 months, depending on your results and skin type.
2 to 4 top-up sessions per month
Preparation
✔️ Cleanse and remove make-up
✔️ Drink plenty of water before and after your treatments
No anaesthetic required
✔️ Cleanse and remove make-up
✔️ Drink plenty of water before and after your treatments.
Session
Operative applies conductivity gel and massages the applicator is slow continuous movements gradually heating your face and neck.
Apply conductive gel to your treatment area, and working in small zones, move the electrodes over your skin gradually heating it until the time is up. Move onto the next area until all desired zones are complete.
How long is a session?
⏱ Usually 30 to 60 minutes
Sometime combined with other treatments such as vacuum massage.
⏱Around 1 hour per full face session.
Sensation
Operative applies conductivity gel and massages the applicator is slow continuous movements, gradually heating your face and neck.
Apply conductive gel to your treatment area, and working in small zones, move the electrodes over your skin gradually heating it until the time is up. Move onto the next area until all desired zones are complete.
Sensation
Relaxing & pain free, warm massage sensation
Some swelling and redness possible afterwards on the skin, normally lasting just a few hours.
Relaxing & pain free, warm massage sensation
Some redness afterwards on the skin, usually fading within an hour or two.
Side effects?
Very rare side effects.
Pain
Damage (crusting, blistering, burns, fragile skin, bruising)
Mild headache
Very rare side effects.
Temporary swelling
Redness
Tingling
Contraindications
RF treatments are generally safe with no down-time.
However, there are some reasons you may not be suitable. See the contraindications listed above.
See the contraindications listed above.
Cost
Single session £65 to £140
Course of 6 £375 to £680
From £99 to £649 for a home-use RF device.
Some combine with other anti-aging technologies.
Results
Tighter, firmer & younger looking skin with improved skin tone, texture & elasticity. Fine lines on the face disappear and soften deeper wrinkles.
Tighter, firmer & younger looking skin with improved skin tone, texture & elasticity. Reduces the appearance of fine lines & wrinkles.
Pros & Cons
✔️ Results are usually more significant than home-use devices
❌ Results don’t last forever and you need regular maintenance sessions
❌ User reviews suggest results vary & they aren't guaranteed
✔️ Much more affordable than professional sessions
✔️ You can maintain results in your home with a reduced treatment schedule
❌ Results vary & you may not get the lift you desire
❌ They demand upfront & ongoing commitment & effort
At-home Radio Frequency devices
If you have the dosh and want to splash out, you can try searching locally for a trusted beauty spa or clinic. Check the reviews, and ask about the equipment and training before you go ahead.
But if professional RF is out of your budget, you can try this instead…
The best at-home Radio Frequency round-up
Learn all the pros & cons of the best at-home Radio Frequency skin tightening devices to give you a tight, bright, smooth and plump skin with lifted sagging jowls, jaw and chin too.
What’s your favourite colour? By the end of this article I think you’ll be fairly fond of red. That’s because, from a strong light source, it casts some magical youth-restoring sorcery on your skin.
LEDs are the typical light source, but you can also use lasers and cold lasers. They shine red and near-infrared light onto your skin. There’s no damage, pain or burning sensation. But the light must be of precise wavelengths or it won’t work. The light energy passes through the skin layers and into the deep tissues. It stimulates our cells, boosting growth and healing. Dermatology professionals use it to treat lines and wrinkles, acne, psoriasis, and sun damage. You can buy various home versions too, which work in the same way as professional systems.
A red & near infrared LED anti-aging facial. Source.
OK, I know. It sounds a bit far-fetched. I was sceptical too. Until I experienced first-hand the glow-giving effects on my 40-something year old skin. Then, I had to know more.
So, it was time to release the Wearebodybeautiful research ferrets. They came back with some grade-A sciencey shit. And now you can learn all here, in red light therapy and facials 101.
Let’s start with a little background.
About light, life & Photobiomodulation
First, we need to understand a bit more about light energy, and how it affects living things by triggering biochemical reactions with photobiomodulation.
What is light?
Sunlight contains every colour of the rainbow, from red to blue. But visible light is only a small part of all light.
The visible spectrum of light from violet (380nm) to red (700nm)
We measure light waves in nanometers (nm). The human eye sees light with wavelengths from 380 nm to 700 nm. Light waves shorter than visible violet at 380 nm are ultraviolet (or UV) light. Waves longer than red at 700 nm are infrared (or IR) light. All light is part of the bigger electromagnetic radiation spectrum along with radio waves, microwaves, x-rays and gamma rays. As well as being waves at different lengths and frequencies, light also consists of photon particles.
Now, we know that light affects organisms. Think back to school science lessons. Plants use photon energy from sunlight, along with water and carbon dioxide, during a chemical process called photosynthesis. This creates sugars the plant then uses to grow and live.
Chloroplast photoreceptor cells in plants use sunlight, water and carbon dioxide to create sugar energy during photosynthesis.
Light affects humans too. Certain molecules in our bodies are light-sensitive, and specific wavelengths kick-start biochemical reactions. One example is when light hits special cells in the retinas of our eyes, called photoreceptors. They absorb light and, via a chemical reaction, convert the energy into an electrical nerve signal which our brain processes into vision.
Light hits retina photoreceptor cells, triggers an electrochemical reaction, and our brain translates it into vision.
In fact, not getting enough sunlight has a bad effect on us too. For example, you’ve probably heard of Seasonal Affective Syndrome (SAD), and rickets caused by lack of Vitamin D3, both stemming from a lack of sunlight.
This biochemical reaction started by light is called Photobiomodulation.
Photobiomodulation & its uses
The word ‘photo’ means from or produced by light. Light creates changes in our body, which is also known as a photochemical reaction. So, photobiomodulation is the scientific term given to how light can change or modulate a biological system.
Photobiomodulation: how light can change or modulate a biological system.
p
INFO: Photobiomodulation therapy using red and near-infrared light has other names too. Such as Low Level Light therapy (LLLT), soft laser, photobiostimulation and red light therapy.
The benefits delivered depend on:
the specific wavelengths
and how deep it reaches into your tissues.
Studies show it works to treat pain, inflammation and hard to treat wounds, and even dementia, cancer chemotherapy side effects and brain disorders. It’s widely used to speed-up healing of burns and sunburns by significantly reducingredness, swelling, and peeling of the skin. It also reduces healing time of skin grafts, infected wounds, amputations and other alternative and more aggressive cosmetic procedures such as laser resurfacing.
The therapy also helps to heal, reduce symptoms and reoccurrence of Herpes simplex lesions (cold sores). The red and NIR light helps strengthen immune system cells to help fight the virus in the body. It also speeds-up healing time.
In dermatology, blue light treats acne and red and near-infrared light treats inflammation such as psoriasis and rosacea. And the boost of collagen from red and NIR light also helps soften scarring (both colour and appearance), signs of sun damage and aging, such as sun spots and wrinkles.
The human eye sees red light as the wavelengths between 630mn and 700 nm long. It’s used to treat the surface of the skin.
Infrared light is invisible to the human eye, with wavelengths between 700 nm to 1,000,000 nm. The infrared spectrum is divided into near, mid, and far-infrared.
Near-infrared light or NIR has wavelengths of 700 to 1400 nm. It generates the most heat out of the different red lights. The healing action of near-infrared light can boost tissue repair and increase metabolism. These effects are due to how it stimulates the mitochondria in the cells, but more about that later.
Mid-infrared light has wavelengths of 1400 to 3000 nm. It can reach the hypodermis, increasing circulation and generating heat to help injured areas of the body.
Wavelength, power, and spot size of the light and the thickness, location, and type of tissue affect how deep it reaches into your skin. Skin colour is also a factor6. Therefore, there are no universal figures for wavelength subdivisions, or the depth of skin they can penetrate.
Indicative depth penetration of different light wavelengths. Source
So to recap, red and NIR wavelengths reach to different depths and stimulate our skin cells. Specific light-sensitive molecules inside our cells absorb the light photons and gain energy. This energy excites the cells so they work harder.
Next, we’ll look at what actually happens in our cells.
What does red light do in our cells?
The magic happens in ourcell Mitochondria. The light energizes their cellular respiration process, which results in a surge of vital ATP energy molecule.s To understand exactly what happens, first we’ll look at the cell mitochondria, how they produce ATP and then how red light enhances this process.
What are Mitochondria?
All the cells in your body, except red blood cells, have miniature power generators called mitochondria. They are essential for normal bodily functions. Their primary responsibility is to convert air, water, and food into energy for our cells. Without them, cells couldn’t grow, divide or function. The cells that use the most energy have higher numbers of mitochondria. The liver has up to 4000 mitochondria per cell!
Mitochondria have other roles in cell signalling, balancing calcium, maintaining body heat and killing cells that are no longer useful.
A chemical called adenosine triphosphate or ATP is the energy currency of the mitochondria. And when the mitochondria have more energy, they do more work and the body heals faster.
Mitochondria have an outer and inner membrane with an intermembrane space between the two. Pores in the outer membrane allow proteins, positively charged protons and negatively charged electrons to pass through. The protein-rich inner membrane encases the gel-like matrix, which is where most stages of mitochondrial respiration take place to create ATP.
Mitochondrial respiration to produce ATP
Mitochondria make ATP during cellular respiration. Mitochondrial respiration is either aerobic (with oxygen) or anaerobic (without oxygen). Aerobic respiration is best because it produces more ATP energy. It’s a complex process with four stages.
STAGE 1: Glycolysis. This takes place in cell cytoplasm.
STAGE 2: Pyruvate oxidation. This takes place inside the mitochondria matrix.
STAGE 3: Citric Acid or Krebs cycle. This also takes place inside the mitochondria matrix.
STAGE 4: Oxidative phosphorylation – Electron transport chain & Chemiosmosis, which takes place across the inner mitochondria membrane.
Diagram illustrating the 4 steps of cellular respiration. Source.
Thankfully, we don’t need to go into the detail of each stage. Suffice to say each stage processes nutrition particles in biochemical reactions to produce either waste (as carbon dioxide and water), or new molecules, electrons and substances used in the next step. Steps 1 & 3 create a little ATP, whereas step 4 creates the most. If you want to boffin-it-up, 🤓 learn more here and here.
So, where does photobiomodulation with red and NIR light come in?
Well, it’s now generally accepted that molecules in a mitochondrial enzyme called Cytochrome c oxidase or COX are the primary light-sensitive chromophores. They absorb either red and NIR wavelengths depending on the depth and tissue type of the mitochondrial location. COX enzyme is also a key player in stage 4 of cellular respiration called Oxidative phosphorylation. To understand how it reacts and why this is good, we must next understand a little more about stage 4 Oxidative phosphorylation.
Stage 4 Oxidative phosphorylation & Cytochrome c oxidase
COX protein enzyme (labelled IV) absorbs photon energy, then moves electrons & pumps protons faster helping ATP synthase produce more ATP. Yay! Source.
COX is the 4th and final protein enzyme (called a Complex) of the Electron Transport Chain. Each Complex embeds in the inner mitochondrial membrane. Electrons move along the Complexes from molecule to molecule, and as they do, they release energy. The Complex uses this energy to then pump out positive Hydrogen ions (H+ protons) through channels in the inner mitochondria membrane into the intermembrane space.
This build-up of H+ protons creates a proton gradient (or electrical charge like a battery) across the mitochondria inner cell membrane. During the following Chemiosmosis process, the Hydrogen protons flow back into the mitochondria through an enzyme called ATP synthase. ATP synthase harnesses the flow of protons like a turbine to synthesize ATP.
Phew.
Now, the crux of how red and NIR increases ATP production.
How red and NIR increases ATP production
Because red & NIR light stimulates COX, it works harder and more efficiently in Complex IV. This means it moves electrons and pumps protons faster, ready for the final ATP production stage in Chemiosmosis. This increases overall ATP output in the cell.
COX also completes the Electron Transfer Chain more efficiently. It’s an important stage to remove the waste molecules and ensure all respiration stages continue. It does this by handing-off the electrons to Oxygen, which then promptly splits and binds with Hydrogen protons to form water.
And an additional antioxidant effect of Red and NIR photons is important here too.
Red and NIR light donate their proton energy to electrons in the mitochondria. The energised electrons then break the bonds in nitric oxide. This is good because too much nitric oxide blocks oxygen from forming water at the end of the Electron Transport Chain. And this stalls ATP production. So, without excess nitric oxide, the process keeps moving efficiently, creating more ATP.
OK, so how does this increased ATP translate to anti-aging results?
ATP, collagen & elastin
With more ATP our cells work and heal faster. This is super news for our fibroblast calls.
Fibroblast cells in your dermis produce a gel-like support system called the extracellular matrix (ECM). Its made of the proteins collagen and elastin, and proteoglycans, which are highly hydrated sugar molecules. Its these things that make your skin supple and bouncy.
The ECM gives the skin strength, elasticity, and hydration and is essential for healing after an injury.
Genetics, lifestyle and environmental factors affect how skin ages. After the age of around 25, the ECM starts to degrade. The production of the essential components slows down, leading to skin that’s drier, weaker, has less elasticity, more wrinkles and imperfections. Boo.
Red light therapy stimulates the mitochondria in your skin cells and specifically your fibroblast cells. They therefore produce more ATP and get an energy boost to build new ECM, regenerate cells and promote oxygen utilization.
So, now you understand what red and NIR light triggers inside our skin, next we’ll look at the results you can expect.
Can I have red light therapy?
Red light therapy is very safe, and tolerated by most people. A sensitivity test patch is not necessary. However, if you have certain medical conditions you must avoid it.
Your clinic or spa will check your medical history. But at-home, you must check your device’s user manual thoroughly. It’s a good idea to download a copy and read it before you buy. Most brands have a PDF version available on their websites. If not, email their support team and request a copy.
Here are the contraindications applying to both professional and at-home red light therapy:
Key checks ✔️
Before you buy a home use device or book a professional sessions, check:
You’re not pregnant, trying to get pregnant or breastfeeding. (It’s not tested on pregnant or breast-feeding women so the risks are unknown).
You don’t have an open or bleeding wound
Body areas to avoid ❌
There aren’t any!
Choose a red light facial, or skin rejuvenation on your body, for your decolletage, tummy or knees.
Medical History
Don’t use it if you have a medical history of:
Lupus erythematosus
Photosensitive eczema or albinism as it may cause a severe skin reaction
Any photosensitive disorder (sensitization to light) such as epilepsy
Light induced headaches
Any genetic conditions of the eye
ALWAYS wear goggles with medical strength light if you have eye disease and conditions including Glaucoma, Cataracts, recent laser eye surgery or light induced migraines.
Medications
Don’t use if you’re taking or have recently taken these medications:
Steroids or cortisone injections
You are taking any medication that can cause photosensitivity. Medications include certain antibiotics, chemotherapy drugs, and diuretics. If you are unsure about your medication, check with your doctor.
Always check your medication instruction leaflet to see if photosensitivity is a listed side effect.
p
NOTE: Other substances not listed here can also cause photosensitivity. Common examples are: St John’s wort, coal tar, deodorants, antibacterial soaps, artificial sweeteners, naphthalene (mothballs), petroleum products, brightening agents found in laundry detergent, and cadmium sulphide (a chemical injected into the skin during tattooing).
Preparation for red light therapy
There’s nothing special you must do or avoid before red light therapy, aside from cleansing your skin and removing jewellery. You can safely go out in the sun both before and after your sessions.
Professional sessions are often combined with another treatment such as microdermabrasion. This removes the dry outer skin layers and helps the light penetrate deepest. So, you can also use a microdermabrasion tool or a gentle facial exfoliator before using a home-use device too.
Hands-free flexible red & NIR mask from CurrentBody is easy and excellent value
FOR AT-HOME SESSIONS ✔️
Find a comfy spot, I like to sit on my bed
Watch TV, listen to music or a podcast, or read a book during your session
If you need mains power an extension cable is handy
Have a small, portable mirror handy if you’ve a handheld to treat in sections
Use your phone to time each section (if needed)
Tie your hair back so it doesn’t get in the way
What does it feel like?
Red light therapy with powerful LEDs feels very pleasant indeed. It’s bright red and warm, but not hot. There’s no pain or burning sensation.
Most professional machines have a strong, manoeuvrable and pivoting arm with several adjustable panels of lights you can position around your face and body in a canopy. The more panels, the bigger surface area it can treat. You may sit or lie down for the session, depending on which body area you’re treating. The lights are typically 10cm from your skin. It’s most relaxing if you lie down. Goggles are provided because the lights are very bright (but harmless to your eyes).
At-home LED devices vary in design. Most are for the face and neck area.
CurrentBody Skin silicone flexible wearable red and NIR light therapy masks.
You can choose a handheld wand-shape which you continuously move around your skin. You must treat your face in sections. Therefore, these are best for focused areas such as crow’s feet or around the mouth. They’re pleasant and comfy enough to use for 3 to 10 minutes per area.
Alternatively, you can choose a face mask. Some are a hard moulded shape, normally running on mains-power. Others are soft, flexible, battery-powered silicone masks, like those from CurrentBody Skin . You must wear them for between 10 to 20 minutes per session. They feel a little warm after a while, and don’t get too hot or sweaty.
And there’s one bad-boy medically certified home-use device from Dermalux.
A very pleasant, warm and relaxing session under the medically cleared FlexMD canopy.
The Flex MD is a mains-powered flexible panel, filled with potent red, NIR and blue LEDs. Not just for your face, you can use it around your whole-body, and comes with goggles too. Use it for 30 minutes in the canopy around your face, and 20 minutes laying directly on other body areas. You can feel a lovely energising warmth in your skin.
Side effects?
Nope.
There are no nasty side effects with red light therapy. Your skin maybe a little red afterwards, but this is simply due to increased circulation in your skin.
Red light therapy schedule & results
Both professional and at-home red light therapy gives best results after a course of sessions.
For professional red light therapy, you’ll need around 6 to 8 sessions in quick succession, one every 24 to 48 hours. You can then opt for periodic top-ups, or repeat the course when you need it. Spas and clinics often combine red and NIR therapy with other skin treatments such as Microdermabrasion, Skin Peels, Micro-Needling, Injectable treatments, and Laser.
The start-up schedules for at-home devices vary from 3 to 5 sessions per week, for 6 to 8 weeks. You’ll notice changes after around 4 weeks, but best results after a few months. The effects build slowly and gradually. Some devices are more efficient and powerful so give faster results. All at-home red light devices are for ongoing use with less regular maintenance sessions, 2 or 3 times per week, or as you feel you need them.
CurrentBody skin wearable masks are super easy to fit in and stick with.
p
TIP:Try the Dermalux FlexMD medically-cleared at-home device for the fastest and most significant results in just a few weeks. My review explains why it’s superior to cosmetic red light devices and how it gives far better results.
As explained earlier, the lights stimulate your skin cells so they create more ATP energy molecules. This sparks a further series of helpful metabolic events as follows:
Stimulates fibroblasts to produce more collagen & elastin
Like many other cosmetic technologies, results vary by individual. Your age, skin type, lifestyle, and genetics all play a part. So, for some results are subtle and for others they’re more significant. You’ll usually get faster and more significant results with a professional (or medical) device than a cosmetic-grade home device. However, there are now medically cleared devices available for home-use, albeit with a rather hefty price tag. Typical results are:
Smoother, firmer & well-hydrated skin
Brighter skin that glows
Fades dark spots & pigmentation
Calms redness & irritation
Softens acne scarring and other scars
Minimises fine lines & wrinkles
Skin looks healthier & younger
Clinical proof for red light facials
Since NASA (18) used red light therapy for experiments on plant growth in the 1990s, doctors have been using it for medical purposes. Numerous clinical research studies show red light therapy is effective.
Research in 36 subjects with sun-damaged skin had positive results. A combined 633 nm and 830 nm light-emitting diode (LED) treatment over five weeks led to significant improvement in wrinkles, softness, smoothness, and firmness of the skin. Electron microscopic analysis showed thicker collagen fibres.26
In a 2014 study of 90 were people treated with 611-650 nm red light (RLT) or 570-850 nm energising light (ELT), and compared to 23 controls. Both treatment groups showed increased intradermal collagen and an improvement in skin feeling and roughness.27
Another study used LED devices to treat 76 subjects with 830 mn, 633 nm, a combination of the two wavelengths or a control light. At the end of four weeks, there was a significant reduction in wrinkles, increase in skin elasticity and an increase in fibroblast activity, collagen and elastic fibres in the treatment groups.28
Professional vs at-home red light therapy
Here’s a comparison table to show the key similarities and differences.
Professional red light
At-home red light
Who’s it for?
✔️ For men and women
✔️ safe for all skin tones and types.
✔️ For men and women
✔️ safe for all skin tones and types.
What skin types?
Aging, dull or inflammed skin with fine lines, wrinkles, and pigmentation problems.
Aging, dull or inflammed skin with fine lines, wrinkles, and pigmentation problems.
Schedule
🗓 Around 8 sessions in quick succession for best results, one every 24 to 48 hours.
🗓 3 to 5 sessions per week for 4 to 12 weeks.
Maintenance
Less regular maintenance sessions or repeat the course as required.
Ongoing sessions as you need them.
Preparation
Clean skin, free from creams or metallic jewellery.
It helps to exfoliate before a session. May be combined with other treatments.
Clean skin, free from creams or metallic jewellery.
It helps to exfoliate or use a home microdermabrasion device before a session.
Session
The device is perpendicular to your skin, around 10cm away. You may lie or sit depending on the configuration of the device.
No gels needed.
Devices and application vary. Some are flexible or solid light panels positioned close to the face and neck. Others are small handheld devices moved across the skin in sections, solid moulded light masks or (the best) soft flexible battery-powered masks.
No gels needed, however with some LED masks you can also apply a hydrating sheet mask.
How long is a session?
⏱ 10 to 30 minutes
⏱ 10 to 30 minutes (depending on the device).
Sensation
No pain or burning sensation. Relaxing down-time. Goggles provided with NIR treatment and as the light is very bright.
No downtime.
Skin maybe red afterwards due to increased circulation.
No pain or burning sensation. Handheld or hands-free options
No downtime.br>
Use before your home microcurrent device.br>
Skin maybe red afterwards due to increased circulation.
Side effects
None! Very well-tolerated and completely safe procedure.
It’s safe to go in the sun before and after a session.
None! A safe & simple procedure with no side effects. However, overuse can cause dry skin.
It’s safe to go in the sun before and after a session.
Contraindications
Very safe procedure with just a few reasons you should not use it.
Very safe procedure with just a few reasons you should not use it.
Cost
£50 per session or £250 for six sessions
From £99 to £385
Results
Smooth, firm, toned, dewy & healthy skin with a natural glow. Reduces the appearance of fine lines, wrinkles & scars.
Results can last many months.
Smooth, firm, toned, dewy & healthy skin with a natural glow. Reduces the appearance of fine lines, wrinkles & scars.
Maintain results with regular weekly sessions, or more/less frequent as you need.
Pros & Cons
✔️ Results are more significant and longer-lasting than home-use devices
✔️ No pain, irritation, or down-time
✔️ More affordable than other professional treatments types
✔️ No negatives!
✔️ More affordable than professional sessions
✔️ You can maintain results in your home
✔️ Top devices are very low effort
✔️ No negatives!
At-home red light devices
If you have the dosh and want to splash out, you can try searching locally for a trusted beauty spa. Check the reviews, and ask about the equipment and training before you go ahead.
Or try this instead…
The best at-home red light therapy
Learn all the pros & cons of the best at-home red light therapy devices to give you healthy, hydrated, firm, smooth & bright skin.
A t-home beauty devices using ultrasound waves boost the effects of your skincare products. They do this by a process called phonophoresis. Phonophoresis is a scientifically proven therapy traditionally used in physiotherapy.
Phonophoresis opens pathways in your skin and gets more topical medications (or skincare molecules) deeper down so they work harder and give bigger results. This means home ultrasonic facials can replenish the lost Hyaluronic Acid in your skin due to aging. This is the only technology that can do this. It plumps, firms and smooths for healthy, younger-looking skin.
This article gets into the nitty gritty. We’ll start with how skincare boosting helps, what specific skincare ingredients you need, why Hyaluronic Acid is awesome, how the ultrasound works, and then the proven results.
How does skincare boosting help?
To answer this, we need to understand what’s in anti-aging skincare and how it works with your skin.
Anti-ageing active ingredients
In your anti-aging skincare are several ingredients. Some give the colour, fragrance and texture, or keep them fresh. But others, known as active ingredients, spark specific activity in your skin for lasting anti-aging effects. They help nourish, protect, repair and stimulate your skin.
Active ingredients, protect, energise & regenerate your skin cells.
There are various types of active ingredients doing different things. For example:
Cell-Communicating ingredients are ‘superstar’ ingredients signalling to our skin cells to “behave better”
Antioxidants are ‘goodie’ ingredients helping your skin to combat collagen-damaging free radicals
Skin Brightening are ‘goodie’ ingredients that help to fade brownish spots
Skin-Identical ingredients are ‘goodies’ because they’re found (or mimic things) found naturally in our skin e.g. Natural Moisturizing Factors
Soothing ingredients lessen skin discomfort
Anti-acne ingredients help you fight against spots and acne Source incidecoder.com
For active ingredients to be effective they must get into your skin. Therefore, the first challenge is to pass the protective outer layer.
Your skin’s protective layer
Your skin keeps good stuff in and bad stuff out.
Your skin does an exceptional job of protecting the lower layers.
The outer most layer is the stratum corneum. It’s typically only 10–20μm (micrometres) thick. But the cells (called keratinocytes), are tightly-packed, bonded together and surrounded by a stacked lipid bilayer. These water-insoluble lipids glue the keratinocytes together forming a highly impermeable ‘brick wall’ pattern. This keeps water in and all harmful things out.
Diagram of the skin’s 5 epidermal layers. The Stratum Corneum outer protective barrier slows or stops skincare getting to the lower layers. Source: PMID: 21118031
p
INFO: A micron, also known as a micrometre, is a millionth of a metre. Therefore, 10 to 20 μm depth is 0.01 to 0.02 millimetres. The symbol for microns is μm.
No surprise then, many skincare molecules have trouble passing this protective layer. It slows or stops some entirely. Smaller molecules can sink to the lower layers. But others are too big so they stay on the surface.
Skincare brands spend BIG money developing formulations that get deeper into your skin because they’re more effective. But even with regular use, results are slow and subtle so it’s hard to see any change. Therefore, the cost of premium formulations often just doesn’t seem worth it.
But, if you could only get more concentrated ingredients deeper in your skin, you’d surely notice the difference. And this is what at-home ultrasound devices do.
At-home ultrasound gets even more from the skincare you’ve already invested in.
Let’s learn how it works.
What’s phonophoresis & how does it work?
First, we’ll look at what ultrasound is, then at phonophoresis and how it works to boost your skin’s absorption of medicinal and skincare goodies.
What is ultrasound?
Ultrasound is a sound pressure wave. It oscillates back and forth like a vibration. We measure sound wave frequency in Hertz (Hz). The human ear can hear sound between 20 and 20,000 cycles per second (20 Hz to 20 kHz). Ultrasound frequency is higher than this so we can’t hear it.
Physiotherapy commonly uses ‘soft’ ultrasound at frequencies 1 MHz to 3 MHz.
Home ultrasound devices uses high frequency ‘soft’ ultrasonic waves at around 1 MHz (1 million oscillations per second) or lower. It’s painless and gentle on your skin. This is the same frequency as commonly practised in physiotherapy for a procedure called Phonophoresis.
p
INFO: Therapeutic phonophoresis uses high frequency ‘soft’ ultrasonic waves at around 1 MHz (1 million oscillations per second) or lower. It’s sometimes called Sonophoresis too.
What’s Phonophoresis?
Phonophoresis helps your skin better absorb molecules from creams and gels applied on the surface. First studied in the 1950s, it’s an established, safe procedure in physiotherapy. It typically uses ultrasound frequencies of 1 MHz to 3 MHz.
The ultrasonic vibrations temporarily jumble-up the protective outer layer of your skin. This creates bigger gaps so more and larger molecules can pass through. In physiotherapy, it sends helpful medicine molecules – such as pain killers and anti-inflammatory drugs – to the source of pain.
But how exactly does phonophoresis do it?
How does Phonophoresis work?
Disruption of the skin barrier occurs because of acoustic cavitation. It’s thought the ultrasound vibrations form tiny bubbles in between the keratinocyte cells. These then vibrate to jumble it all up and create tiny openings. Skincare molecules then have easier passage through the stratum corneum to the lower skin layers.
Ultrasound creates tiny bubbles that vibrate and jiggle things up making tiny temporary openings. Skincare molecules can pass easily through them. Source PMID: 21238514
The effects are temporary, but the pathways stay open for a while.
p
TIP: With the Mira-skin home ultrasonic device your skin is extra absorbent for around 30 minutes after your session. Therefore, you can apply more serums and goodies immediately after the ultrasound treatment so more gets deeper into your skin.
Most at-home ultrasound devices partner with their own skincare products. You can use them or your own preferred skincare. But the key ingredient for maximum effect on aging skin is Hyaluronic Acid. Together with the ultrasound boost, you get noticeable skin hydration and plumping effects.
What’s Hyaluronic Acid?
Hyaluronic Acid occurs naturally in our bodies, in our joints, ligaments, skin and eyes.
Hyaluronic Acid is a sugar molecule in our skin which binds with water to keep it hydrated
Despite the word ‘acid’, it’s really a sugar molecule. And a clear gel-like goo and a water-loving super-sponge!
Various internet sources say it can hold up to 1000 times its weight in water. No surprise then our bodies use it to hydrate tissues and lubricate joints. 50% of yours is in your skin. It’s found throughout your skin in the dermis (lower) and epidermis (outer) layers.
A baby’s skin is bursting with Hyaluronic Acid and water.
Along with collagen and elastin, it’s the main molecule in your skin’s extracellular matrix (ECM). The ECM is the scaffold that supports and nurtures your skin cells and keeps it looking young. The water Hyaluronic Acid holds keeps skin firm, smooth and plump. It’s the reason babies and children have such perfect, soft skin.
It’s a very good thing indeed.
Unfortunately, from early adulthood, your Hyaluronic Acid starts a steady decline. This contributes to the first signs of aging in your 30s and 40s. Eventually, it disappears from your epidermis entirely. Yikes. Skin becomes dry, dull, sagging and wrinkled. Boo.
Left: Younger skin is organised, strong with activated cells and fibres, and plenty of Hyaluronic acid in the epidermis. The skin surface is smooth. Right: Cells and fibres in aging skin are fewer, weaker, broken and slow.Hyaluronic Acid eventually disappears from the epidermis entirely. The skin surface is thin & wrinkles.
So, replacing what’s lost as we age is a neat idea. And skincare can help here. Hyaluronic Acid is an ‘IT’ ingredient in skincare right now. Let’s learn what it does.
How does Hyaluronic Acid work in skincare?
Hyaluronic Acid is a repeating molecular structure (called a polymer). The subunits can repeat many times as long-chain (or high-molecular-weight), or just a few times as short-chain (or low-molecular-weight).
In its high-weight, long-chain format it’s too big to absorb into your skin. Therefore, it sits on the surface drawing moisture from the air to hydrate and smooth the outer skin layers. It’s an excellent moisturiser. In the world of skincare ingredients, it’s a humectant.
Advanced Hyaluronic serums
However, you can formulate Hyaluronic Acid to be shorter chain. And clinical research shows medium and short-chain molecules sink deeper into the skin. The shorter the chain the deeper they go. They then attract and hold onto more water in the skin. And soap and other cleansers can’t wash them away. Therefore, a good Hyaluronic serum must have molecules of different chain lengths to moisturise all the layers.
And with daily application it builds in your skin. But it takes time.
The shorter chain Hyaluronic Acid molecules stay deeper inside your skin for about a day. Then enzymes break them down. So, it’s a slow-refill process as the molecules steadily increase. This gradually plumps the skin making it firm and bouncy. And over time it subtly smooths fine lines and fills-out wrinkles.
So, partner an advanced Hyaluronic serum with a regular at home ultrasonic phonophoresis boost, and you’ve got a potent combination.
Can I use it?
Phonophoresis facials are very gentle, and very well tolerated. However, there are a few contraindications for home devices to be aware of.
q
IMPORTANT: Consult your doctor before using an ultrasound skincare boosting device if you’re currently under medical care for a skin condition.
Key checks ✔️
Before you buy a home use device, check:
You’re not pregnant.
You’re over 18 years of age
You DON’T have a pacemaker, heart disease, cardiac arrhythmias or other serious medical condition
Body areas to avoid ❌
Don’t use the ultrasound wand device:
Internally and avoid the eyes, eyelids, ear and throat (Adam’s apple area)
More than 10 minutes per treatment. Overuse of ultrasound cleansing tires out the muscles and tissues, and produces undesirable results
On open sores, wounds or infected areas. Consult a doctor prior to use
Skincare ingredients to avoid ❌
Nanoparticles
Essential oils
Fruit acids
Enzymes
Results & clinical proof
Therapeutic phonophoresis (1MHz to 3MHz) is clinically proven and regularly practised in physical therapy. However, there aren’t many studies for aesthetic use.
However, there’s one home-use ultrasonic infuser called Mira-skin that has good clinical evidence proving it’s safe and effective. When used with the Mira-skin Hyaluron Serum, the tests show it works to:
✔️ Deeply replenish your lost Hyaluronic Acid
✔️ Diffuse anti-aging active ingredients deeper into your skin fuelling repair and rejuvenation
The visible results of this are:
✔️ Softened lines & wrinkles
✔️ Plumped, smooth, firm & hydrated skin
Additional results depend on other active ingredients in the serum and in your own skincare. So, for example, you need skin brightening ingredients for dark spots. And for a collagen boost you need regenerative and antioxidant actives. Results from the best home ultrasound boost and serum combinations include:
✔️ Faded age spots & redness
✔️ Bright & clear complexion
✔️ Stronger collagen & elastin for healthier skin
In addition, several therapeutic ultrasound studies clinically prove therapeutic ultrasound boosts cell metabolism to support healing. It helps heal muscles, joints and tissue injuries by increasing collagen and elastin. These are the proteins responsible for skin repair and health.
Although open to some discussion, it’s thought the ultrasound gently heats tissue. This doesn’t hurt or damage anything, but it does increase blood circulation to the cells.
Gentle heat caused by the ultrasound stimulates your cells so they build stronger Collagen (brown) and Elastin (green). All this combines with the Hyaluronic Acid (blue) in skin’s extracellular matrix (ECM) for healthy, younger-looking skin.
Blood removes waste from your cells whilst delivering oxygen and nutrients. So, with more blood flow sluggish skin cells ‘wake-up’ and start working harder. Each ultrasound session energises them. They build new, stronger collagen and elastin fibres. Gradually, this refreshes your skin making it brighter and more radiant.
So, a further effect of an ultrasound facial is:
✔️ Invigorated skin cells, with renewed collagen and elastin
Your energised cells also make better use of the other deeply-diffused skincare actives. It all combines so regular treatments gradually hydrate, repair and revitalise the layers of your skin.
Phew. So, if you’re still here, you now know everything a phonophoresis facial can do for your skin.
At home ultrasound skincare boosting devices
There’s one device which uses true ultrasound phonophoresis to get more skincare goodies deeper into your skin. It’s called Mira-Skin. Partnered with a good HA serum, it gives impressive skin plumping results, especially on drier and more mature skin that’s lost volume. If you love and invest in high perfoming skincare, you should check out the before and after photos.
The Mira-skin sdevice uses true ultrasound phonophoresis to get more skincare goodies deeper into your skin
Other brands with fast vibrating cleansers and applicators claim their devices boost your skincare absorption. However, there’s no clinical proof for these devices and they don’t create pathways in your skin like ultrasound phonophoresis.
K immy K, Kate Hudson, J-Lo, Jennifer Anniston and Meryl Streep. Are super-human genetics behind their fresh, smooth, youthful skin? Course not. It’s a healthy bank balance and those fancy microcurrent facials they’ve each raved about.
But what is a microcurrent facial you ask? ‘Tis where therapists move small electrical probes around your face and neck. This passes a teeny electrical current into your skin. This ‘micro’ current mimics the natural bioelectricity in our cells. It stimulates skin and muscle cells on your face and neck to tone, tighten and lift. The result is a healthier complexion that makes you look younger. And there are several compact, affordable and clinically proven microcurrent devices for use at home too.
If that’s enough for you, check out our recommended best buy home microcurrent devices here. But if you’re hankering for more, read on. I’ve researched high and low to bring you this in-depth microcurrent 101 round-up to help you can decide if a microcurrent home device is right for you.
First, a bit of background…
About Bioelectricity & Electrotherapies
You’re electric, baby.
But then again, so is everyone else.
The human body is like a complex circuit board fuelled by electrochemical changes. Credit Nicolas Thomas on Unsplash.
Loads of stuff happens in our bodies because of electrical currents. These currents help fuel our cells, send communications and control the behaviour of cells and tissues. Without them, our hearts wouldn’t beat, nerves wouldn’t fire and send signals to the brain. You couldn’t see, hear, feel or think. All the vital processes in the body, including circulation, breathing, digestion, movement, immune and brain function rely on electricity. Without electricity, there would be no human, animal or even plant life!
Luigi Galvani discovered bioelectricity in 1780 but it wasn’t until the 20th century we started taking advantage of the electrical forces in our bodies using Electrostimulation. Probably the most obvious example is the pacemaker. Over a million new pacemakers are fitted annually, and without these small electrical devices, people worldwide with life-threatening heart conditions couldn’t live healthy lives.
Nowadays, we’ve a variety of different Electrotherapies. One of the most well-known is Electrical Muscle Stimulation (EMS). This targets muscles with low-volt stimulation, causing contractions and rebuilding strength. The home-use Slendertone devices are examples of EMS devices. Another popular type is Transcutaneous Electrical Nerve Stimulation (TENS) which uses a mild current to work on nerves, controlling some types of pain.
p
INFO: Microcurrent is an electrotherapy and it’s also known as: 👉 Microcurrent Electrical Neuromuscular Stimulation (MENS) and 👉 Microcurrent Therapy (MCT) or 👉 just plain Microcurrent!
Microcurrent is an electrotherapy too.
What is Microcurrent Therapy?
Microcurrent is a type of Electrotherapy commonly used by physiotherapists to speed up tissue healing.
We measure electrical current in units called Amperes or Amps. Microcurrent uses very low-Amp electrical stimulation, in the microamp (μA) range. 1 microamp (μA) is 1 millionth of an Amp. It’s teeny and it works at a cellular level. In comparison, TENS electrotherapy stimulates your nerves to manage pain in the milliamp (mA) range. 1 milliamp (mA) is one-thousandth of an Amp which is 1,000 times greater than microcurrent.
Microcurrent is teeny! Therapists explain you need 1 million Microcurrent machines to power a 40-watt light bulb! Credit Diz Play on Unsplash.
“weak stimuli increase physiological processes and extreme stimuli inhibit or abolishes activity”.
The Arndt-Schultz rule
In other words, your cells readily accept the minuscule electrical charge from Microcurrent, which increases cellular function. Whereas a substantial electrical charge harms the cell and stops it functioning.
p
TIP:Microcurrent is almost identical to the delicate, low-intensity electrical current already in your own cells. And because it’s so small you can’t feel it.
Research into microcurrent applications began with rehabilitation for sports injuries, wound healings and stroke recovery. There are loads of scientific studies since the 1960s. The majority of these studies agree it’s useful for helping the bones and muscles to heal following injuries, or for skin wounds and ulcers. Studies performed on diabetic patients and people with venous disease found it useful for increasing circulation. It can also help repair muscle function and strength.
How does Microcurrent for healing work?
Microcurrent Therapy uses electric currents like those produced by the body during tissue healing. It encourages specific electrochemical changes ultimately increasing the energy in your cells.
In unhealthy or damaged tissues this current is weak or absent. So, the Microcurrent offers a boost to kickstart the natural healing cycling. To understand better, we must first understand how our cells generate and use electricity.
How our cells use electricity
Bioelectricity is different to the electricity we use every day. That uses a flow of electrons, whereas bioelectrical current is a flow of electrically charged ions. These are the atoms or molecules from our food like sodium, potassium, calcium, and magnesium. Your cells use them to communicate and as a source of electrochemical energy. So, how does it work?
Movement of chorine, sodium and potassium charged particles through matching protein gateways creates bioelectrical potential our cells can release to create electric currents. Credit By Synaptidude, CC BY 3.0
It’s down to how ions do (or don’t) flow through the cell membrane. A cell membrane has protein gateways which allow certain ions to pass through and blocks others. So, the ion concentration in the cell and surrounding cell solutions is different. An imbalance of positive and negative ions across a membrane stores a potential charge, like a battery.
All cells release and use this charge or bioelectric resting potential during metabolic processes. But some use it for special functions such as fast signalling in nerves, muscle movement and secreting hormones or other substances.
So, the flow of charges across the cell membrane generates electrical currents. In turn, different stimuli can trigger different proteins and potentials, currents and patterns to communicate between cells and tissues. For example, this affects how tissues develop and heal.
How Microcurrent helps heal & regenerate
Severely damaged tissues have an imbalanced bioelectrical potential.
This means your natural bioelectricity follows the easiest route around severely damaged areas, rather than the more difficult route through them. Therefore, without these electrical signals, wounds, fractures and breaks can’t naturally heal and regenerate.
But apply microcurrent directly to an injury and it guides damaged cells to ‘jump-start’ their healing processes. The electrically imbalanced cells ‘borrow’ the charge they lack, returning homeostasis to the cells.
Although there are gaps in our understanding about how microcurrent does this, studies show it restores the cell’s ability to move ions across the membrane, and boosts protein, amino acid and ATP production. These are all crucial in wound healing and regeneration.
And these effects of microcurrent on skin and muscle are what also makes it a desirable anti-aging treatment.
Microcurrent anti-ageing facials
Several sources say it was in the 1970s that doctors using Microcurrent Therapy to treat Bell’s palsy noticed a rather interesting side-effect; their patients’ skin tone was improving, and their wrinkles and lines were less pronounced. Interest grew in the beauty industry, and consequently many medical instrument manufacturers switched to marketing cosmetic machines.
Celebrity fans of micrcurrent facials. Credit CurrentBody.com
In 1993 the British built CACI microcurrent facial was first available. Since then popularity has slowly grown, boosted in recent years with celebrity fans such as Jennifer Lopez and Jennifer Anniston. It’s now dubbed the ‘non-surgical facelift’.
Microcurrent facials use two hand-held electrode prongs delivering a microamp (μA) dosage of electrical current to your face and neck. It harnesses the same healing power as Microcurrent Therapy, stimulating your cells and increasing production of ATP. And ATP is very important especially in aging skin.
What’s ATP & why is it important?
ATP stands for adenosine triphosphate. Our cellular mitochondria create it, metabolising the food we eat and oxygen we breath. Then it’s stored in the liquid cytoplasm until we need it.
Make-up of an Adenosine triphosphate (atp) molecule
ATP has several purposes in the body. This complicated chemical is a nucleotide which means it’s one of the building blocks for DNA. Without ATP you can’t make new cells to repair and renew tissues.
ATP is crucial because it’s also the energy currency of our cells. With age, we’re less efficient at metabolising ATP. The amount of ATP stored in our skin decreases too. And this is bad because ATP protects us from the effects of ageing and keeps us looking youthful. Boosting our natural levels repairs and rejuvenates aging skin cells, soothes inflammation, helps cells detoxify and promotes amino-acid and protein production. Important proteins such as collagen and elastin, that aid in cellular reparation and act as potent moisturisers. So, with less ATP we have lethargic cells and a tired, dull, older looking appearance.
And this is where microcurrent facials help. The 1982 Dr. Cheng study on rats shows microcurrent at less than 500 μA can boost ATP production by a massive 500%. The study also shows ATP levels drop sharply with microcurrent greater than 500 microamps. Here is a detailed account of how microcurrent creates ATP.
However, we use up ATP very quickly. So, we need several microcurrent facials to restock and build our stores. Professionals recommend a course of 10 to 15 sessions, 2 per week, and then monthly sessions to maintain the levels. This healthy level of ATP stored in our cells is continually available for skin repair and new cell generation, just like in younger skin.
The results & proof for microcurrent facials
A mcirocurrent facial from nouveauskintherapy.co.uk
Most practitioners say you can use microcurrent as both a preventative and corrective skin treatment. Some practitioners suggest it’s good from age 25+ when collagen and elastin decline. So, if you have teeny or no visible signs of aging, theoretically you can delay them with the occasional microcurrent sesh.
However, it’s best if you have aging skin and want an anti-aging corrective, visible health boost. Device manufacturers say after a course of around 10 sessions the effects of a microcurrent facial are:
✔️ Boosts the production of ATP ✔️ Stimulates the production of collagen, elastin and amino acids ✔️ Improves circulation ✔️ Helps cells to eliminate waste products ✔️ Restores healthy cell balance
These microcurrent effects give the following visible results:
✔️ Improve skin tone and texture ✔️ Decrease puffiness and inflammation ✔️ Reduce lines and wrinkles ✔️ Tighten and firm skin for enhanced facial contour ✔️ Lift sagging jowls and droopy eyelids
Some researchers found microcurrent dramatically improves acne, whilst others say don’t use it if you suffer this skin condition.
Muscle re-education?
Several providers of microcurrent facials also say it stimulates and ‘re-educates’ the underlying facial muscles to improve tone and reduce sagging.
It’s claimed that by lifting and massaging muscles into specific positions, the increased ATP helps them re-learn lost tone and stay that way for longer. The theory is credited to Dr. George Goodhart, a chiropractor in the 1960s and is possibly from his alternative medicine technique called Applied Kinesiology. However, although microcurrent can lift sagging contours, there’s no clinical evidence to support muscle re-education during a microcurrent facial.
Clinical proof for microcurrent facials
Based on existing studies for Microcurrent Therapy for healing, we can safely say the effects of microcurrent listed above are correct. It boosts ATP, which in turn energises muscles and skin, helps to repair cellular damage, increases protein synthesis and circulation.
One small study, with a sample of 30 women, found it was effective in reducing wrinkles after 30 sessions, and 70% of the participants were happy with the results. CACI, a British company, is perhaps the most famous manufacturer of professional microcurrent facial equipment. Their study shows excellent results after a course of 10 microcurrent facials. But overall, there’s little clinical data confirming the effectiveness of cosmetic microcurrent facials.
So, are microcurrent facials FDA approved?
FDA approval
The US Food and Drug Administration (FDA) protect the nation’s health by making sure medicines and medical devices are safe and effective. Before a professional or home-use microcurrent device is sold or marketed in the US, they must have FDA approval. This means the manufacturer must submit evidence it’s effective, safe and the benefits outweigh the risks.
Microcurrent devices must be FDA approved or cleared for sale in the US
The FDA has cleared several home-use microcurrent devices such as Nuface and Ziip. They’re in the same category as TENS devices and classified as a class II medical device. The class indicates the risk level associated with using the device. A class I represents low risk such as an elastic bandage, class II is moderate risk, and class III the highest risk such as a pacemaker. Their indicated use is for facial stimulation.
Most professional grade microcurrent devices on the FDA database have clearance for medical applications only. I can’t find any FDA-cleared for professional cosmetic use.
In the UK and Europe, where FDA regulation does not apply, you can get microcurrent treatments at beauty spas and clinics with machinery brands such as CACI, Bio-Therapeutic and A-Lift.
Professional vs at-home microcurrent facials
Like most at-home and professional comparisons, you can expect faster results with professional sessions. But you’ll also pay a lot more overall.
With home-use microcurrent devices the trade-off is they demand a lot of your time and effort to get noticeable results. And the devices have minimal configuration options so they may not be the best match for your exact skin type which can affect your results.
Here’s a comparison table to show the key similarities and differences.
Professional microcurrent facials
At-home microcurrent facials
Who's it for?
For men and women, safe for all skin tones and types.
for men and women, safe for all skin tones and types.
What skin types?
Your practitioner advises the number of sessions best for your skin condition and the likely outcome.
Best for mild to moderate sagging skin.
Preparation
Cleanse with a water-based cleanser and drink 2 to 4 glasses of water before and after the session. This helps your cells create ATP and flushes away the toxins removed during the treatment.
Cleanse with a water-based cleanser and drink 2 to 4 glasses of water before and after the session. This helps your cells create ATP and flushes away the toxins removed during the treatment.
Customisation
Sessions focus on 32 muscles in the face and neck. Your operative configures the machine based on your skin type, health and damage to correct.
Learn & follow fixed routines and/or use specialist attachments for eye and lip areas. Pre-set and not configurable by the user.
Schedule
A series of sessions gives cumulative results. You need a course of around 10 to 15 sessions (depending on skin type) at 2 per week, to boost ATP levels and increase cell health.
ATP levels and results slowly build with regular use and get better over time. You need 3 to 5 sessions per week for at least 2 months.
Maintenance
A maintenance session every 4 to 8 weeks.
Keep going with the start-up schedule to improve your results or drop to 2 to 3 times per week for maintenance.
Sensation
Conductivity gel or mask applied pre-treatment. No pain. Subsensory with just an occasional mild tingling sensation.
Water-based conductivity gel needed. No pain. Subsensory with just an occasional mild tingling sensation.
How long is a session?
45 to 60 minutes per session. Sometimes combined with other treatments such as microdermabrasion.
5 to 25-minute sessions, plus cleansing & clean-up.
Side effects?
Very rare side effects. No irritation, redness or inflammation. You can apply skincare and make-up directly afterwards and return to your day. Learn more below
Very rare side effects. No irritation, redness or inflammation. You can apply skincare and make-up directly afterwards and return to your day. Learn more below
Contraindications
Generally safe but there are some reasons you shouldn't use it. For contraindications see below.
Generally safe but there are some reasons you shouldn't use it. For contraindications see below.
Cost
A session cost from £59 to £120/$60
Course of 10 from £531/$580
Several devices with price ranging from £160 to £425
Results
Results vary and depend on your skin type, level of damage/sagging and skill of the microcurrent operator. With a skilled operator, the results after a course can be significant.
With a bit of daily effort, you can get confidence boosting results. Results vary depending on skin type and damage and can be subtle to noticeable. A before and after photo helps you track your progress.
Pros & cons
[yes_list]
Results are usually faster & more noticeable than home-use devices
[/yes_list]
[no_list]
Results don’t last forever and you need regular maintenance sessions
Depending on your skin type, you may eventually need another full, expensive treatment course
User reviews suggest results vary based on the skill of the operator
[/no_list]
[yes_list]
Much more affordable than professional sessions
[/yes_list]
[no_list]
Results can take months to build, much longer than the advertised schedule & you may not get the lift your desire
They demand upfront & ongoing commitment & effort
[/no_list]
Can I have a microcurrent facial?
Microcurrent therapy is safe, but if you have certain conditions you must avoid it. If you opt for microcurrent facials at a clinic, they will check your medical history with you. Here are the common contraidications for professional microcurrent treatments:
Professional contraindications
You aren’t suitable for professional microcurrent facials if any of the following apply to you:
Taking anticoagulant drugs like Warfarin and Heparin or any drugs in high dosages
Pregnant in the first trimester
Wounds or sites of scar tissue that are less than two months old
Pacemakers
Implanted heart pumps such as defibrillators or stimulators or hearing aids
Metallic inserts in the face
Or you have any of the following medical conditions:
Insulin-dependent diabetes
History of seizures or epilepsy
Active cancer
Severe acne with inflammation
Any acute infection with fever
Stroke or heart surgery in the last six months
Allergies to products used
Immune deficiency disease
Thyroid or circulation problems
Hepatitis
Chronic fatigue or other hypersensitivity disorders
If you use an at-home device, YOU MUST check the user manual for their list of warnings and contraindications.
Key checks ✔️
Before you buy a home-use device, check:
You’re not pregnant. It’s not tested for safety during pregnancy
Don’t have a history of epilepsy or seizures
Don’t have an electronic implanted device such as a defibrillator, neurostimulator, pacemaker, ECG monitor
You aren’t under 18 years of age
And don’t have active cancer
Areas to avoid ❌
Don’t use the device:
Over swollen, infected or inflamed areas of skin e.g. phlebitis, thrombophlebitis, broken capillaries or varicose veins.
Take care over any areas where you lack normal sensation.
Do not use on mid-line of neck, breast or groin area.
Do not apply stimulation across the chest.
Talk to your doctor
Consult your doctor first if you:
Have suspected or diagnosed heart disease, epilepsy, or if you haemorrhage following acute trauma or fracture
Had recent facial surgery or laser treatments
If you’re unsure of any medical conditions it’s best and safer to check with your doctor for peace of mind
p
TIP: You can use at-home microcurrent devices after botox or fillers. 👉 Nuface suggest waiting 7-14 days after your procedure 👉 ZIIP suggest waiting 10 days after your procedure
For compatability with other cosmetic procedures, you should first check with your doctor.
Are there any risks or side-effects?
There are just a few very rare side effects from microcurrent facials and no reports of long-lasting or serious reactions to it. Some people have experienced:
Drowsiness
Fatigue
Nausea
These reactions can start an hour after the treatment and last for 24 hours. To help, drink plenty of water (up to two litres) in the two hours following your treatment. If you experience these symptoms for longer than 24 hours, or they are more severe, you should go see your doctor.
Skin irritation or hypersensitivity could occur due to either the electrical stimulation or the gel. If you use a home device, don’t forget to do your skin sensitivity test. And if it’s the device itself try reducing the intensity level and/or seek advice from your doctor.
With other muscle stimulator devices, users have experienced rare skin irritation and burns beneath the electrodes. There are such no reports with microcurrent devices, however, if you were to experience it, stop using it immediately.
At-home microcurrent devices
If you have the dosh and want to splash out, you can try searching locally for a trusted beauty spa. Check the reviews, and ask about the equipment and training before you go ahead.
Or, try this…
The best at-home microcurrent round-up
Learn all the pros & cons of the best at-home microcurrent devices to give you healthy, hydrated, firm, smooth & bright skin.
The MiniMD is a compact, home version of diamond peel exfoliation (microdermabrasion facials) available in day spas and medical aesthetic centres. The diamond tip exfoliates rough, bumpy and leathery dead skin and the vacuum sucks away the debris.
Removing the top skin layers not only reveals fresh skin, but it also promotes the growth of healthy new cells to replace it. The suction also stimulates your skin’s blood flow, boosting energy so it rebuilds strong collagen and elastin. Both actions give healthier, smooth skin and a beautiful afterglow. Skin is rejuvenated and looks and feels younger.
There are several FDA-registered microdermabrasion models to choose from Trophy Skin ranging from £99 to £219 / $99 to $299. Use them on your face, neck and chest to reduce visible photo-damage and ageing effects. This review is for the the basic MiniMD model.
Clinically proven home microdermabrasion from Trophy skin. This is the most affordable choice MiniMD.Slide the exfoliating diamond tip across your skin and the rough dead outer layers get sucked away into the hole!
First impressions
The packaging is neat, feminine and attractive, in a rose and rose gold box with all the key infoThere’s a shiny rose gold insert box inside that slides outInside the device, power cable, filters and manual are secured in a plastic moulded bed
Being picky, the plastic insert is thin and makes scratchy sounds, and the surrounding cardboard is maybe a tad flimsy to withstand ongoing storage needs. It’s not as robust a box as you get with other brands – but hey, let’s not make this little guy feel bad.
The contents of the box: MiniMD device, pack of wool filters, power cable (with US plug), user guide and welcome note from Trophy Skin.
What’s in the box:
Trophy Skin MiniMD device
Medium diamond tip
30-pack of filters
Power adapter
User manual
It’s all very nicely done and well presented. A super first impression.
Hello dinky little MiniMD
The MiniMD is dinky! It’s just 17cm tall and just under 4 cm wide at the broadest middle point. A classy, smooth-white, long and round applicator with shimmery dusk gold and shiny rose gold controls and accents. The diamond exfoliator tip stands to attention at the gently pointed top.
I just can’t wait to see what crap this thing sucks off my face!
Before you start
First, read the user guide
Start by reading the user manual. It’s a good introduction and shows you how to operate the MiniMD. It also lists a few reasons you shouldn’t use the MiniMD or microdermabrasion in general.
❌ Don’t use the MiniMD if you have:
Lesions, warts, or recent herpes outbreak
Sunburn or sun sores
Active rosacea
Auto-immune disorders
Skin cancer
Vascular lesions
Any open wounds, sores, or cuts
Are taking oral blood thinners (anti-coagulants)
p
Thin or delicate skin?
If your skin is very thin or delicate, a microdermabrasion device could be too much for you. Instead, I suggest a red & NIR light device which stimulates, heals and strengthens your skin without exfoliation or damage. Try the CurrentBody Skin masks or the bad-boy FlexMD.
It also tells you to do a skin sensitivity test on the inside of your forearm. The skin there is more delicate and a good indicator to show if you’ll be sensitive to the exfoliation on your face.
I found this test difficult because you must pull the skin taut as you glide the exfoliator tip over your arm. To do this, I need an extra hand. As I don’t have one, I just tried without and found the whole sensation rather squeaky and tickly! I didn’t get very far, but my skin seemed fine with what I did manage.
Next, find a comfortable place to sit, beside a plug and in front of a mirror. A handheld mirror requires one of your hands and you’ll need both for this baby, so find an alternative. Wash and dry your face. Then, crack on!
p
TIP: Always microderm on freshly washed and dry skin. Don’t wash and wait a bit because your natural protective skin oils come out and reduce the effect of the micro-exfoliation. They’ll be far less evidence on the used filter!
Design & operation
Remove the protective white cap to see the exfoliating diamond tip underneath.
The MiniMD is very simple to operate and easy to handle. Pull off the tip and pop in a new wool filter before every treatment. It takes a bit of practise to get the correct angle and motion as you work across your face. But it’s so incredibly satisfying and effective.
p
TIP: Trophy Skin Microderm devices are safe for all skin types, including most sensitive. However, if you have very sensitive skin, use a lower setting and / or use it less often.
Gently pull off the diamond tip applicatorBefore every use, place a fresh small round black wool filter over the fine gauze and replace the diamond tip applicator.Power cable fits snug and is lightweight. You must be close to a socket or use and extension cable.
The MiniMD is mains-powered. The power cable is ok. It’s 145 cm long but rather thin which matches the lightweight device. I’d prefer a slightly longer cable because you must be close to a power socket and a mirror. I sit next to a socket on the floor with a small pedestal mirror to work with. You may need an extension cable if you’re working with a fixed mirror that’s too far from a socket.
The MiniMD works worldwide on multi-voltage. It comes with a US plug built into the mains cable and a separate UK socket adaptor.
Press the power button to start suction level one, and again for level 2. Feel it through the hole in the diamond tip!
The MiniMD is small and lightweight (138g). There’s a single button to operate it. Press to power on at suction level 1 and the bottom blue light illuminates. Press it again to level 2 and the top blue light illuminates. Press it again to power off.
The routine
It’s very easy to handle and manoeuvre. A little low pitch whirring starts up inside and sounds a bit more earnest on suction level 2. Do each side of your face in turn.
How to use the MiniMD from the user guide
Start on the right forehead. With your free hand pull your skin taut and place the tip squarely against your skin until the suction takes. Slide the tip in small, smooth motions to the outside of your forehead. It’s easy to get the hang of.
Continue across your nose and cheeks, down your outer cheeks and around your mouth. Then across your upper lip and chin. Take care around your eyes and lips and make use of the lower suction level where skin feels thinner, more delicate or loose.
Repeat on the other side. Don’t do the same bit of skin more than 3 times in a session. Trophy Skin say treatment takes just 5minutes. For me, it’s up to 10 minutes depending on how thorough I am.
You may also treat your neck and chest area too. I do occasionally, and also my hands.
Afterwards, apply your skincare products. They’ll have an easier job absorbing in. And don’t forget to apply sunscreen SPF 30+ before you go about your day!
How does it feel?
I like the sensation. There’s no pain. The diamond tip is scratchy across your skin but in a very fine way.
The 2 suction levels are gentle but create a firm seal with your skin. Level 2 is significantly more powerful and so effective. Level 1 is good for your first go, and for sensitive or delicate areas around your eyes, mouth and on the neck.
Sometimes it’s tricky to position on the centre of my forehead for the suction to take. And it makes small squeaky noises on my neck (and tickles). However, it’s important not to press the tip too hard against your skin.
The tip works on all my nose apart from the bridge and tip (it’s quite pointy). It’s also a bit fiddly around my hairline where my small wispy baby hairs interfere with the suction. I persevere here though because I have some small but visible sunspots I’d like to see less of.
The suction makes your skin turn pinky-red, but this doesn’t last very long. If it does, or if you’ve any irritation, rest your skin until it fades. Also, reduce how often you use it and / or the suction level. And don’t do too many passes over your skin.
Product just sinks into my skin afterwards. It can sting a little if you’ve overdone it in any areas. And touch your skin afterwards and feel how fresh and moist, beautifully soft and smooth it is. It gets softer after each session and feels like silk.
Oh. Lushness.
But what I really love is both admiring and feeling horrified at the filter once you’re done!
Face gunk, meet everyone. Everyone, meet my face gunk!
There’s an impressive amount of face gunk. Who knew I was so flaky? It’s so incredibly satisfying and more-ish. I love you can plainly see what’s exfoliated away.
What results to expect?
Results are far superior to using any exfoliation or microdermabrasion scrub. Plus, there’s no environmental impact on our oceans with those nasty micro-beads.
You can feel and see it actually works.
You can feel the difference from the first session. But it’s gentle. Apprehensive at first, I thought maybe it’d be too much for my skin to do more than 1 per week. I was wrong and I now do 2 sessions per week (as that’s easy to fit in).
And you can see the work it does after each session. If you start on the lower suction level it’s not so obvious. But on the higher suction level – oh boy. I see more gunk the more frequently I use it. I guess my skin had a kick-up the bum and is churning out more skin cells now!
What it fixes: Softens fine lines and wrinkles, fades dark spots, shrinks pores, reduces scarring, brighter & smoother skin, a youthful glow.
After 3 months, my complexion is baby-smooth, clear and even. I’ve no bumps or blemishes as I had before. Post-session, my skin drinks in my Vitamin C cream and serums (which can sting if you overdo the microderming!) Make-up glides on, but I don’t need as much anymore because I look fresh-faced.
Maybe my forehead lines have reduced a bit, but it’s difficult to tell because they weren’t too bad to start with. I’m looking forward to using this over the Winter months when I really suffer from very dry, rough skin.
You get a 60-day money-back guarantee from CurrentBody.com and TrophySkin.com. This is long enough to try it and fall in love with it.
The MiniMD also partners perfectly with the Mira-skin ultrasound skincare booster. That’s because the MiniMD removes the top layers of dead skin so the Mira-skin booster get’s even more skincare goodies deep into your skin. And I also use it before my red light mask or FlexMD because it makes it easier for the light energy to penetrate my skin. Love this little guy.
Replacement tips & filters
There is the ongoing cost of replacement filters and diamond tips to consider too. I get annoyed at the crazy costs of fancy replacement gels with other home beauty devices. Especially seen as much cheaper basic alternatives are available. However, with the Trophy Skin devices, I think the replacement tips and filters are good value. And of course 100% necessary!
100-pack replacement filters £12, shiny new diamond tip £25.
A 100-pack of replacement wool filters costs £12. Replacement diamond tips cost £25 each. And there are a few to choose from.
The MiniMD comes with the ✔️ standard diamond tip. There’s also a ✔️ fine tip, ✔️ body tip and ✔️ precision tip for around eyes, lips and nose. As well as a ✔️ pore extraction and ✔️ infusion tip.
Tips last between 6 months to 1 year, which I think is good. And you’ll get best results if you clean it regularly. The MicrodermMD comes with a cleaning brush, the MiniMD doesn’t. Trophy Skin explain on the website you’ll get best results if you clean the tips in an ultrasonic bath cleaner. This uses water and ultrasound waves to gently vibrate-off dirt and debris. You can also use it to clean jewellery. Buy ultrasonic cleaner from Amazon here.
For one year of use, microderming twice a week, you’ll need at least 1x 100-pack of filters. And let’s assume you need 2 tips. So:
1 x 100-pack wool filters @ £12
2 x tips @ £25
1-year total cost is £62
That’s not bad at all, especially compared to other skincare devices with expensive gels. It’s a manageable and worthy investment for smooth, glowsome results.
Trophy Skin MiniMD Review Summary
If you’re a teenager or in your early twenties, you’ve no need for this. But from around 30 onwards or at the first sign of fine lines, I think it’s a simple, quick and affordable, skin health-boosting option. It makes a difference immediately and effects gradually build too. If you’re choosing your first home skincare tech I think you’ll be pleasantly surprised. Plus, it’s highly addictive, in a very good way.
Here’s a summary of my test scores, and pros and cons for the Trophy Skin MiniMD to help you decide:
Ease of use
👍👍👍👍
Simple, easy to follow, x2 suction levels. Use a clean filter each session, diamond tips last 6 months to 1 year. Quick and very more-ish satisfaction seeing dead skin gunk in the filter!
Effort
💧
Low effort. Takes 5 to 10 mins just 2 or 3 times per week. For ongoing use.
Results
⭐⭐⭐⭐
Immediate smooth skin. Boosts cell turnover, collagen & elastin build gradually, refreshing and brightening. Healthier skin, faded wrinkles & pigmentation over a month or so.
Pros
Very affordable
Easy to use & low weekly effort
Durable & intuitive
Options for different budgets
Exfoliation tips for different body areas
Immediate smooth, glowing results
Love the visible face-gunk!
Clinically proven
Cons
Over-zealous use means after-session products can sting!
Ongoing cost of tips & filters (but it’s small)
MiniMD has a short, thin power cable
Trophy Skin MiniMD deals
I hope you’ve found this Trophy Skin MiniMD review helpful. If you want to get your mitts on it, please support my future reviews and shop via these links. I earn a small commission, but your price stays the same. I really appreciate your support 🙏!
BODY5
Use this code at CurrentBody for an extra discount!